AP-on-a-Stick (APoaS) Surveys are tedious, time consuming, frustrating, but a necessary evil that can’t/shouldn’t always be avoided. If your like me, you’ve been doing them for years and always manage to find the worst gear to get your AP at ceiling height. Pushing a rickety contraption that will eventually smack your head, fall over, and cut your car seats with a shiv it made when you weren’t looking. Survey kits can vary in price from home-made $100 bucks, to professionally made $5k wonders.

I decided enough was enough, and set out to build a professional looking, quality, medium priced survey kit that would meet my requirements.
Lets take a look at how it turned out…
First and foremost, this survey kit was inspired by Zaib Kaleem (@WLANBook), as he came up with the original design. Also a shout out to Nick Turner (@nickjvturner) for his blog posts on his survey kit that helped me design mine as well.
Parts List:
Tripod – Impact Folding Wheeled Base Stand (Black/Chrome-plated, 11 feet)
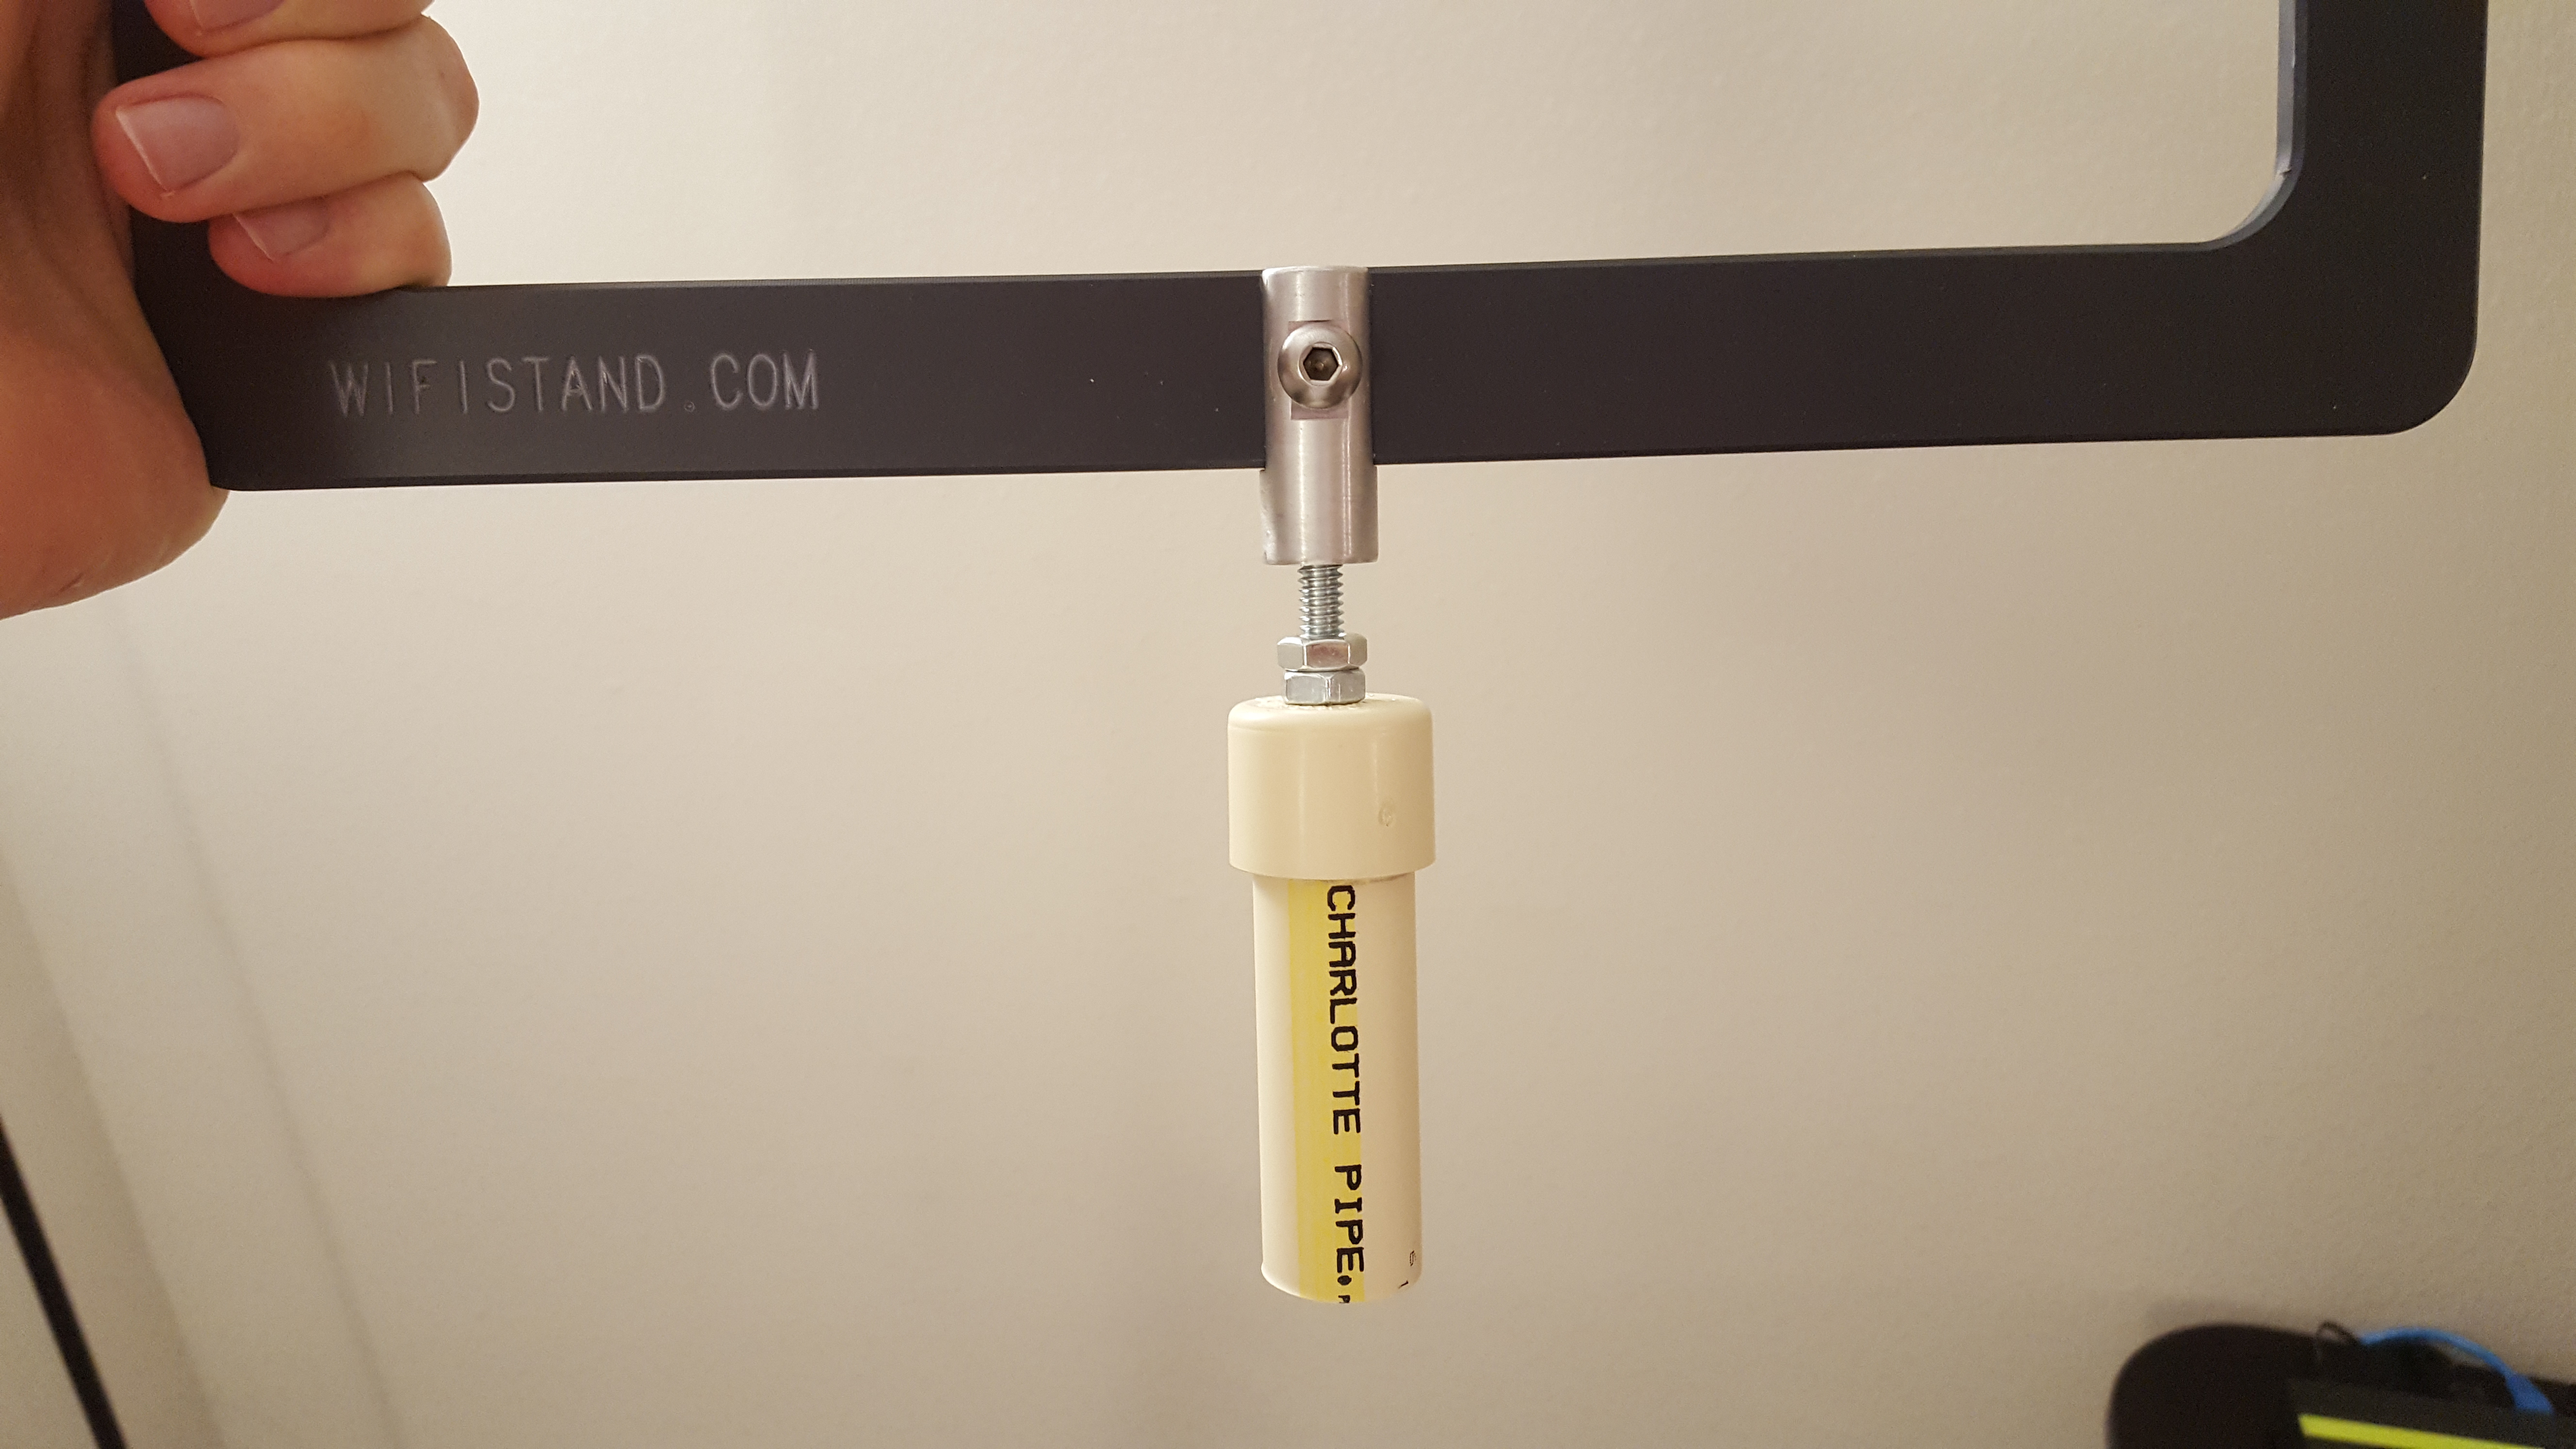
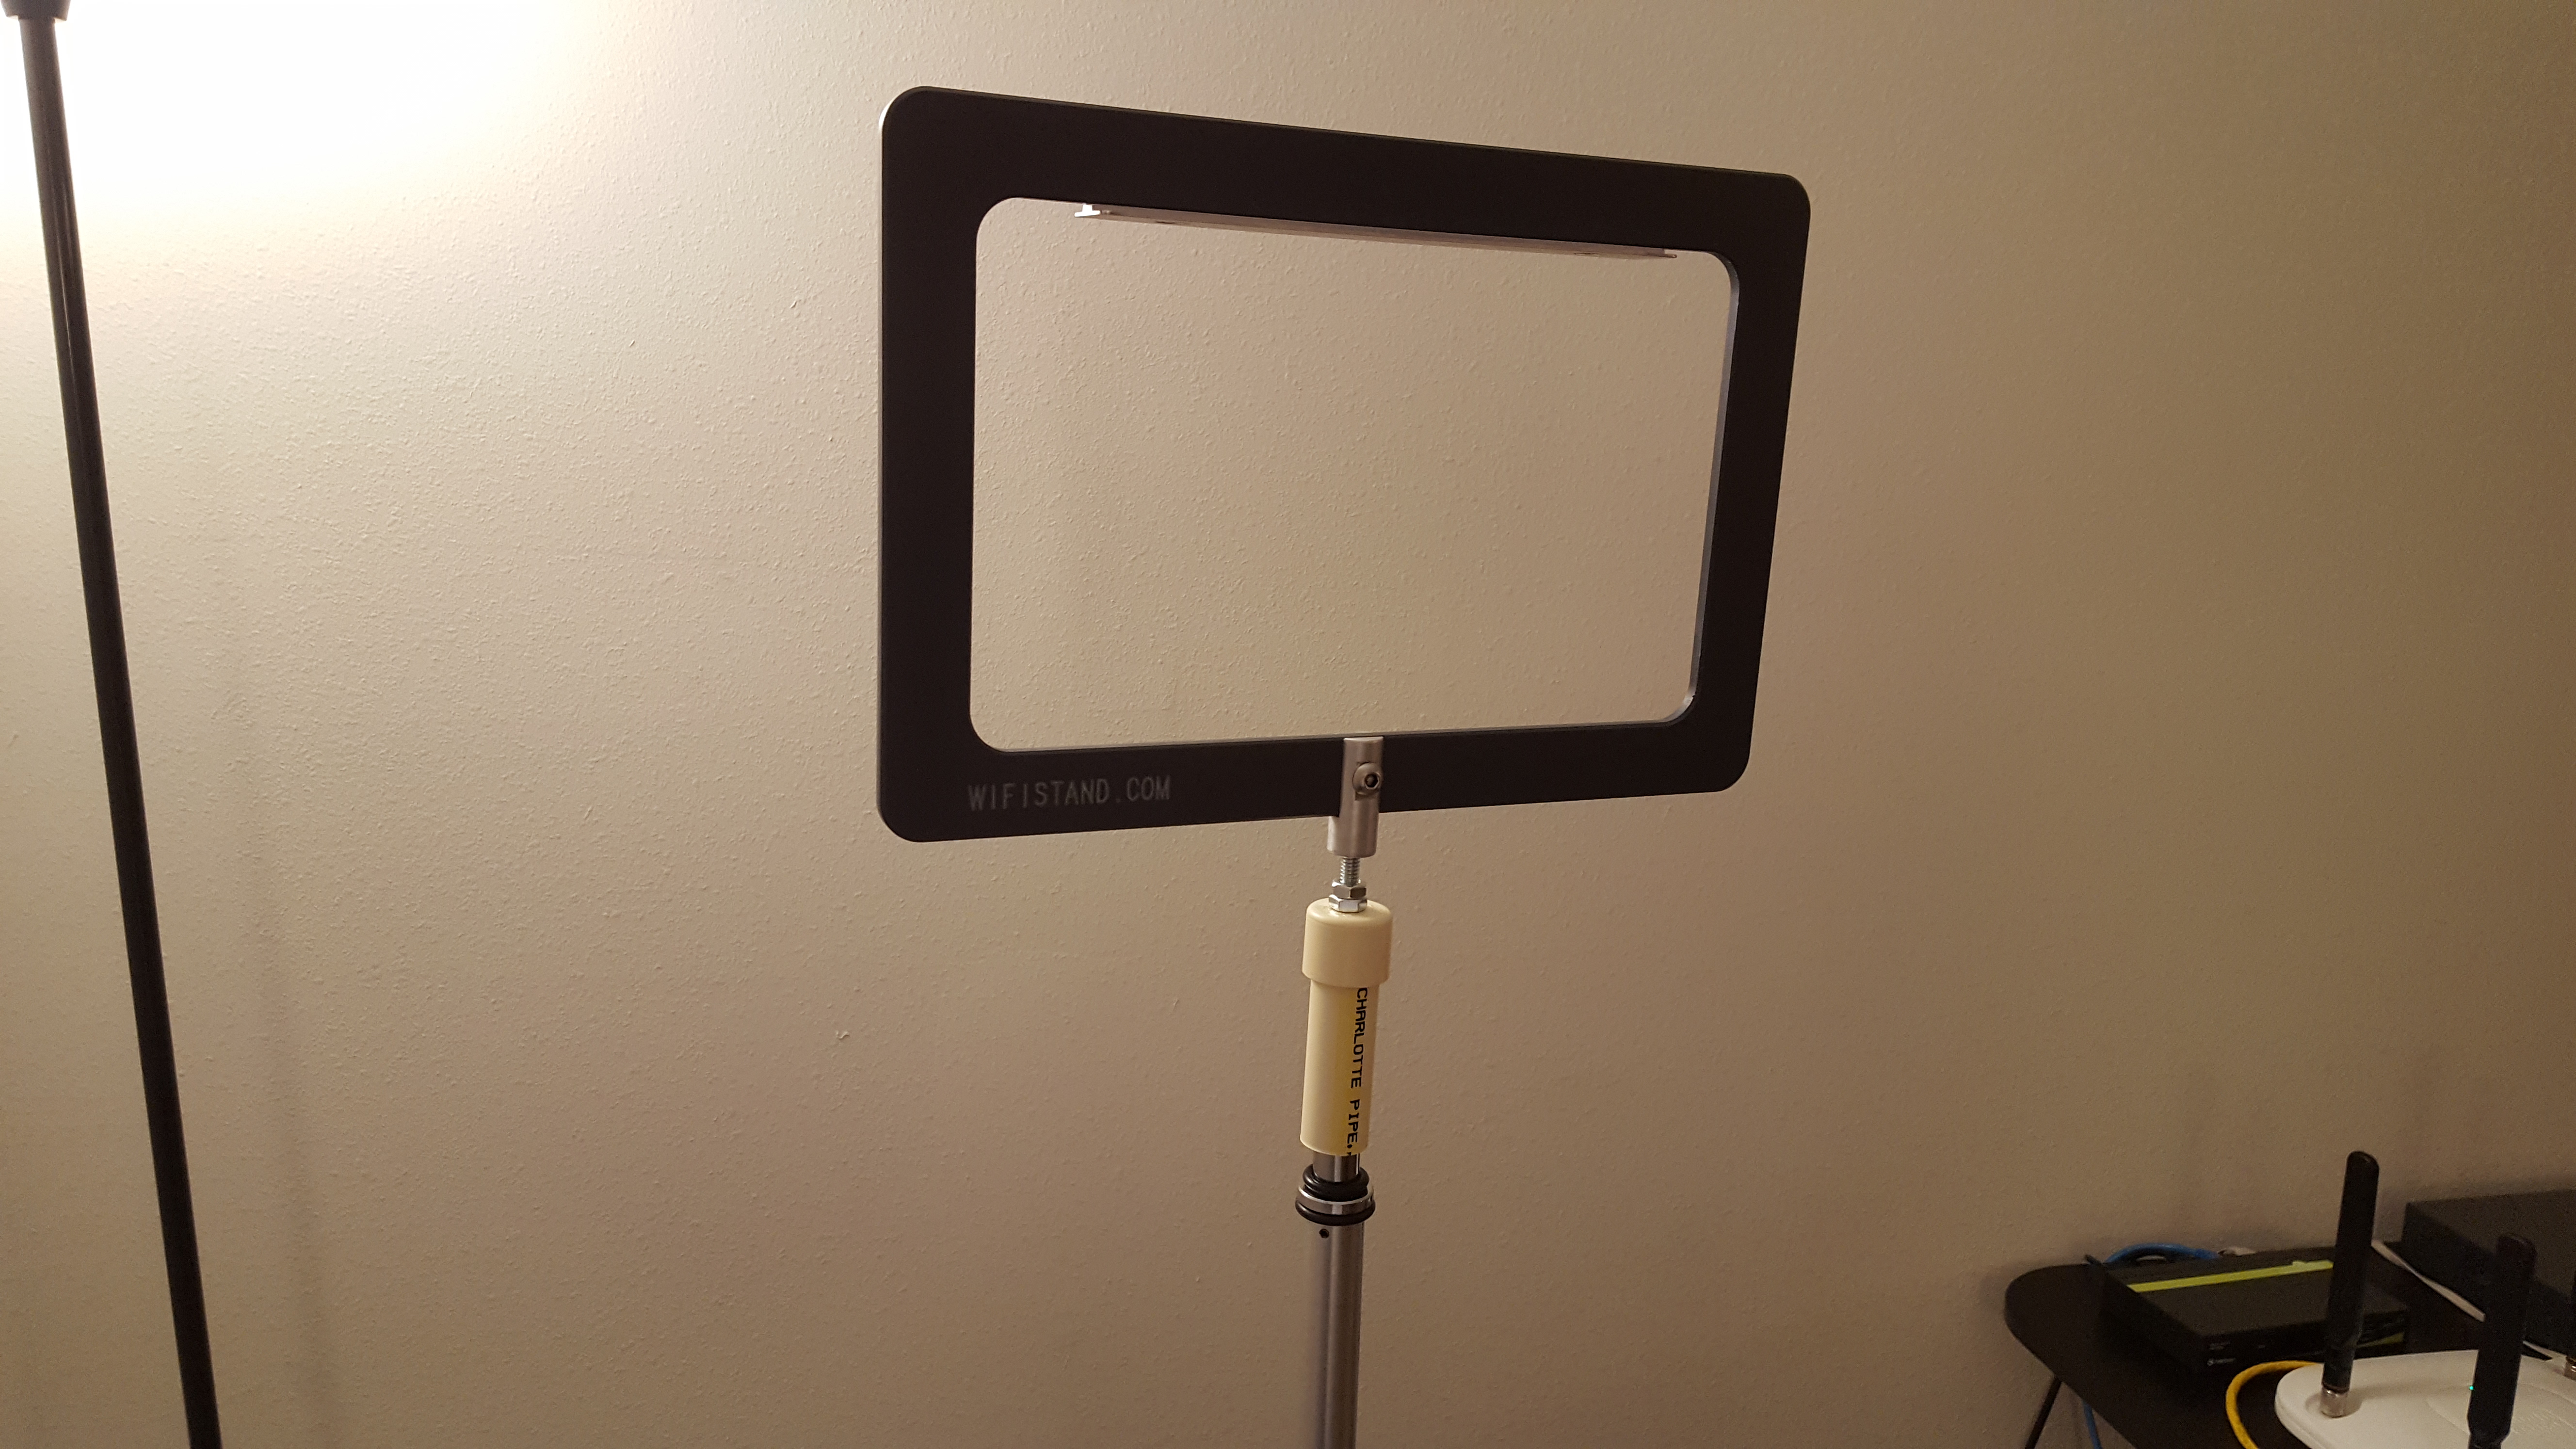
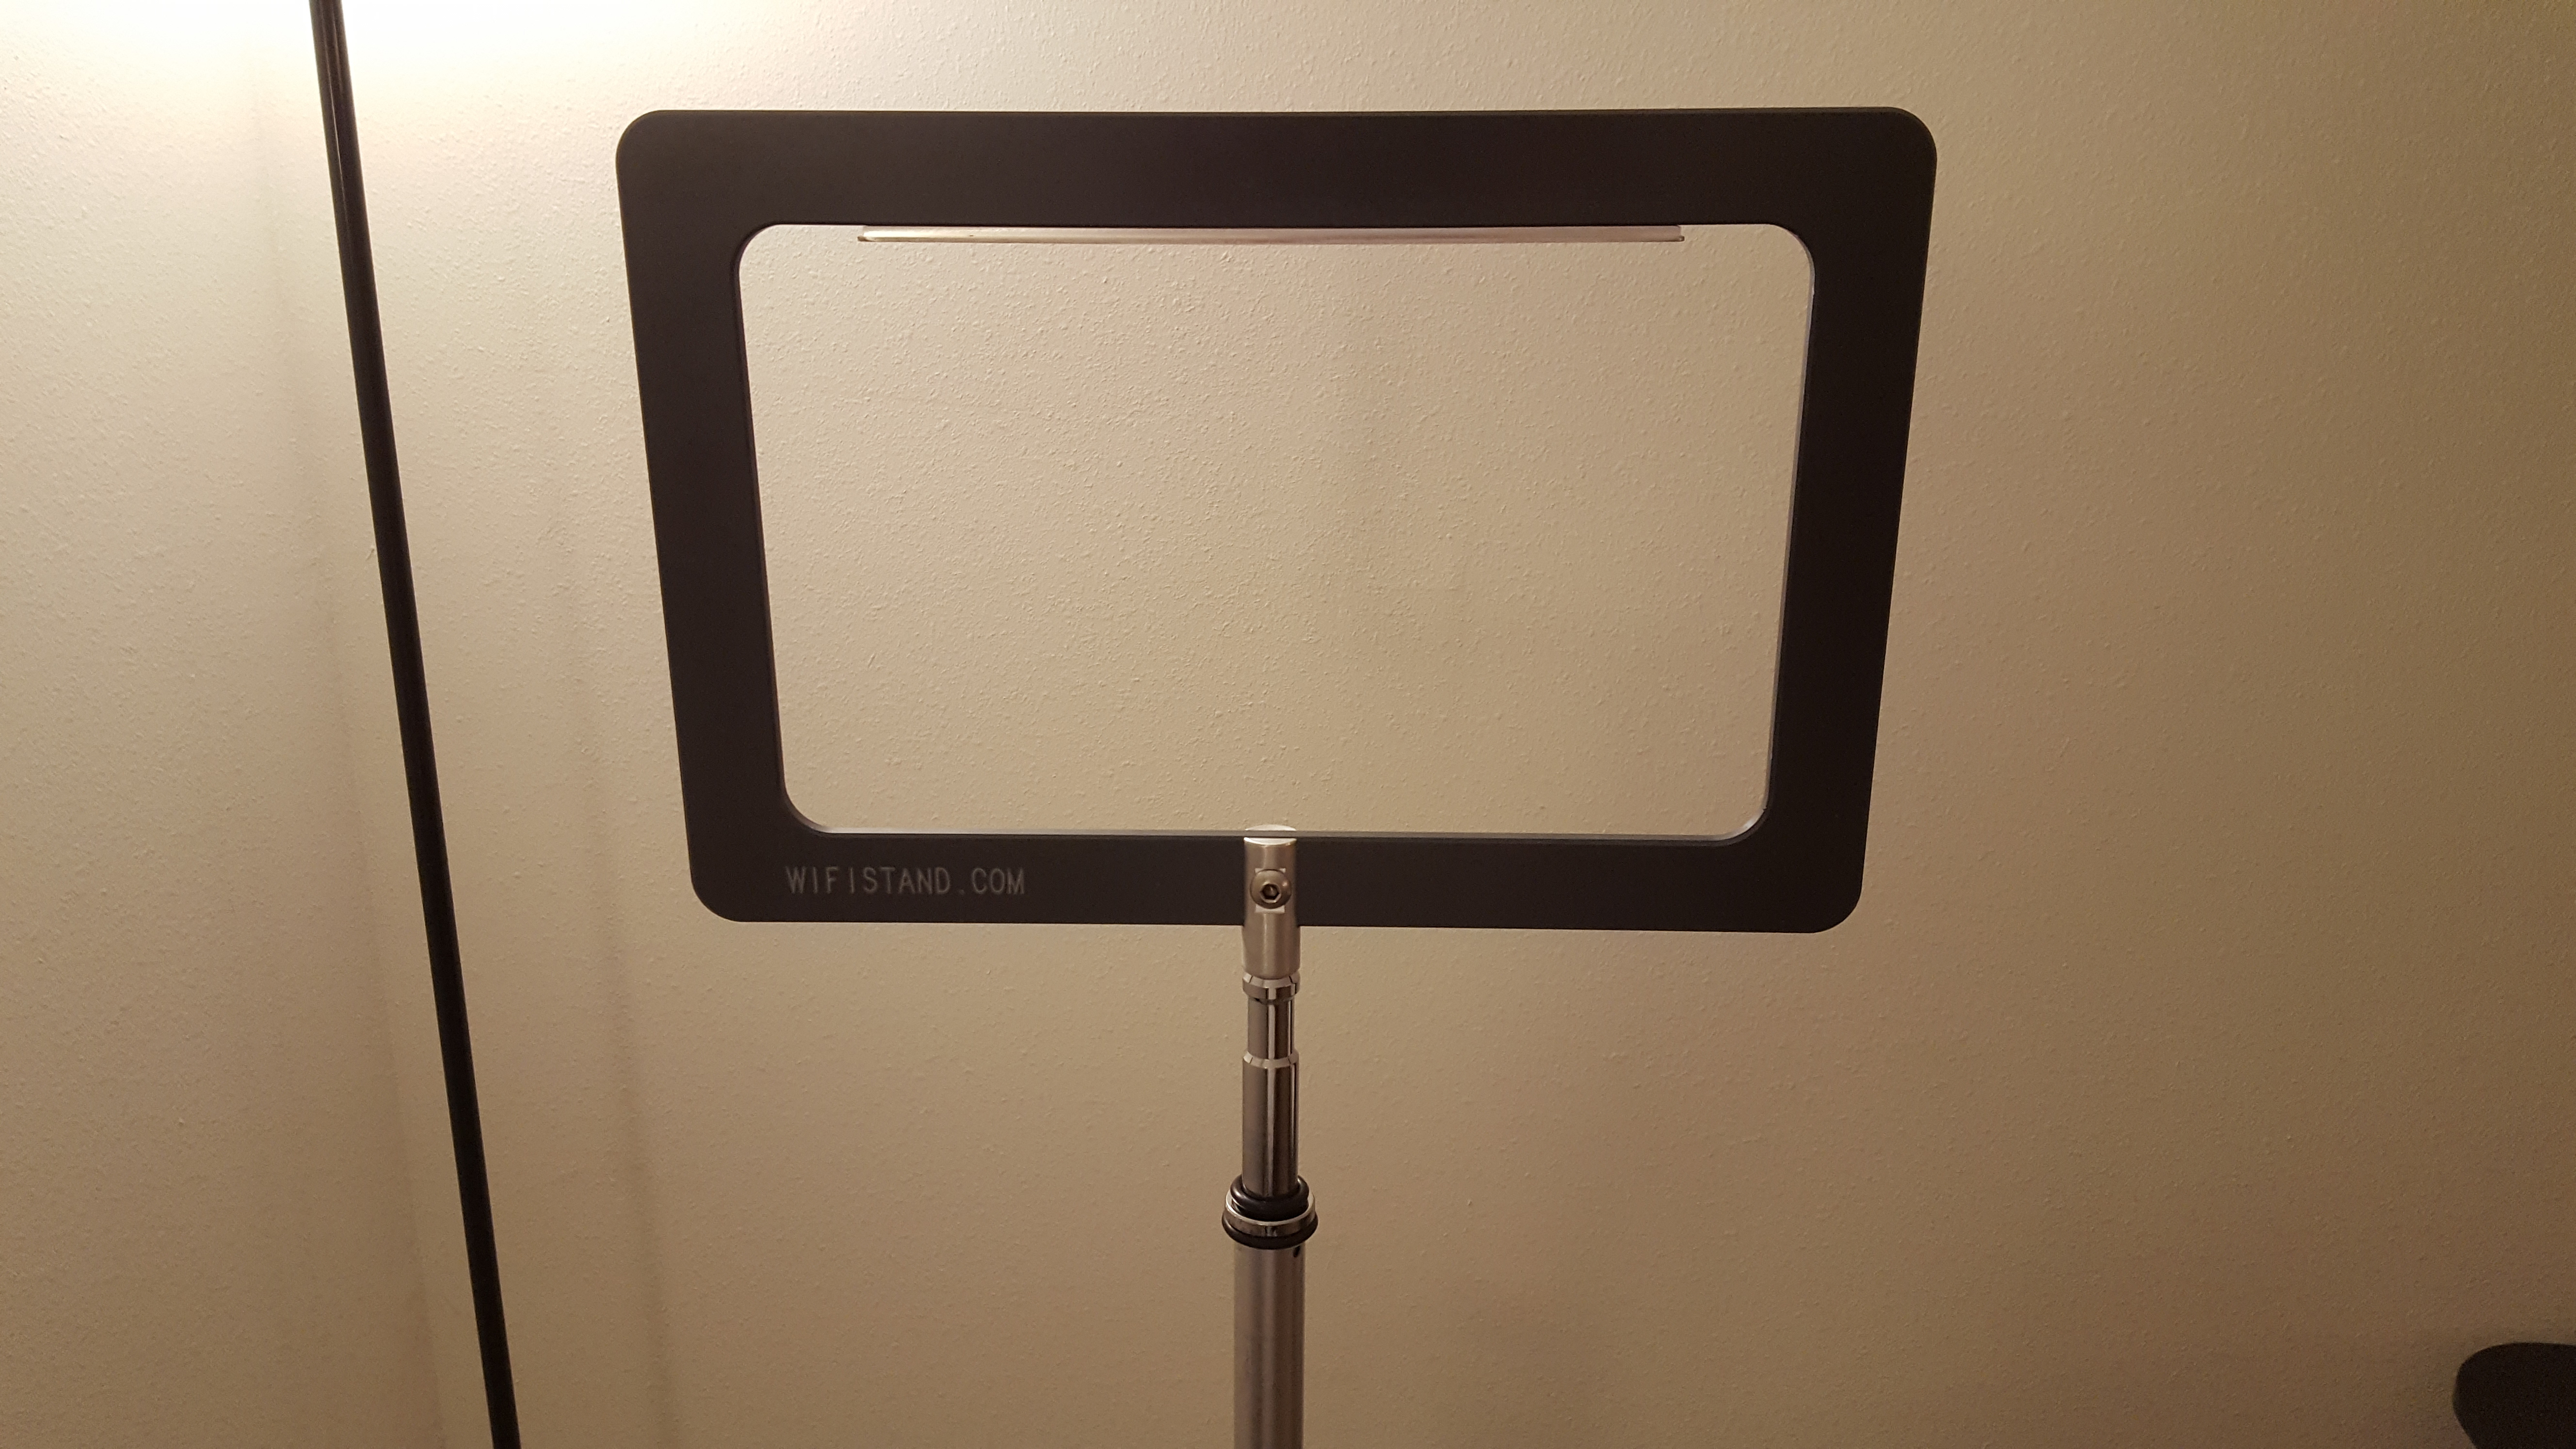
Wi-Fi Stand – The WiFiStand Bracket
Ethernet Cable – Custom Coiled CAT6 Ethernet Cable 10 feet
Battery – AFTERPARTZ Flasche 36V 10.4Ah E-BIKE Battery Pack
*Battery Run-time Test: ~19 hours on a Cisco 3502i access point
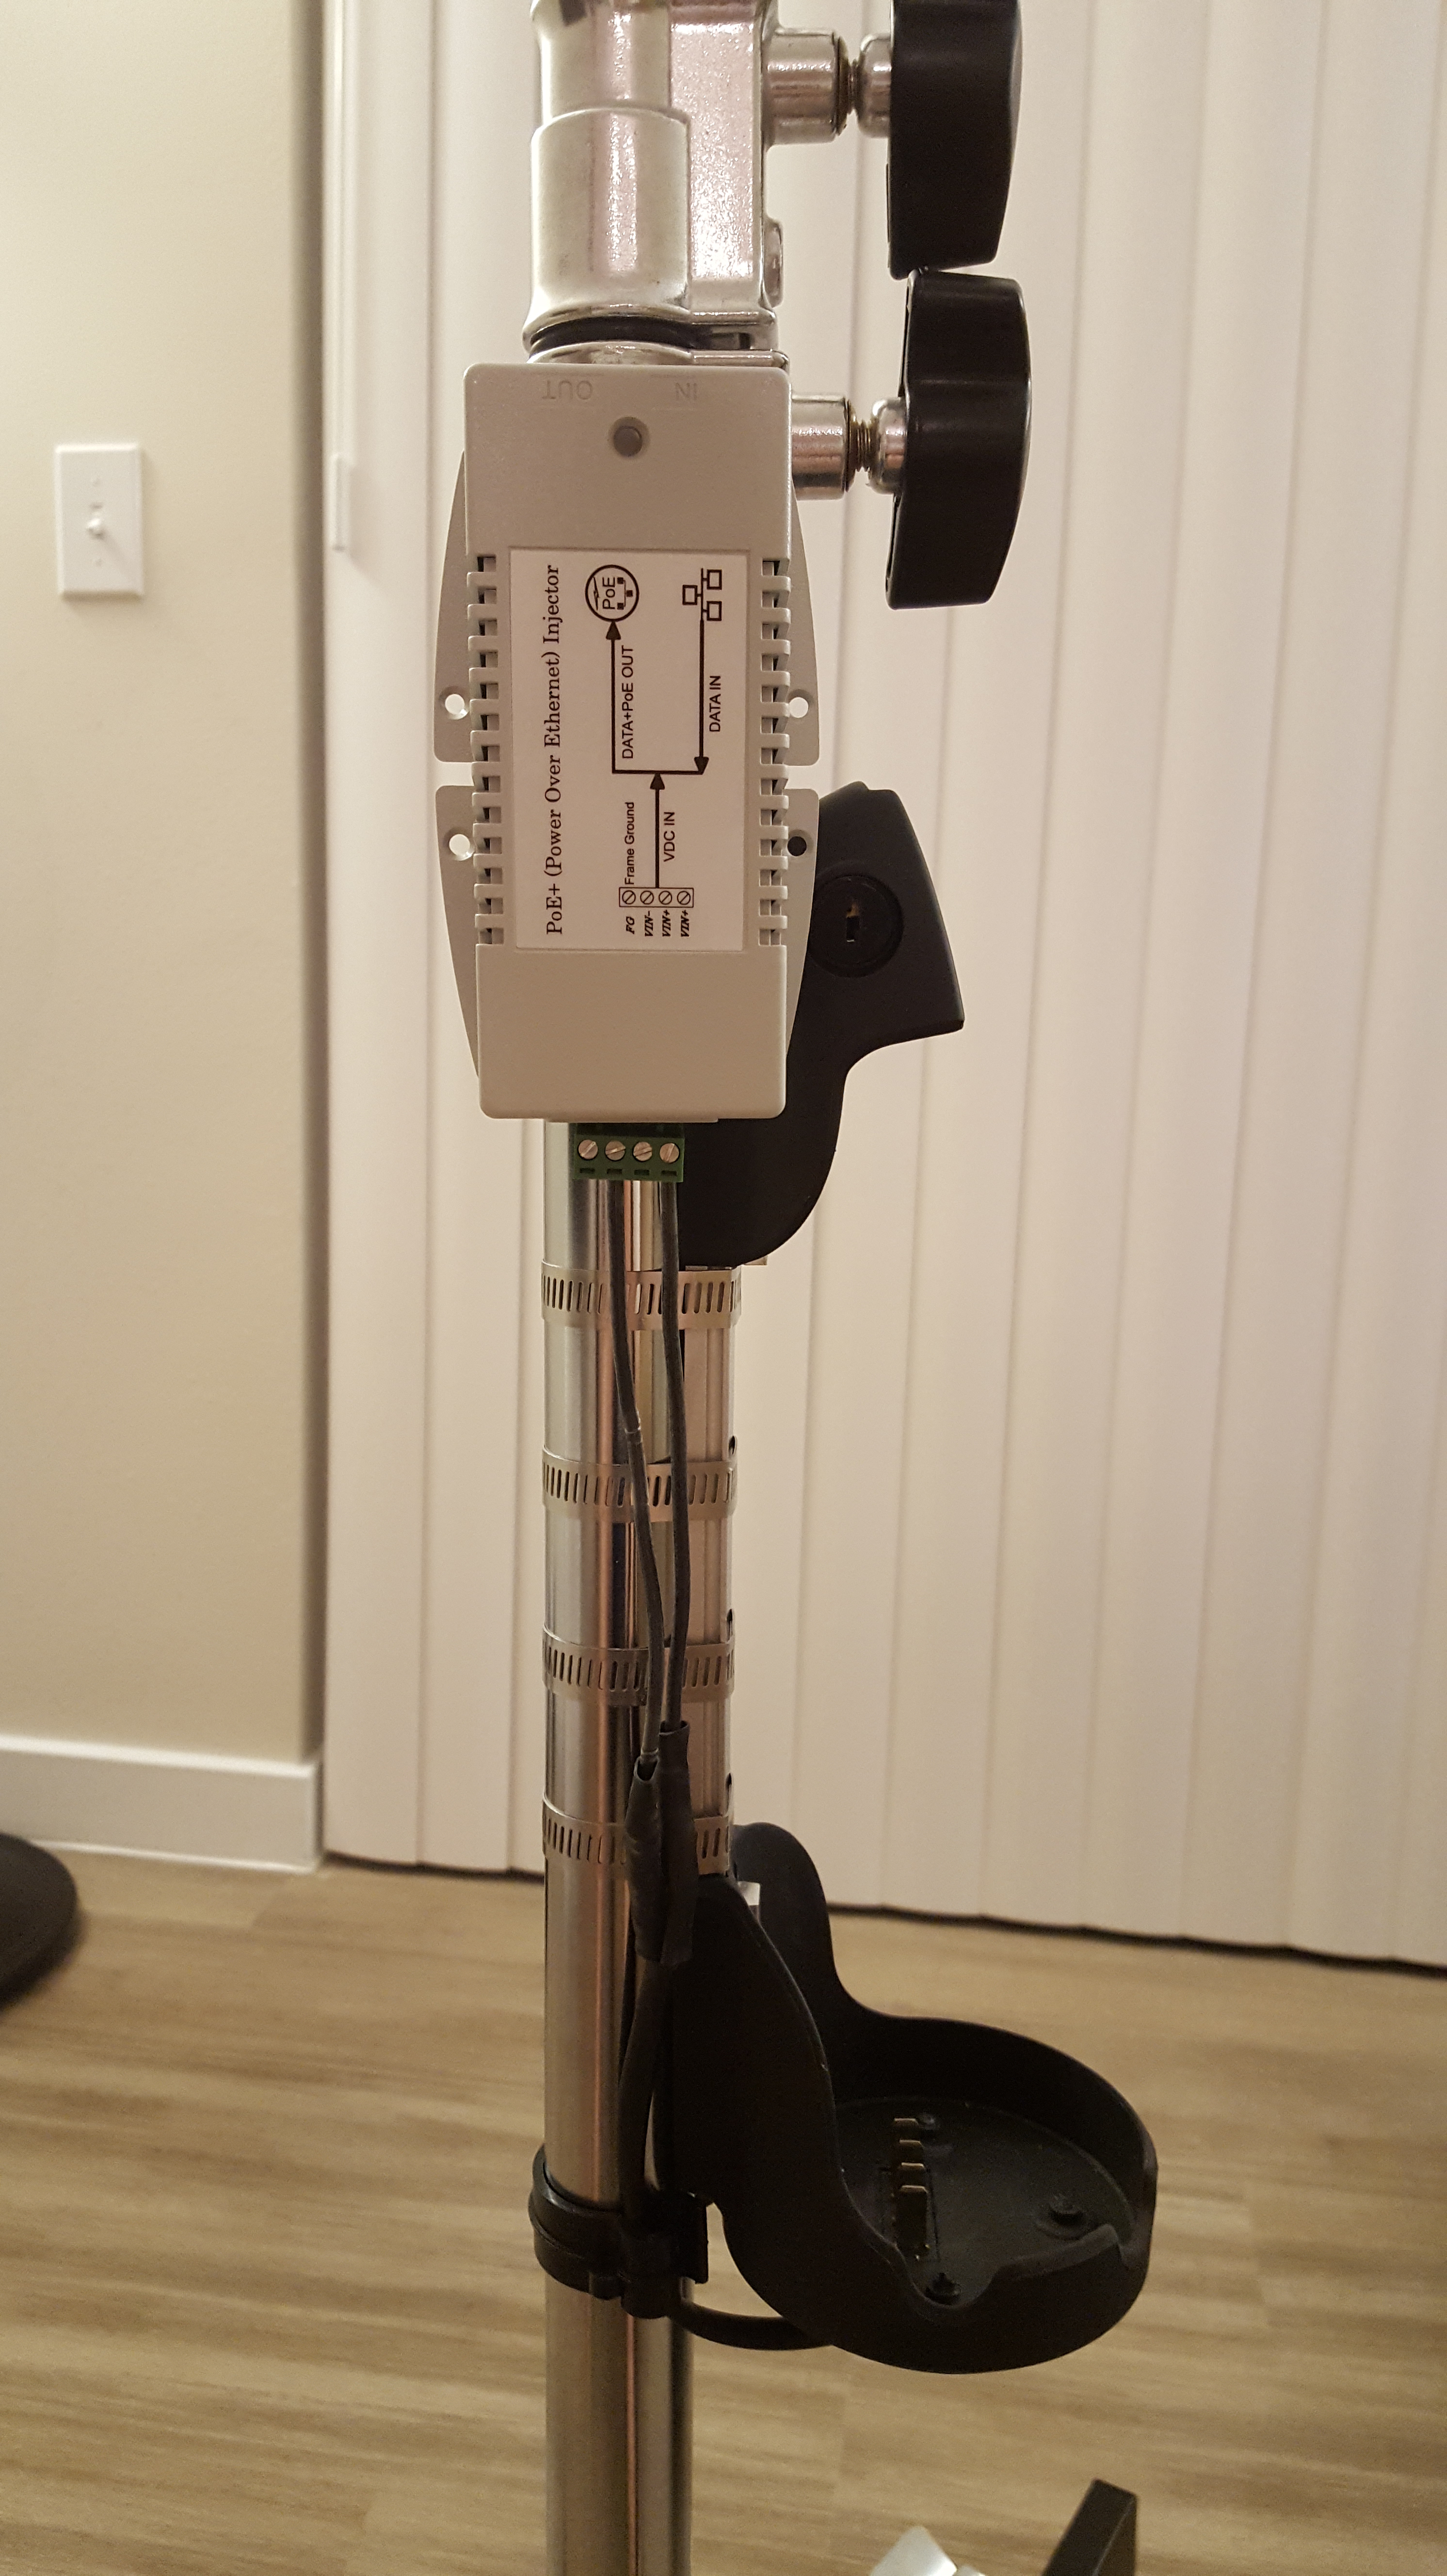
Power Converter – Tycon Systems Inc TP-DCDC-2448GD-HP
Power Converter Mount – Quad Lock Bike Mount Pro
Power Converter Adapter – Quad Lock Universal Adapter
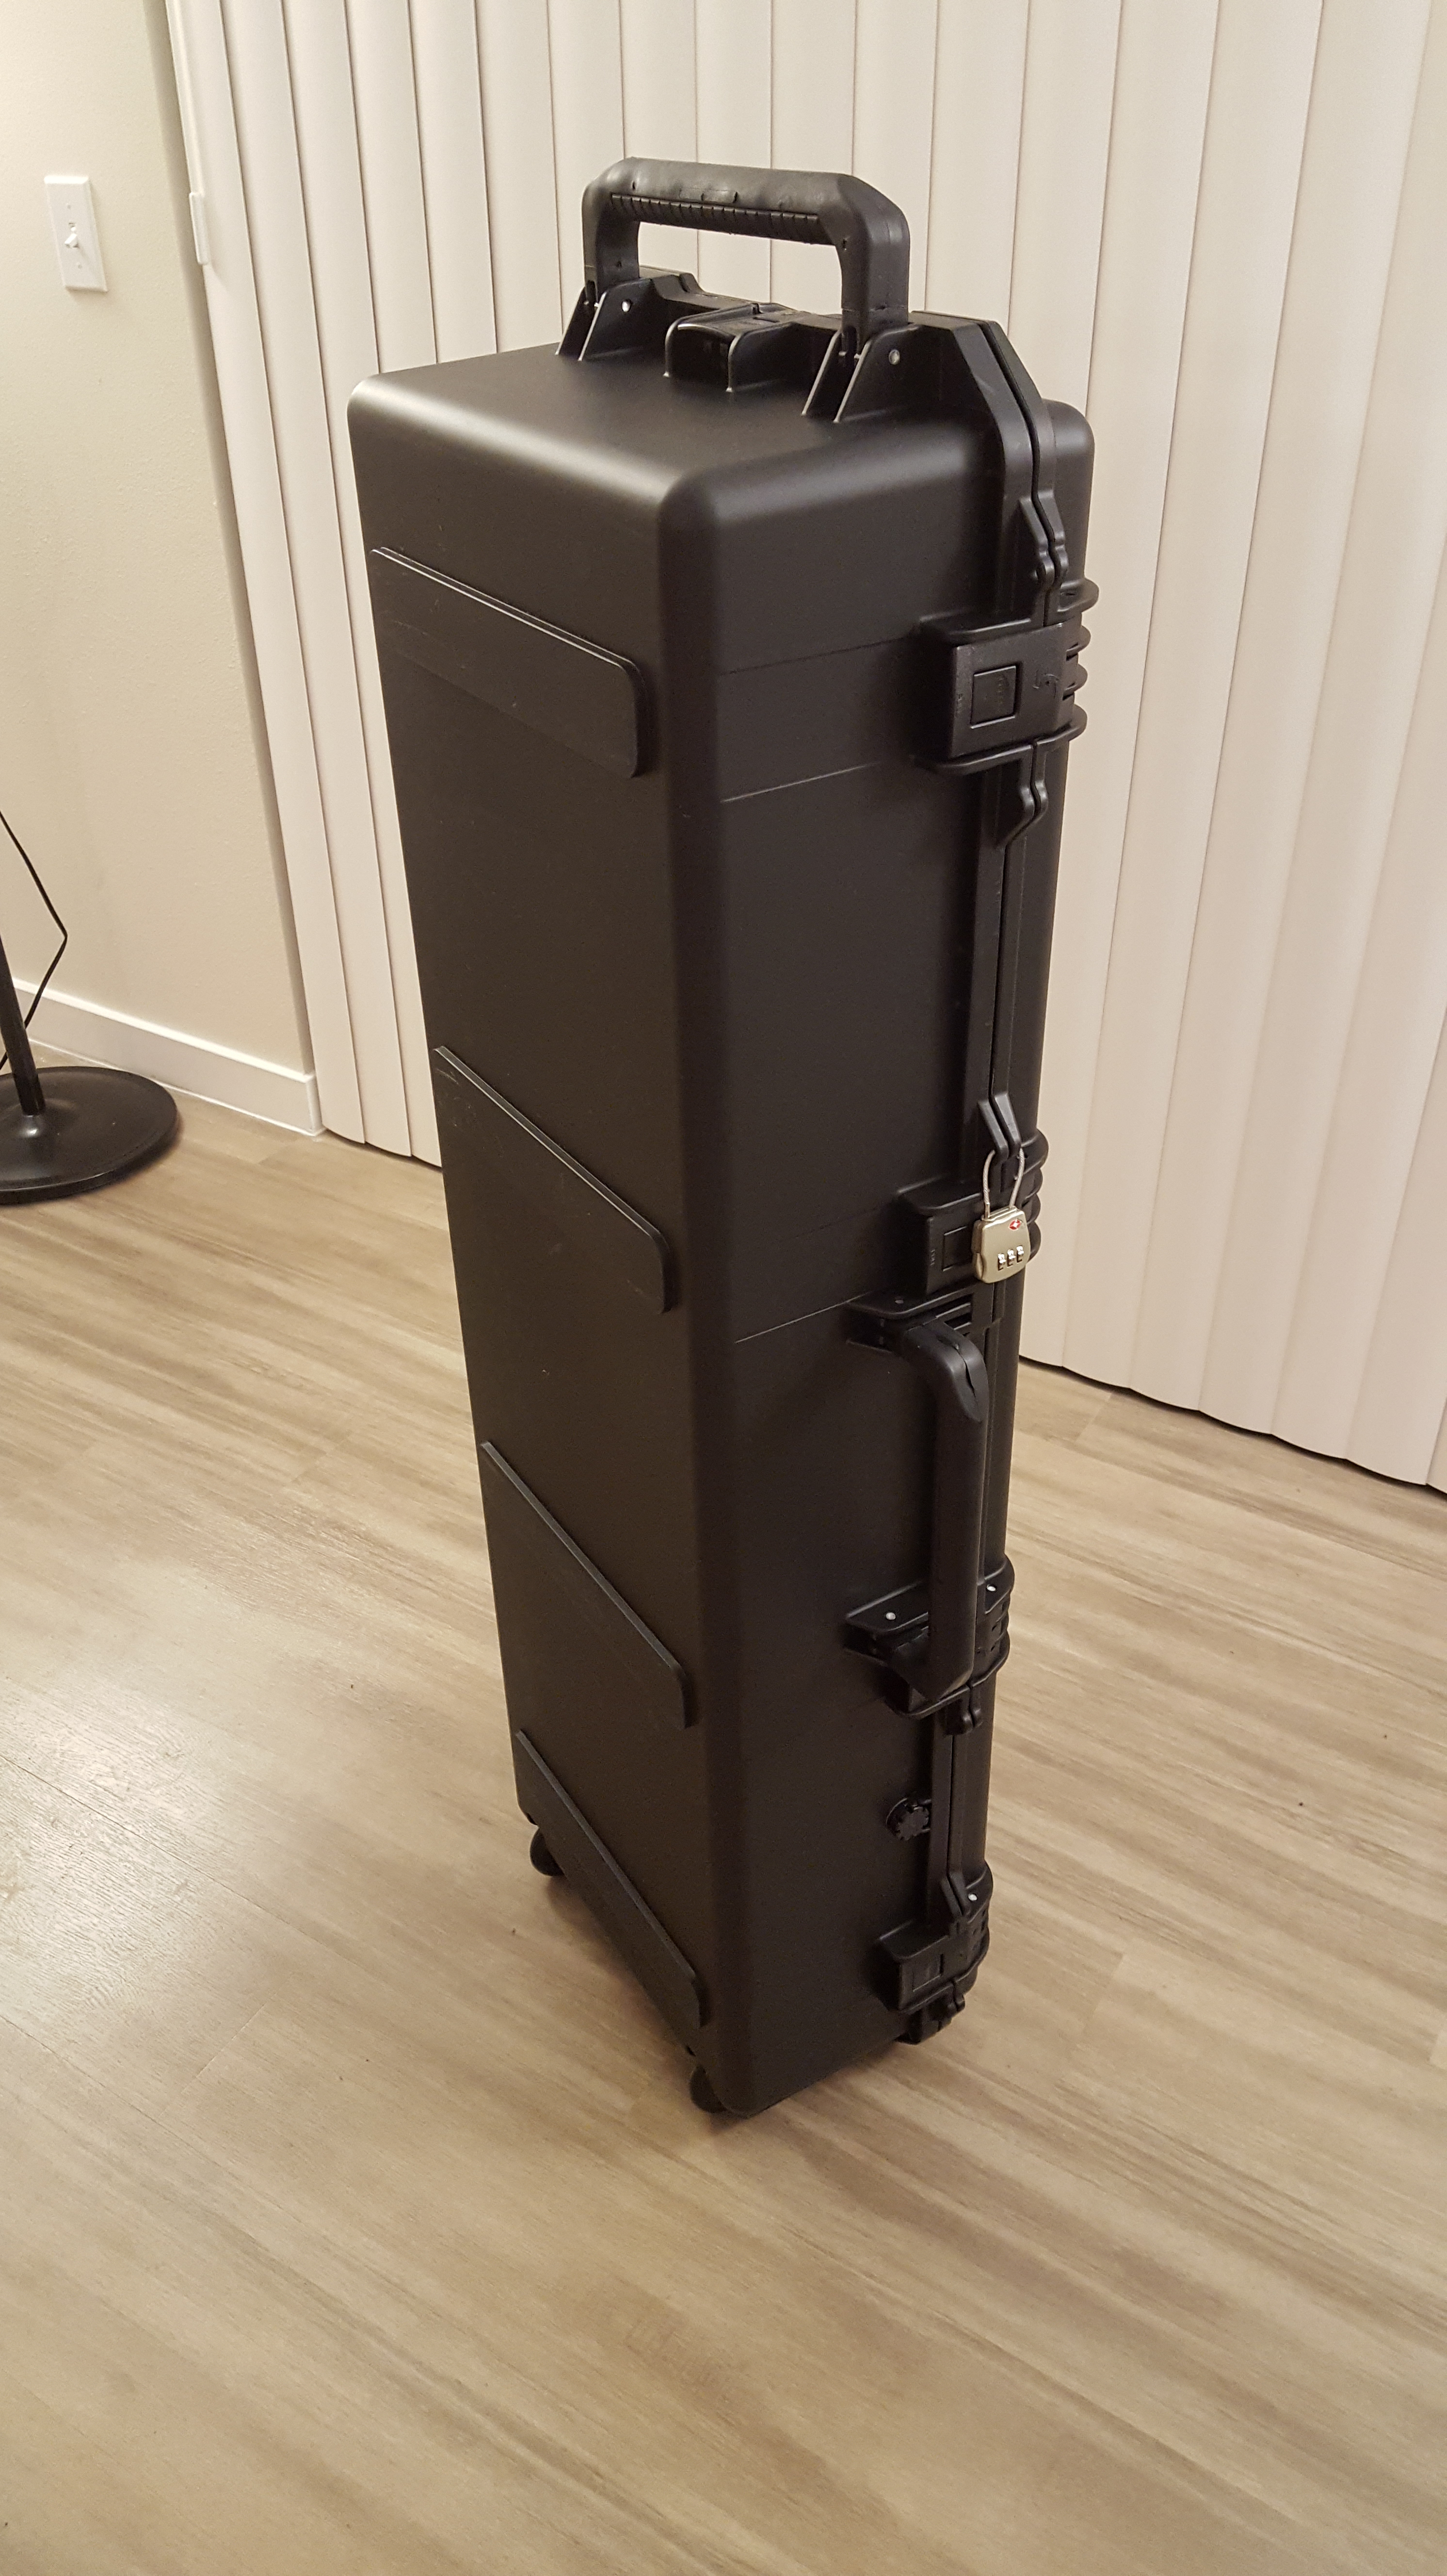
Pelican Case – Pelican Im3220-00001 Case
Pelican TSA Lock – Pelican 1500-518-000 1506 TSA Lock
My requirements:
- Modular and easy to assemble/disassemble
- Travel worthy or easily able to be shipped
- Professional looking
- Long lasting quality
- Solid center of gravity
I feel that this kit meets all of my expectations.
Build:
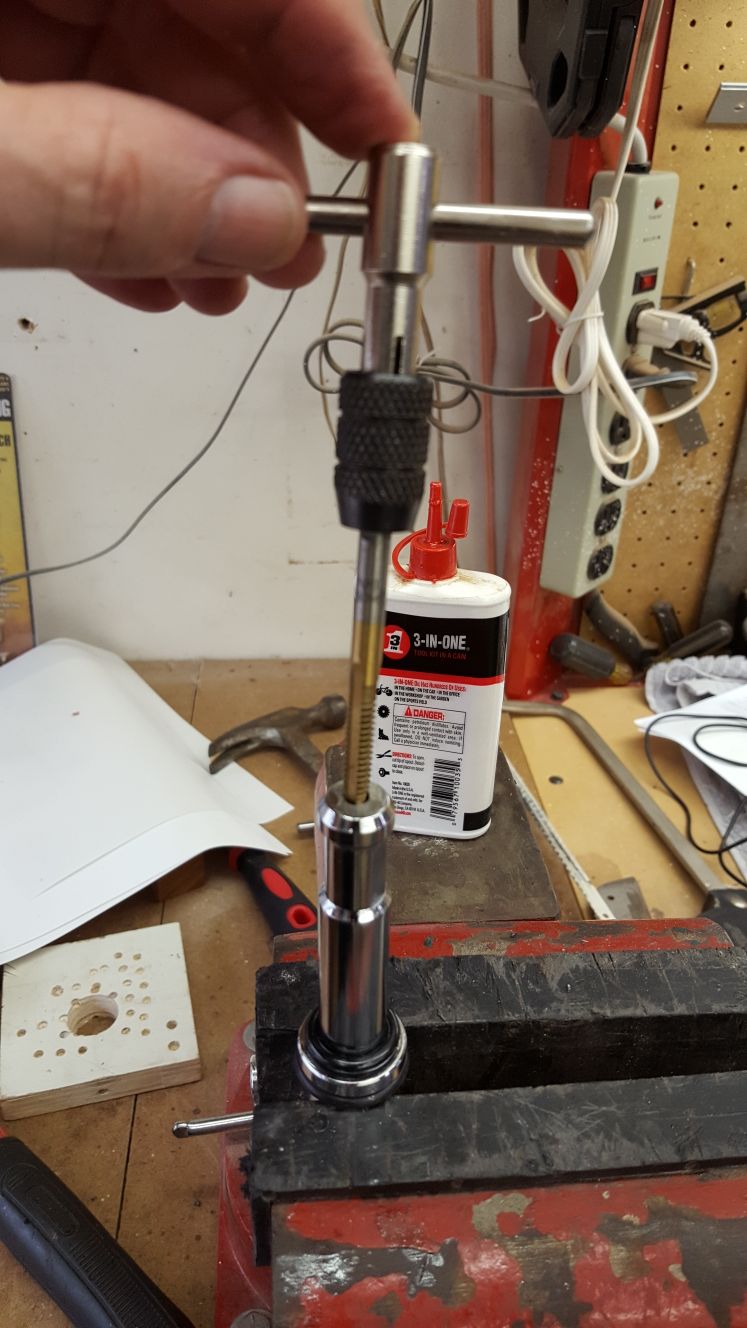
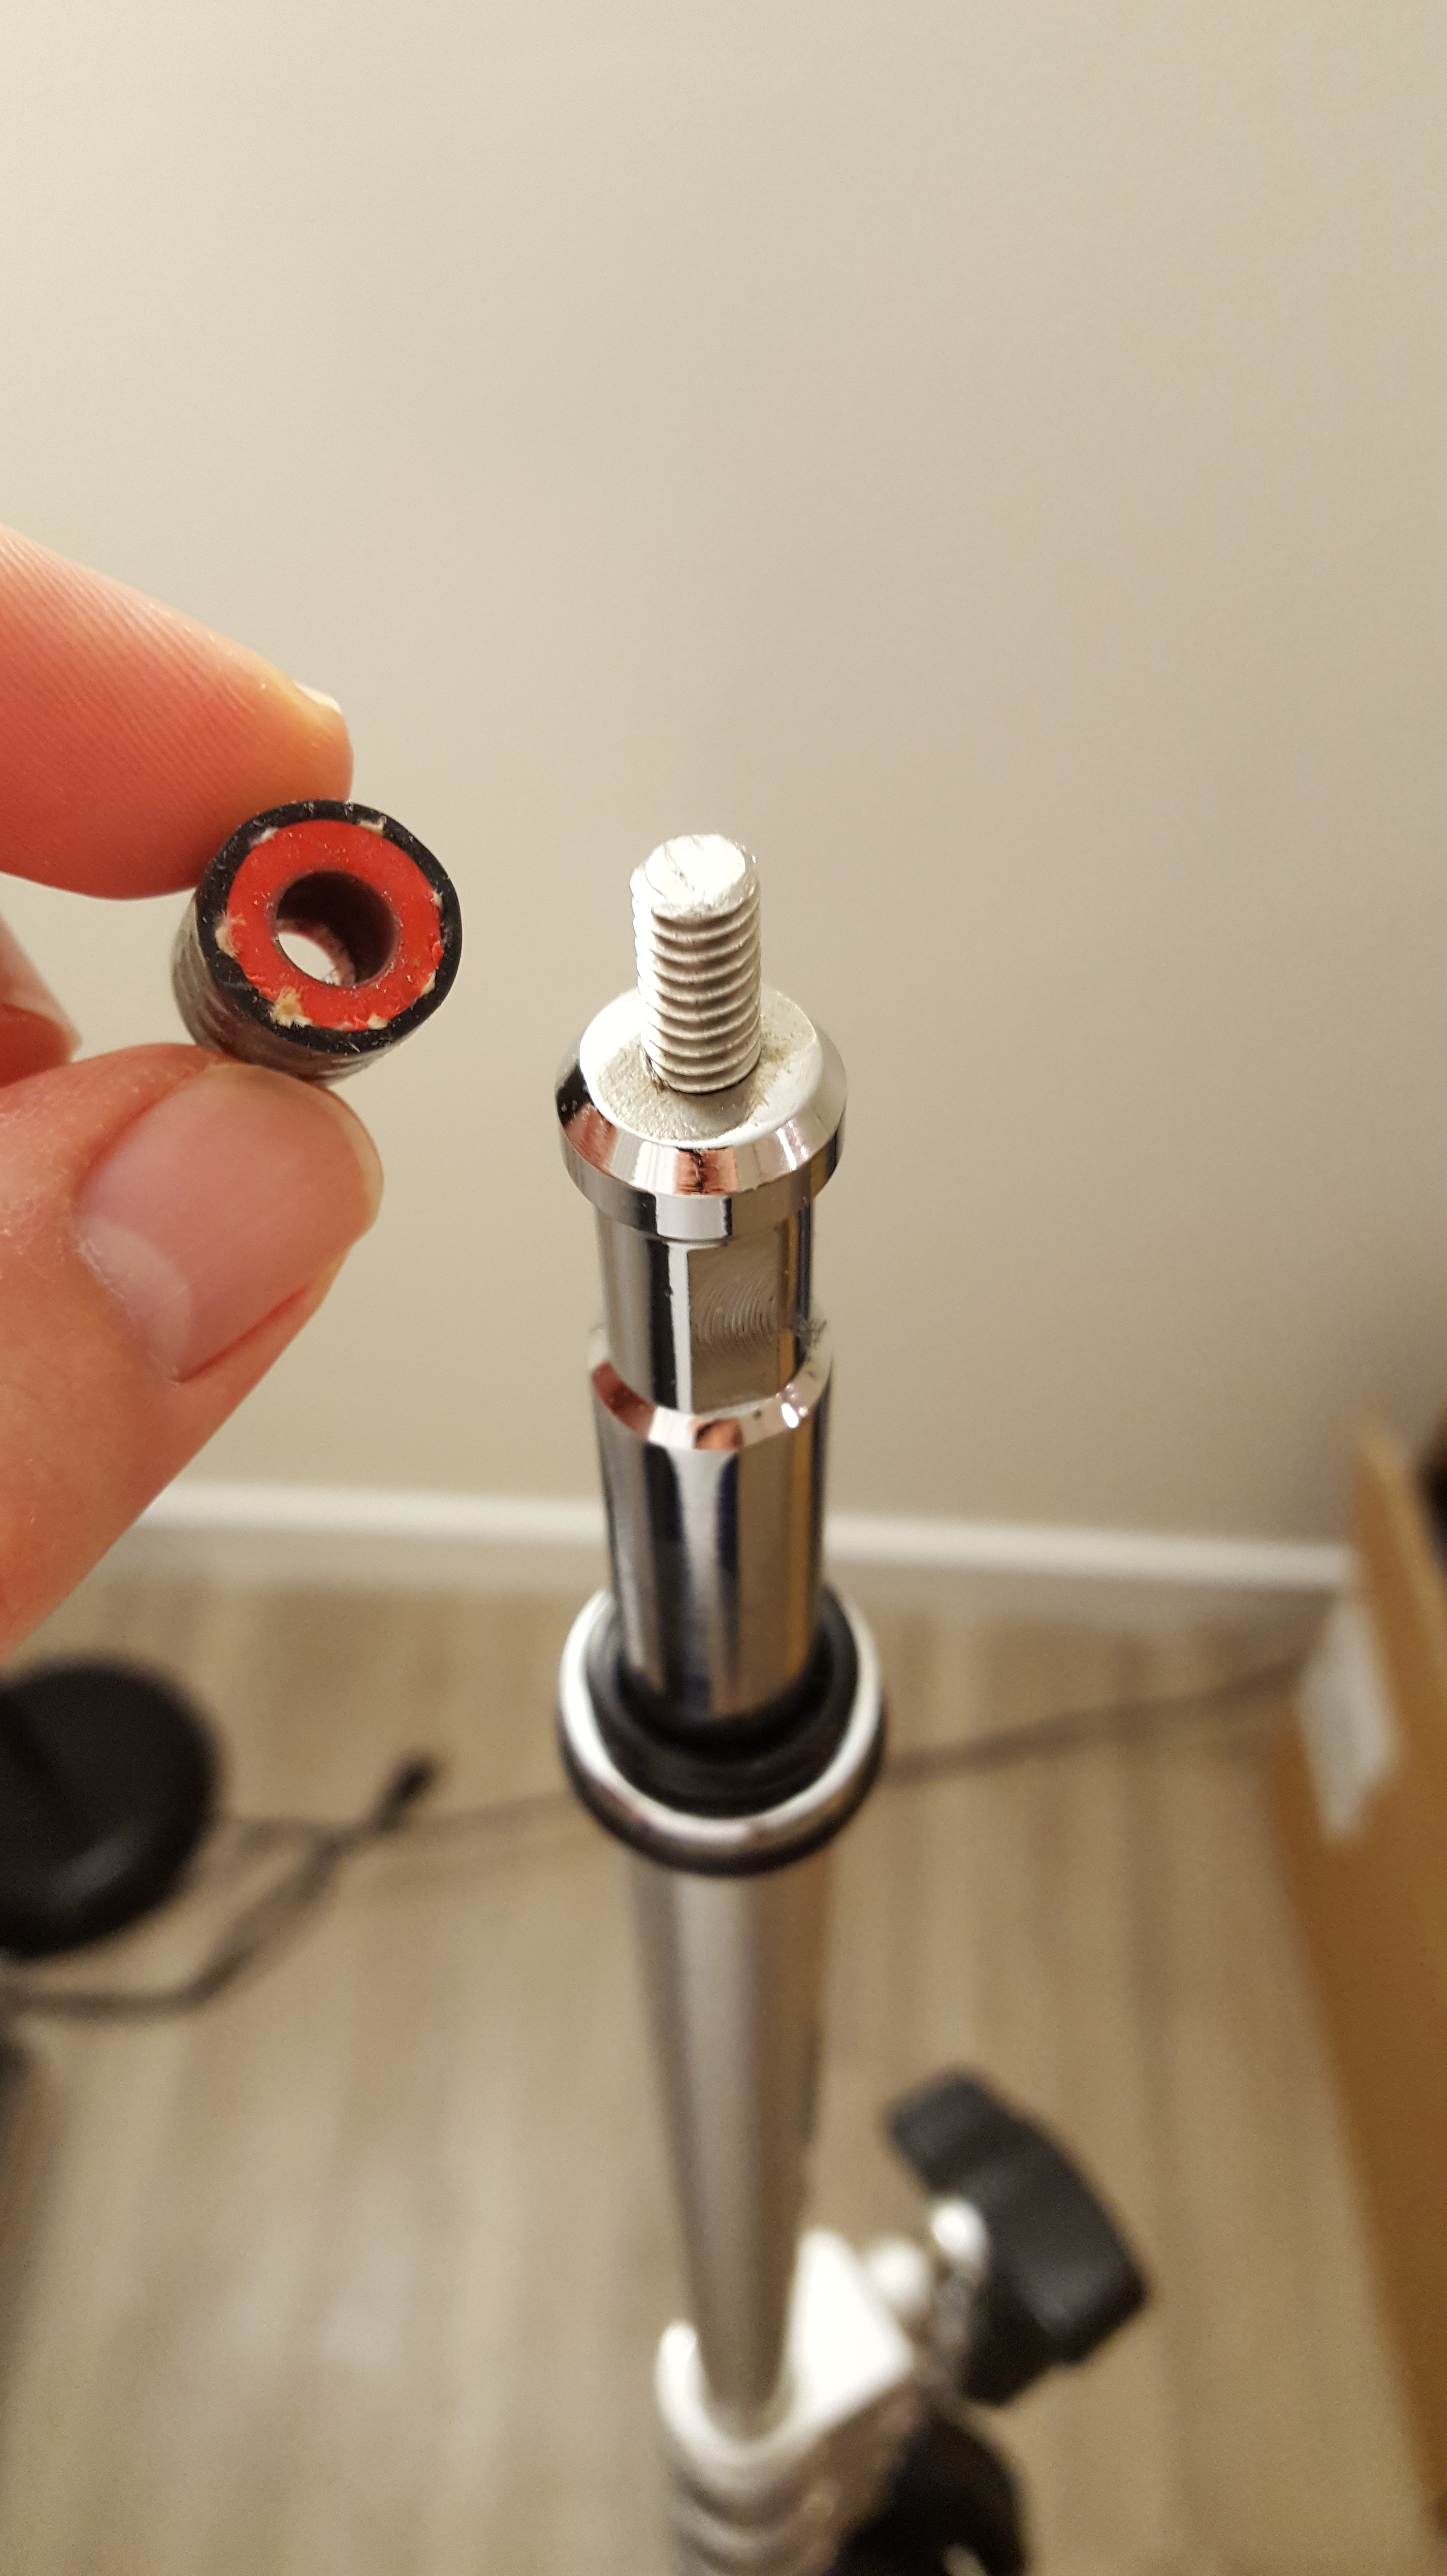
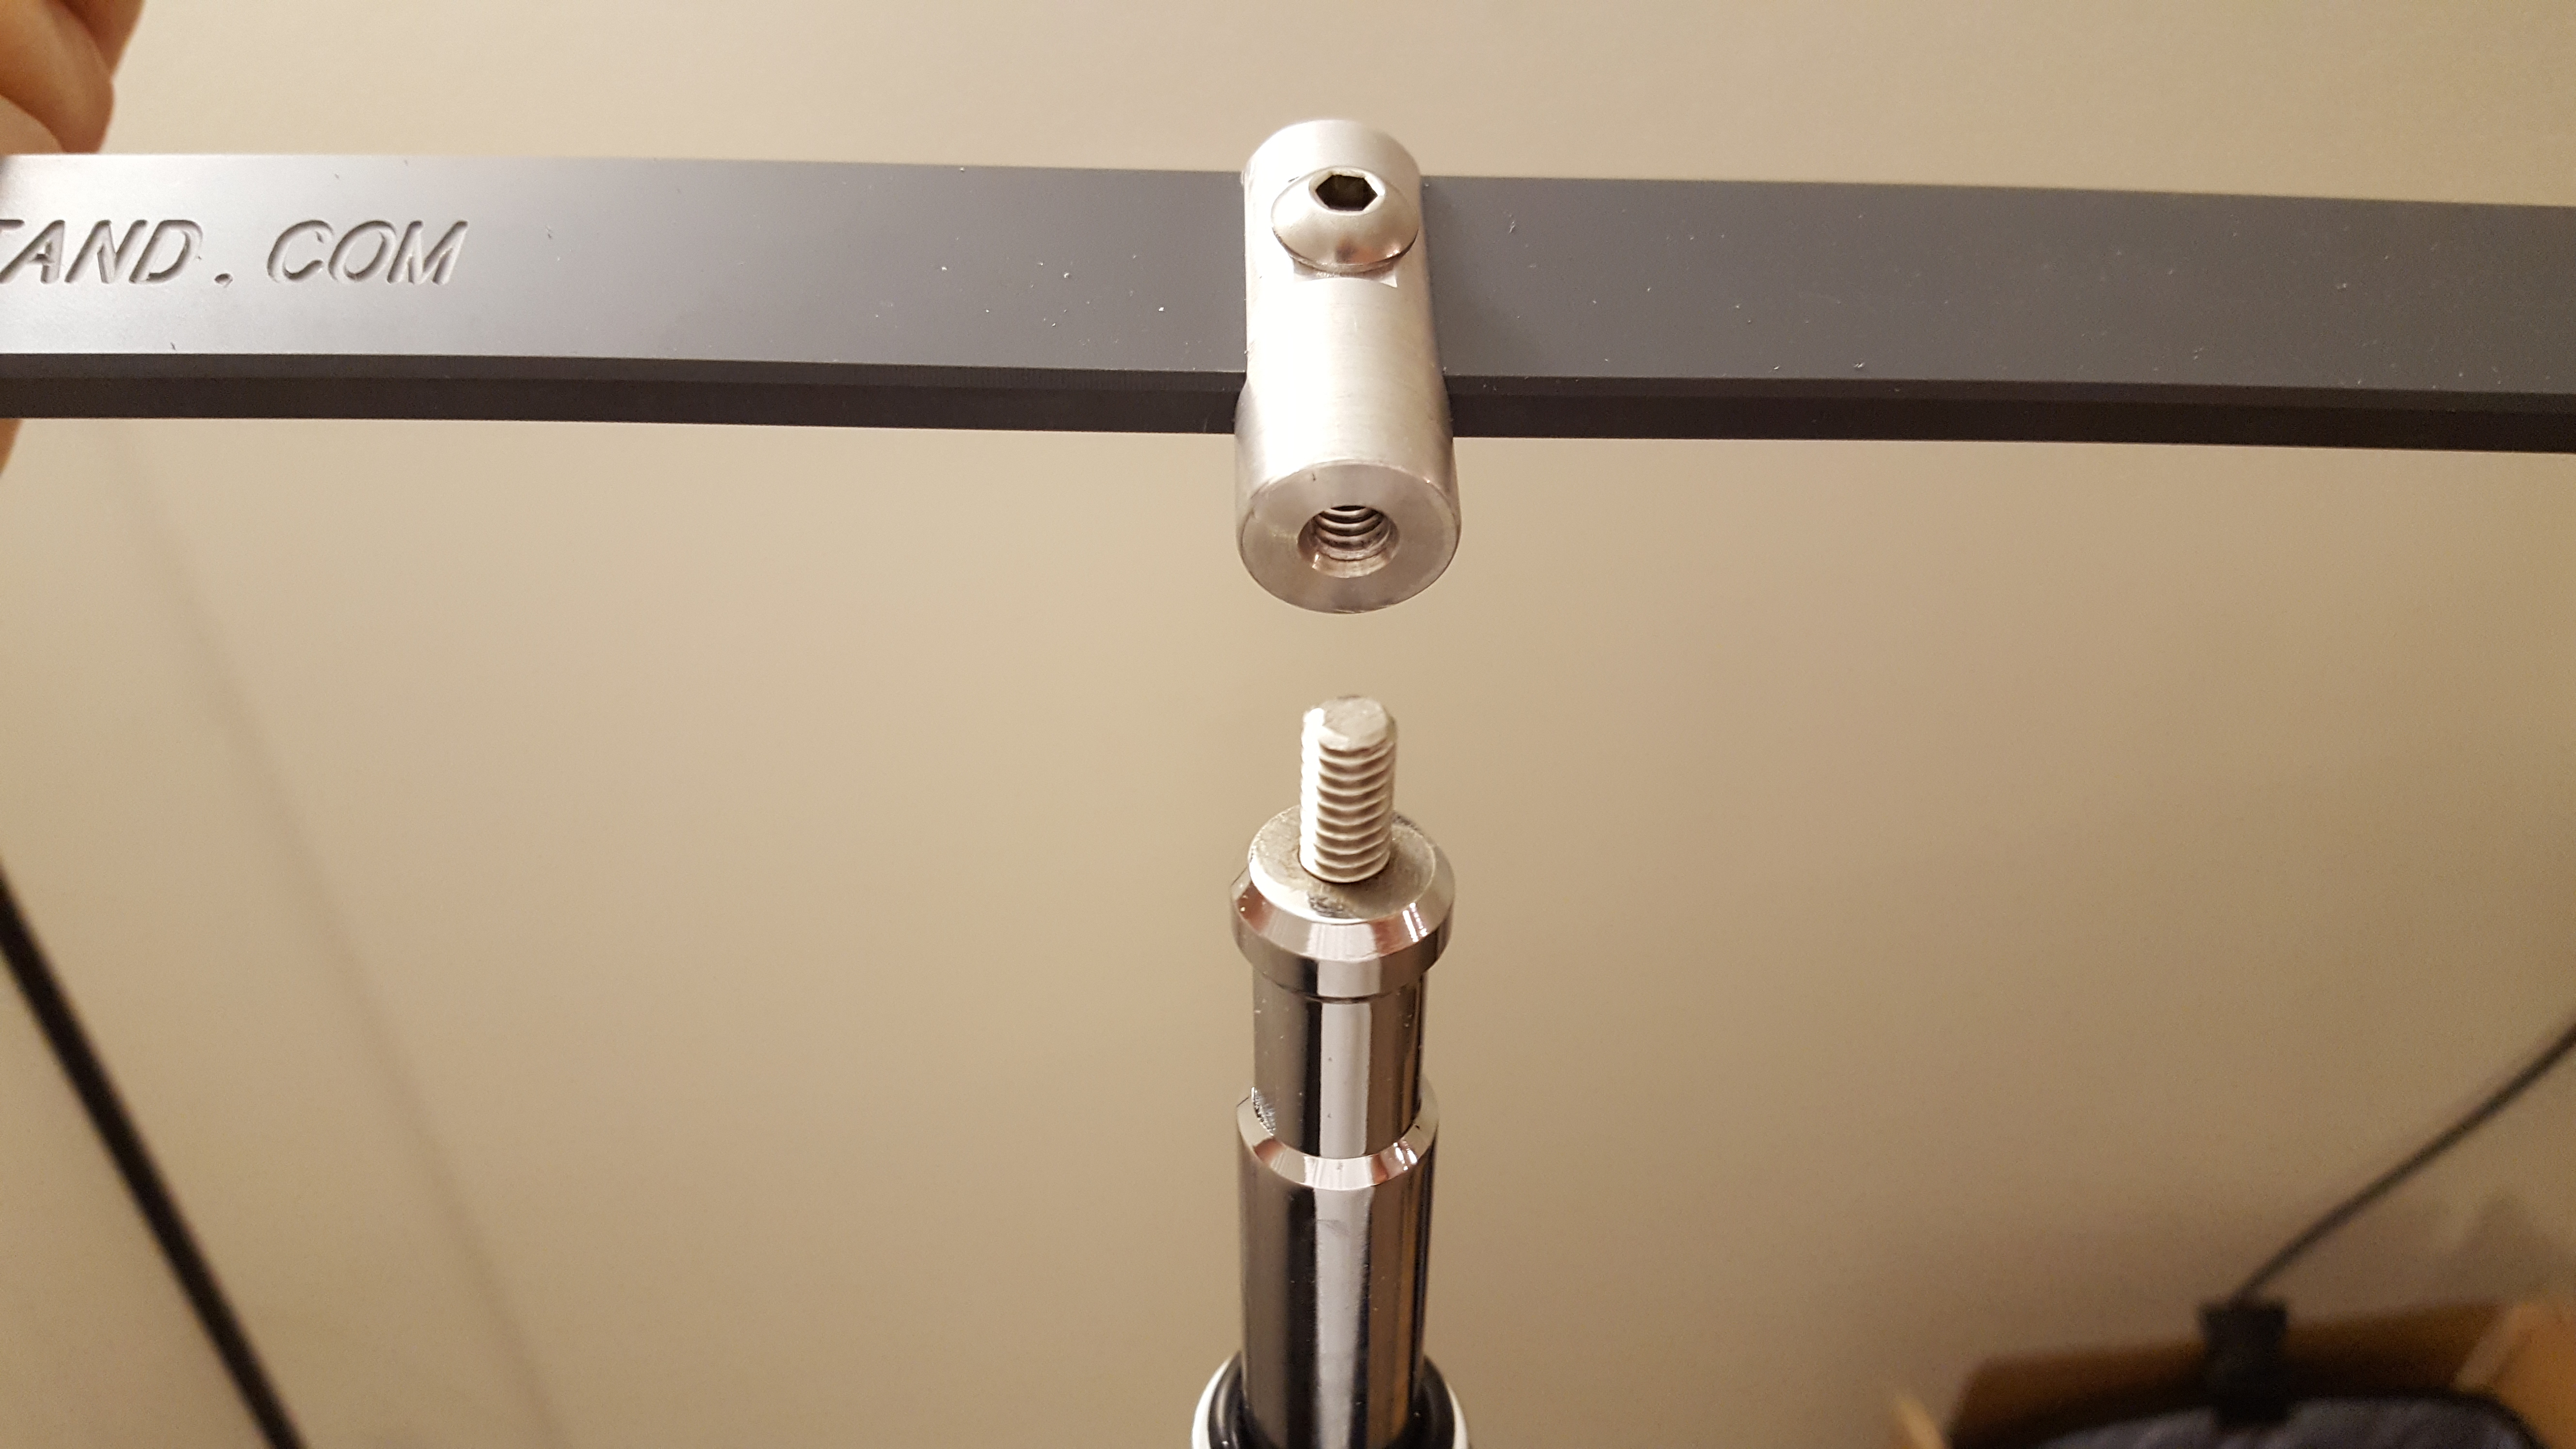
The first thing I needed to figure out how to do, was get the Wi-Fi Stand Bracket to mount to the top of the tripod. The first idea I had (which will work fine for those that don’t have access to tools), was I purchased some PVC pipe (5/8). Cut it about 4 inches in length, and capped it. I drilled a hole into the cap and then inserted a 1/4-20 thread bolt and nut.
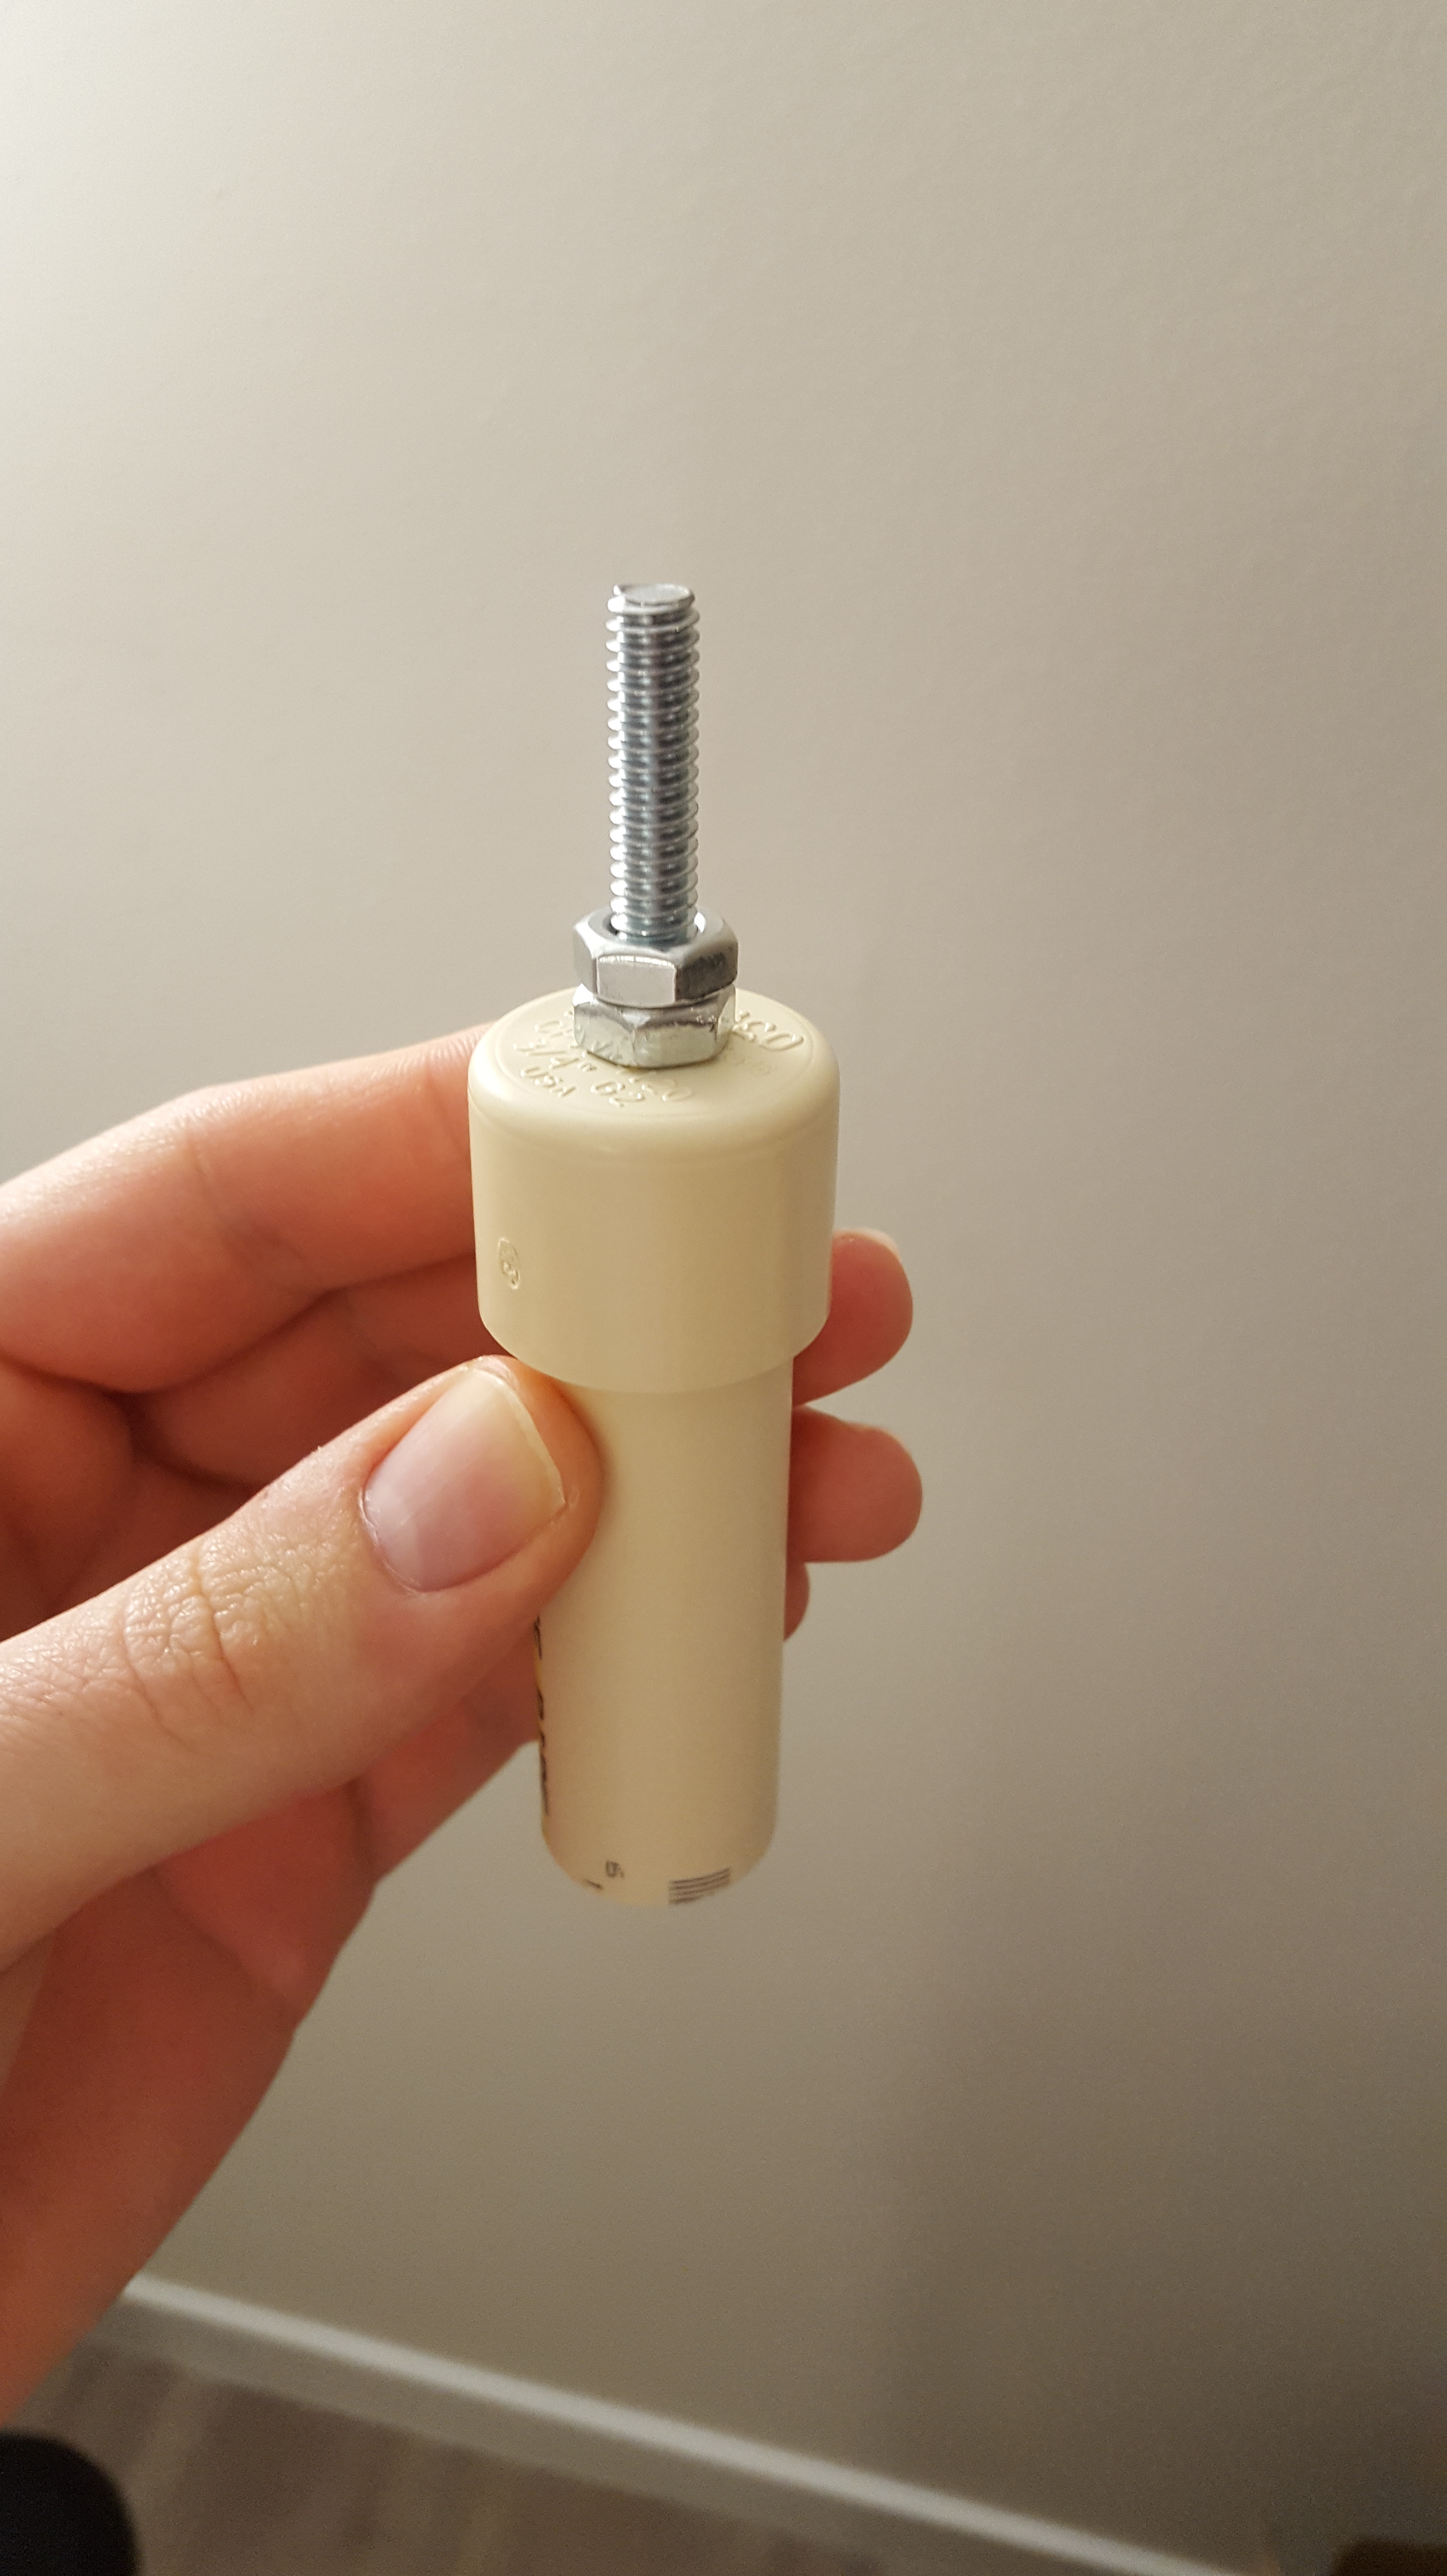
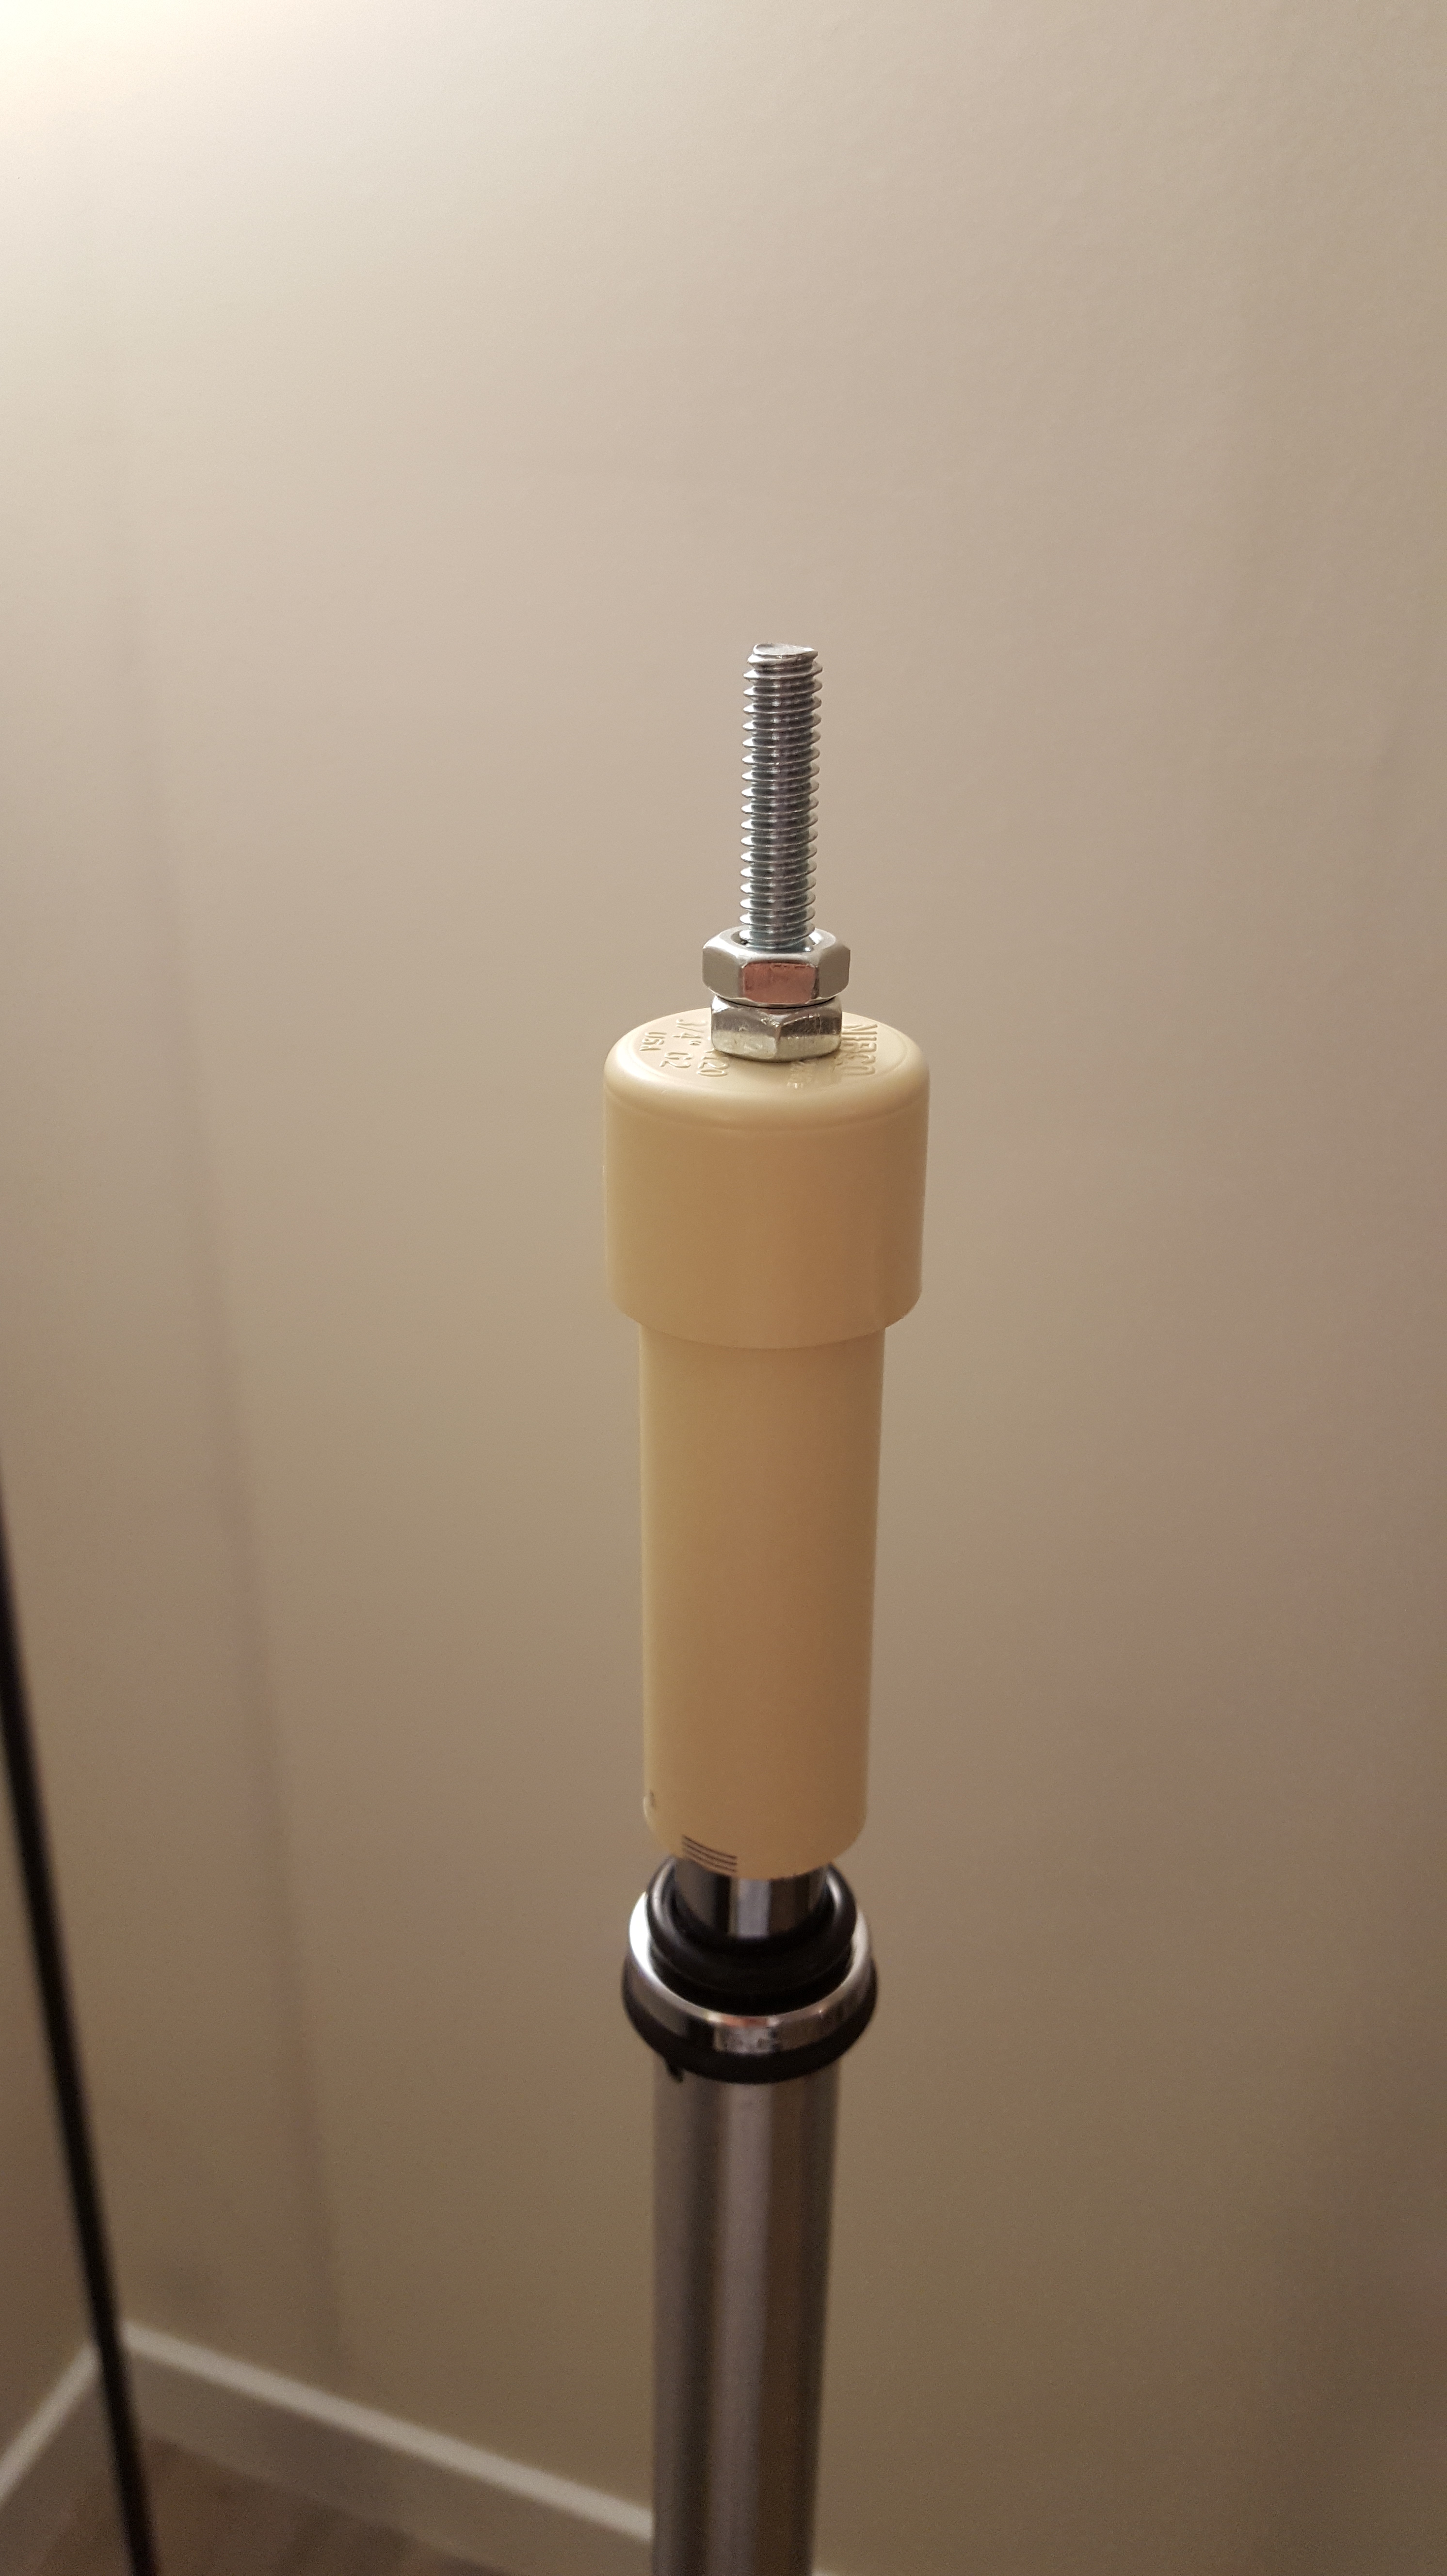
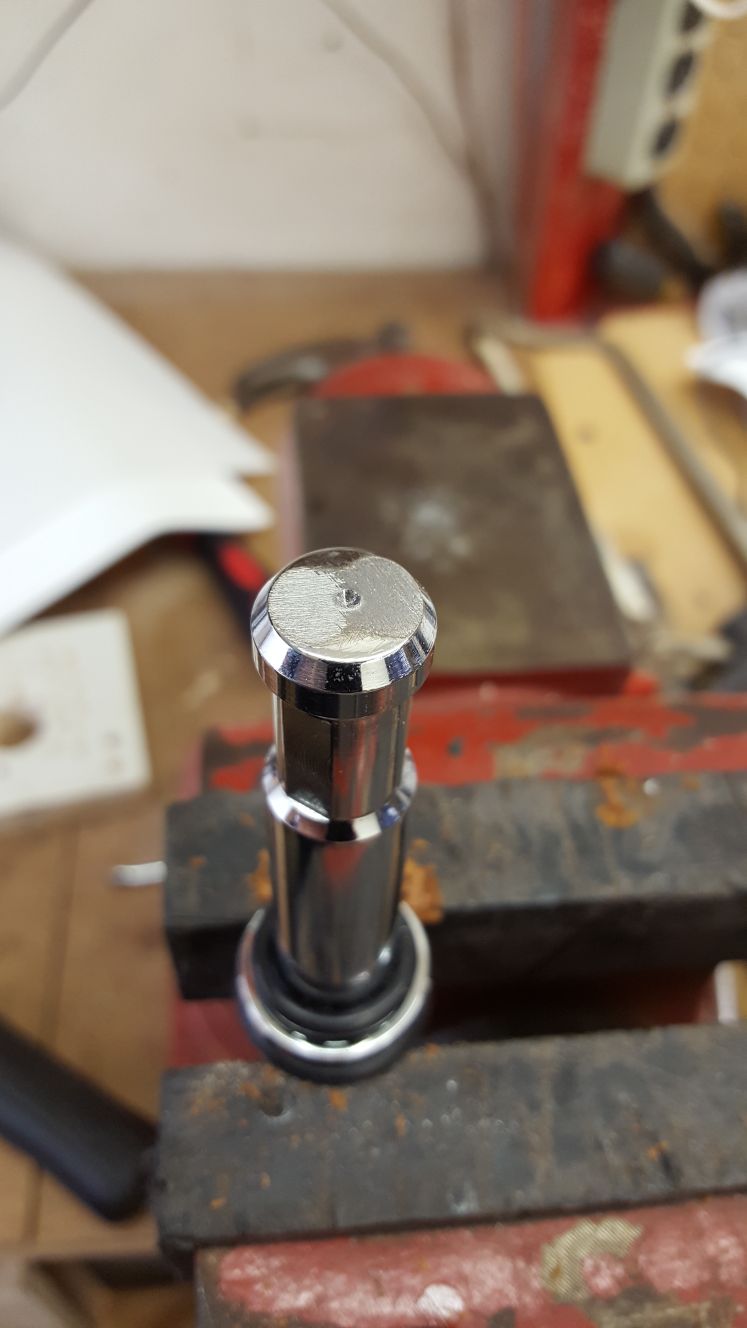
Works fine, it is however a little wobbly, and I was looking for something a little more solid and permanent. This is where I realized the tip of the tripod is actually solid, so I decided to drill a hole into it, tap it, and insert a 1/4-20 thread bolt with loctite to keep it from coming out easily.
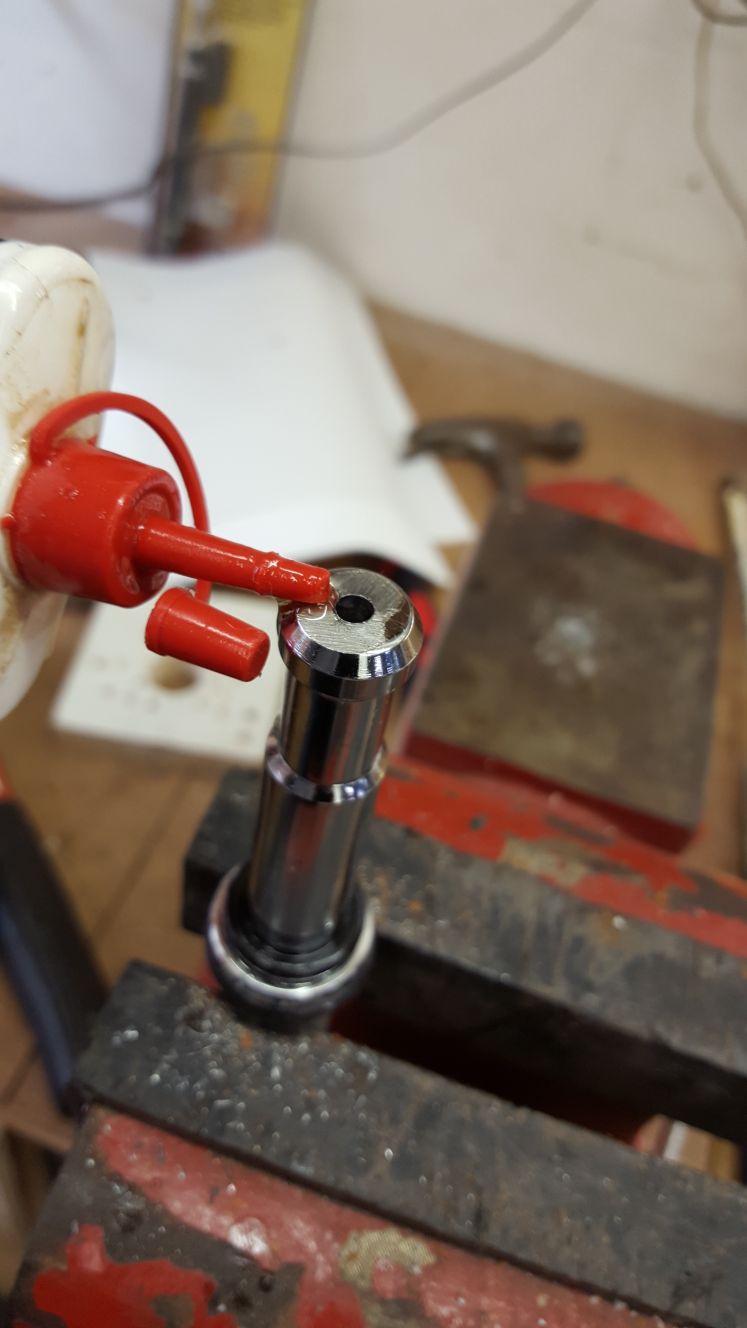
Working with my father in his shop. First you have to file off the chrome on the top of the tip. We then used a center punch to create a small dent in the center of the tip for drilling.

Drill 1/16th pilot hole, then increase bit sizes until you reach 13/64th or a #7 bit. This is the recommended tap drill size for a 1/4-20 thread. Make sure to use some oil during the drilling process to help keep things cool and go smooth.

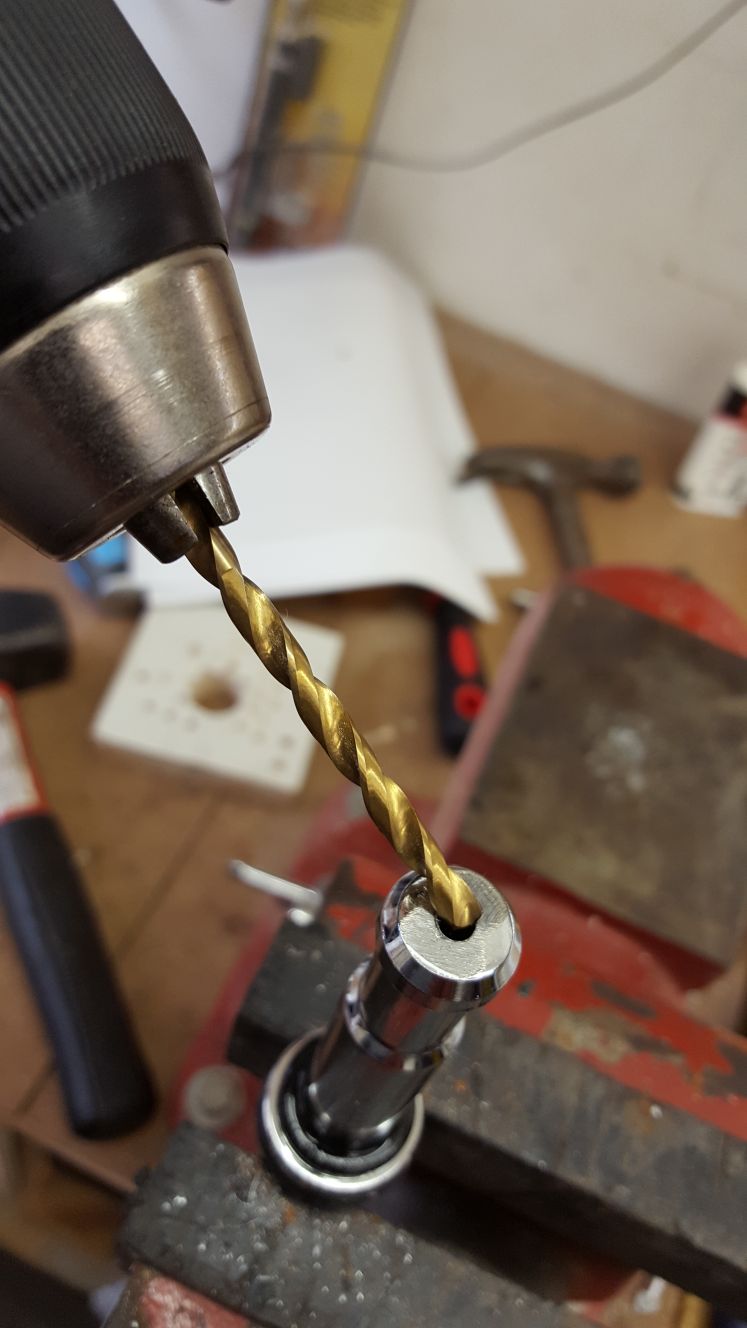
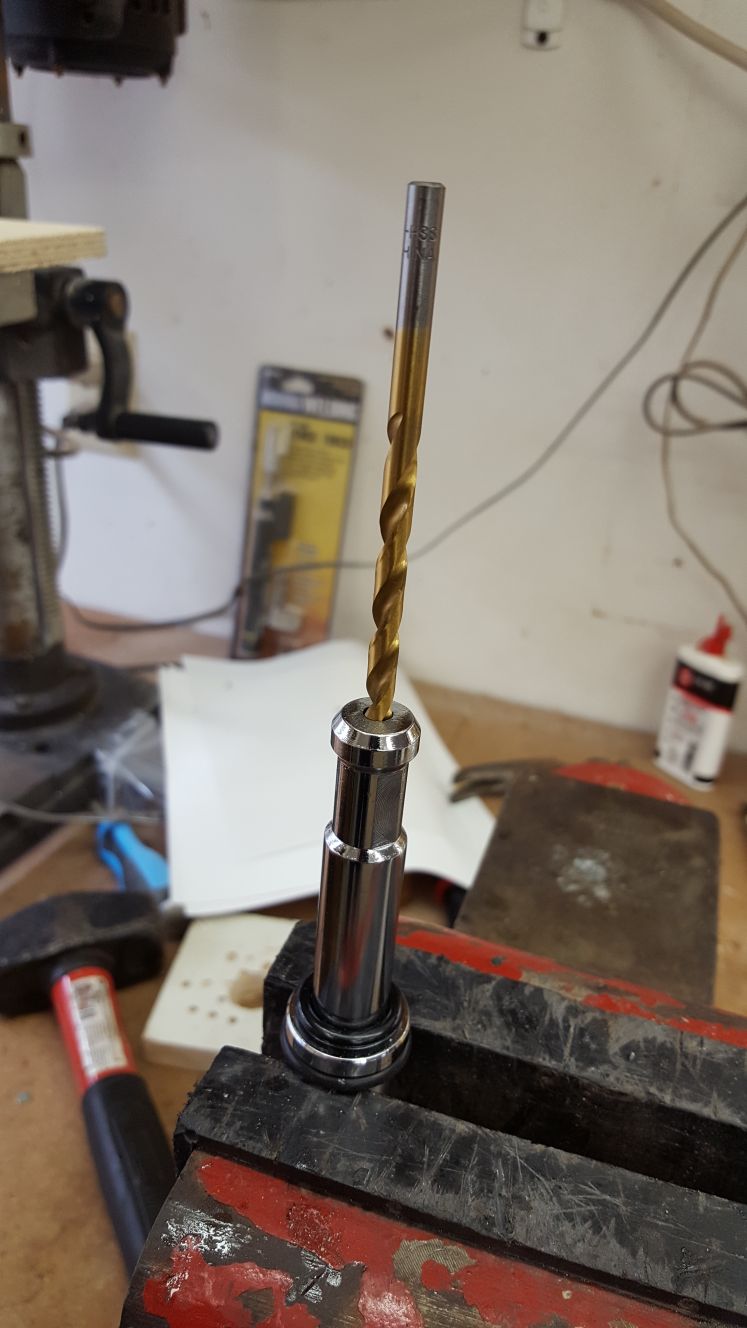
You will need a quality tap, and then proceed carefully.
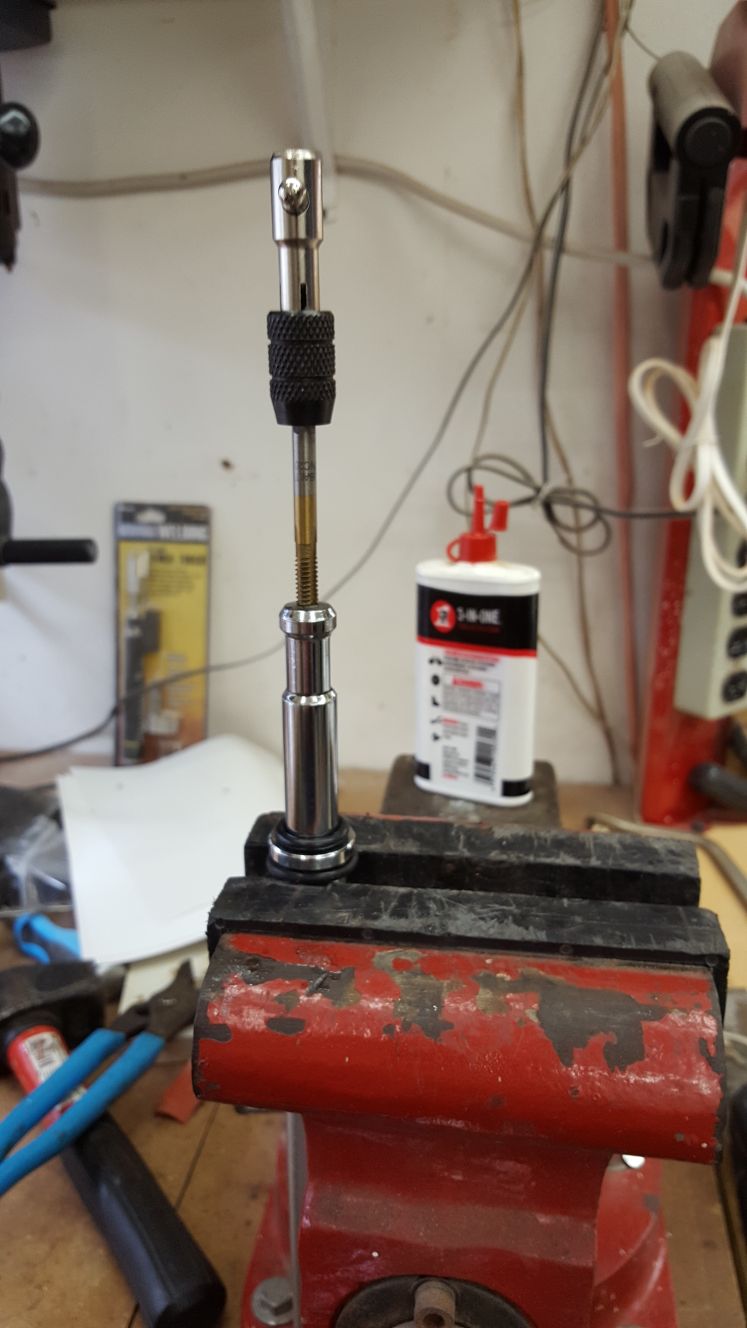
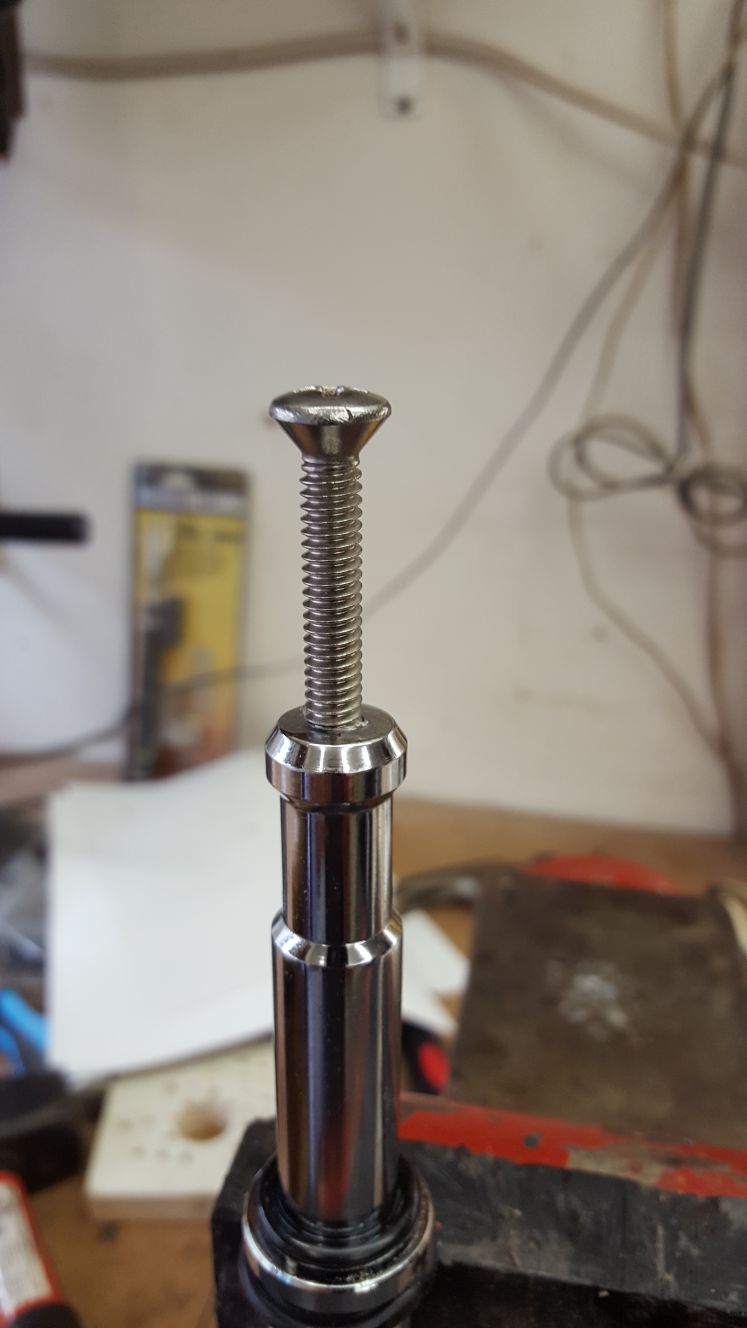
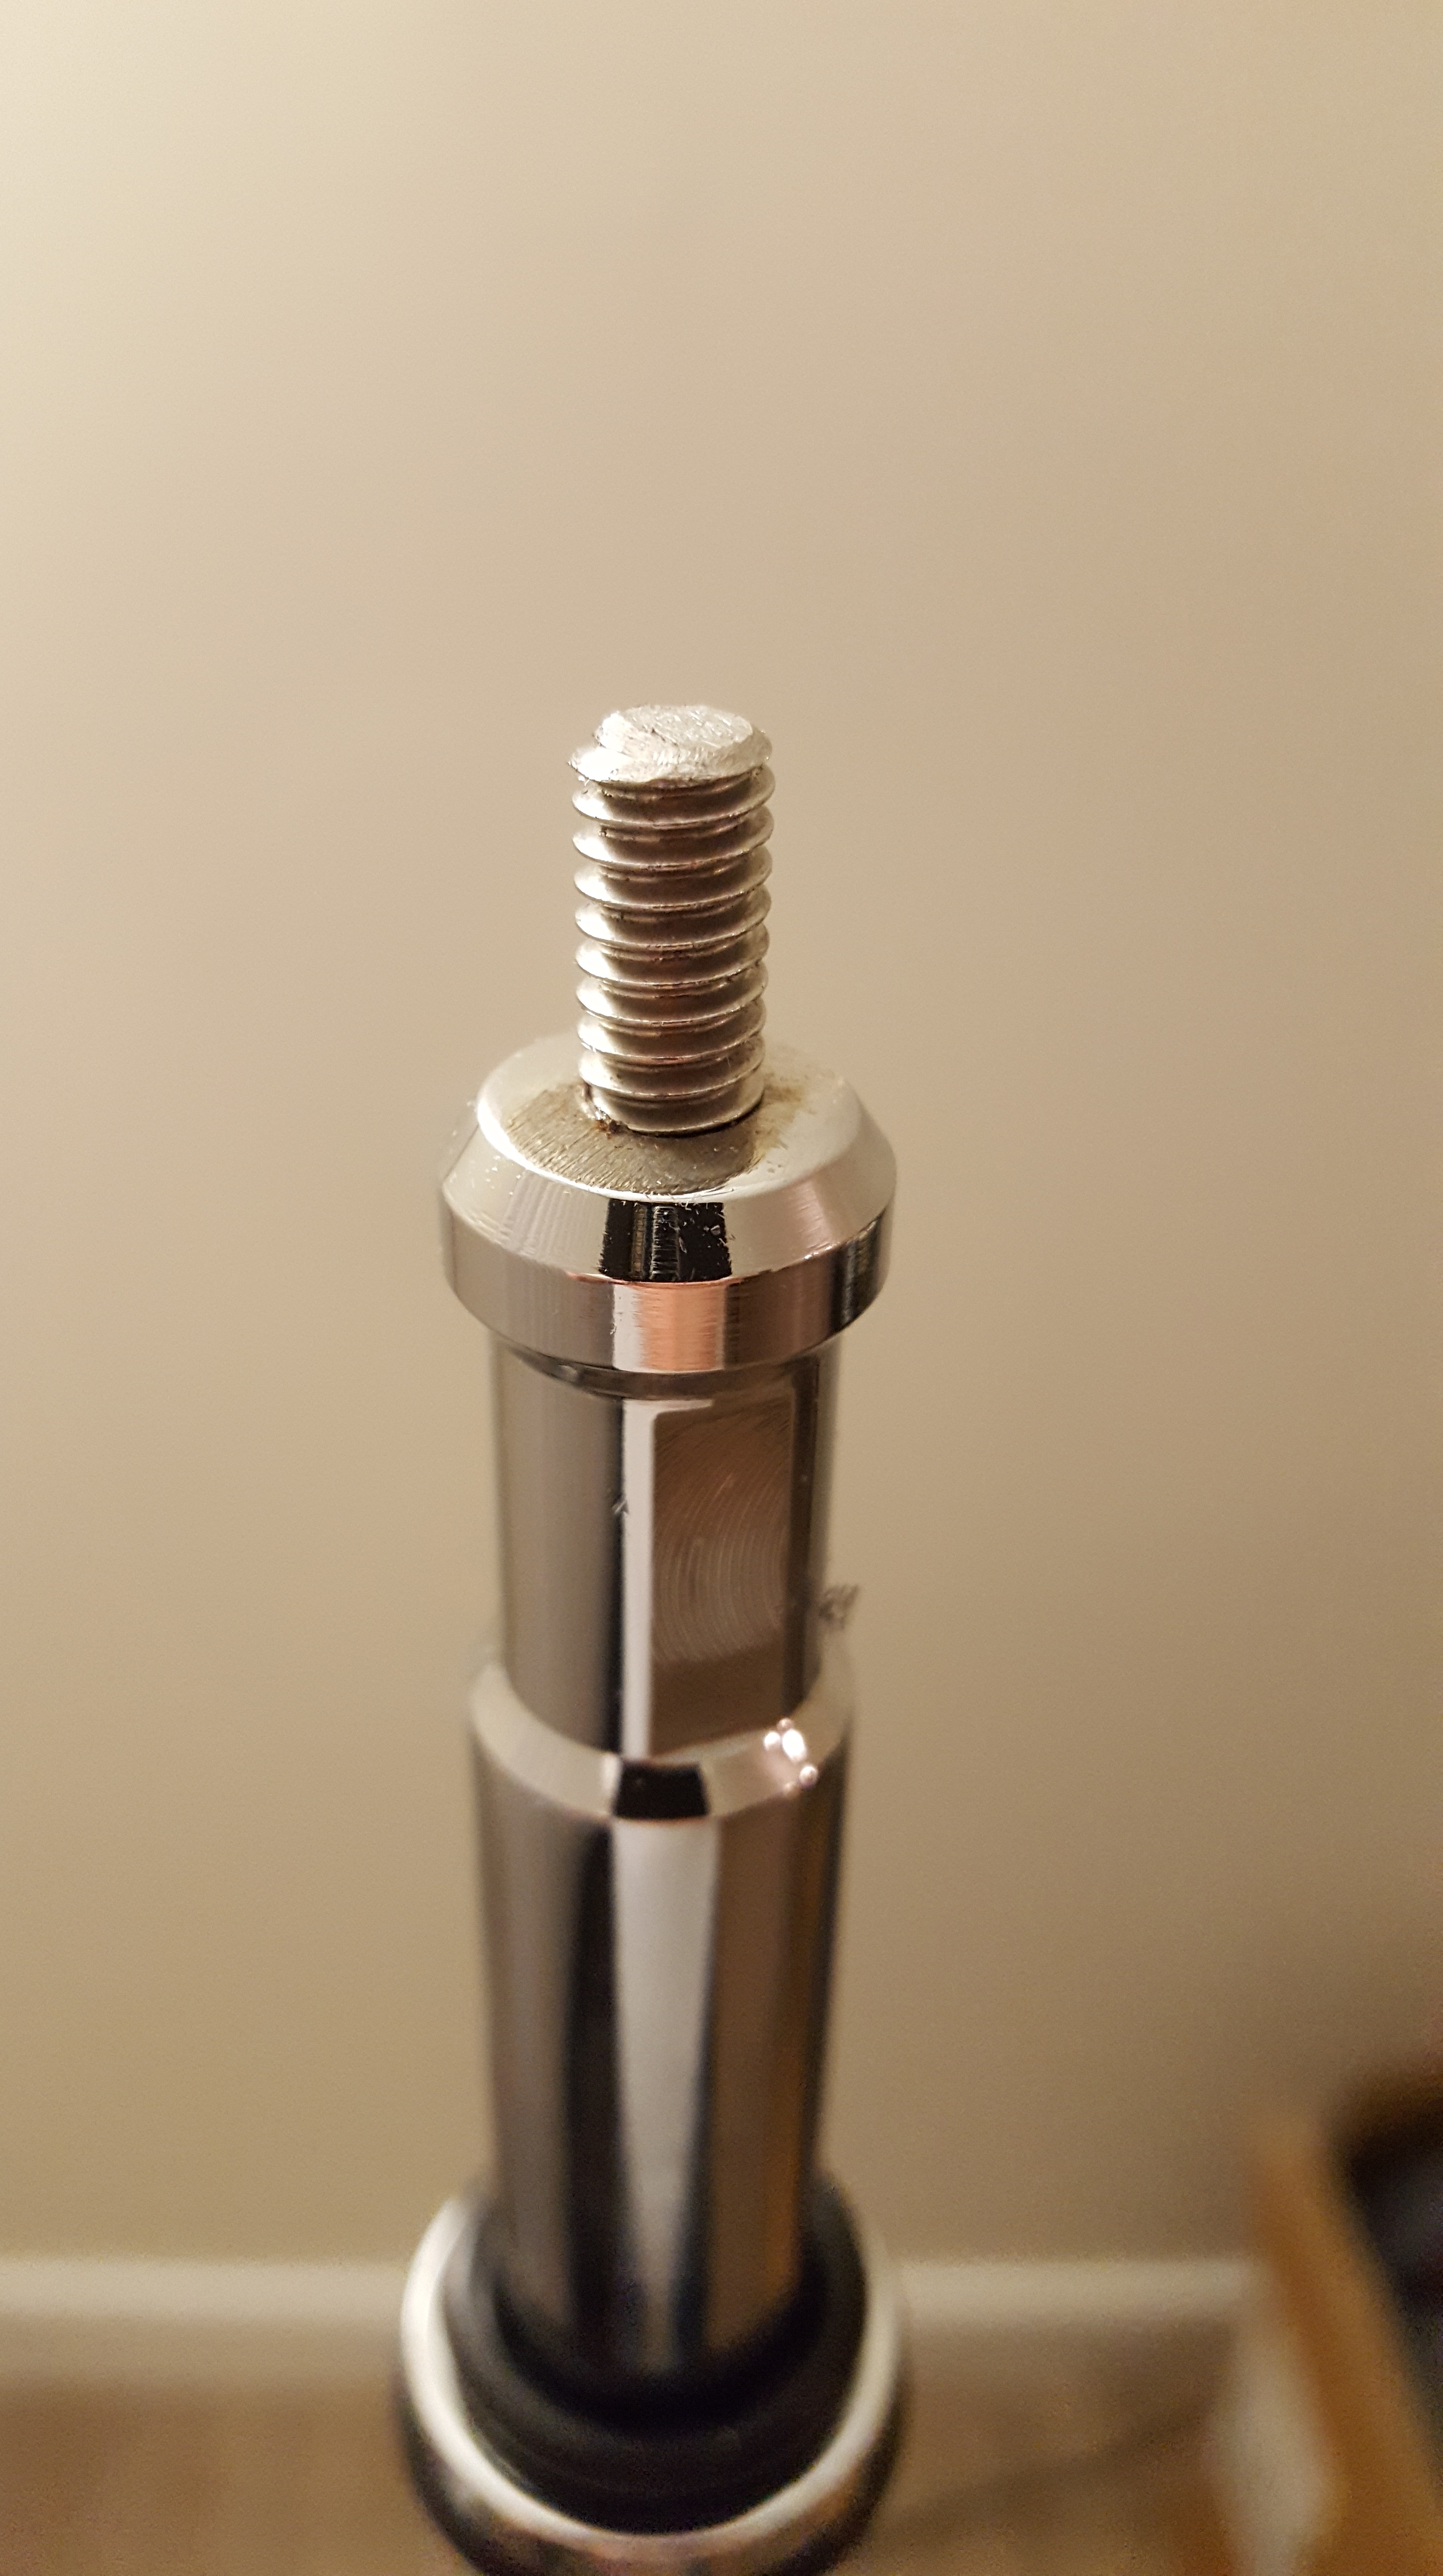
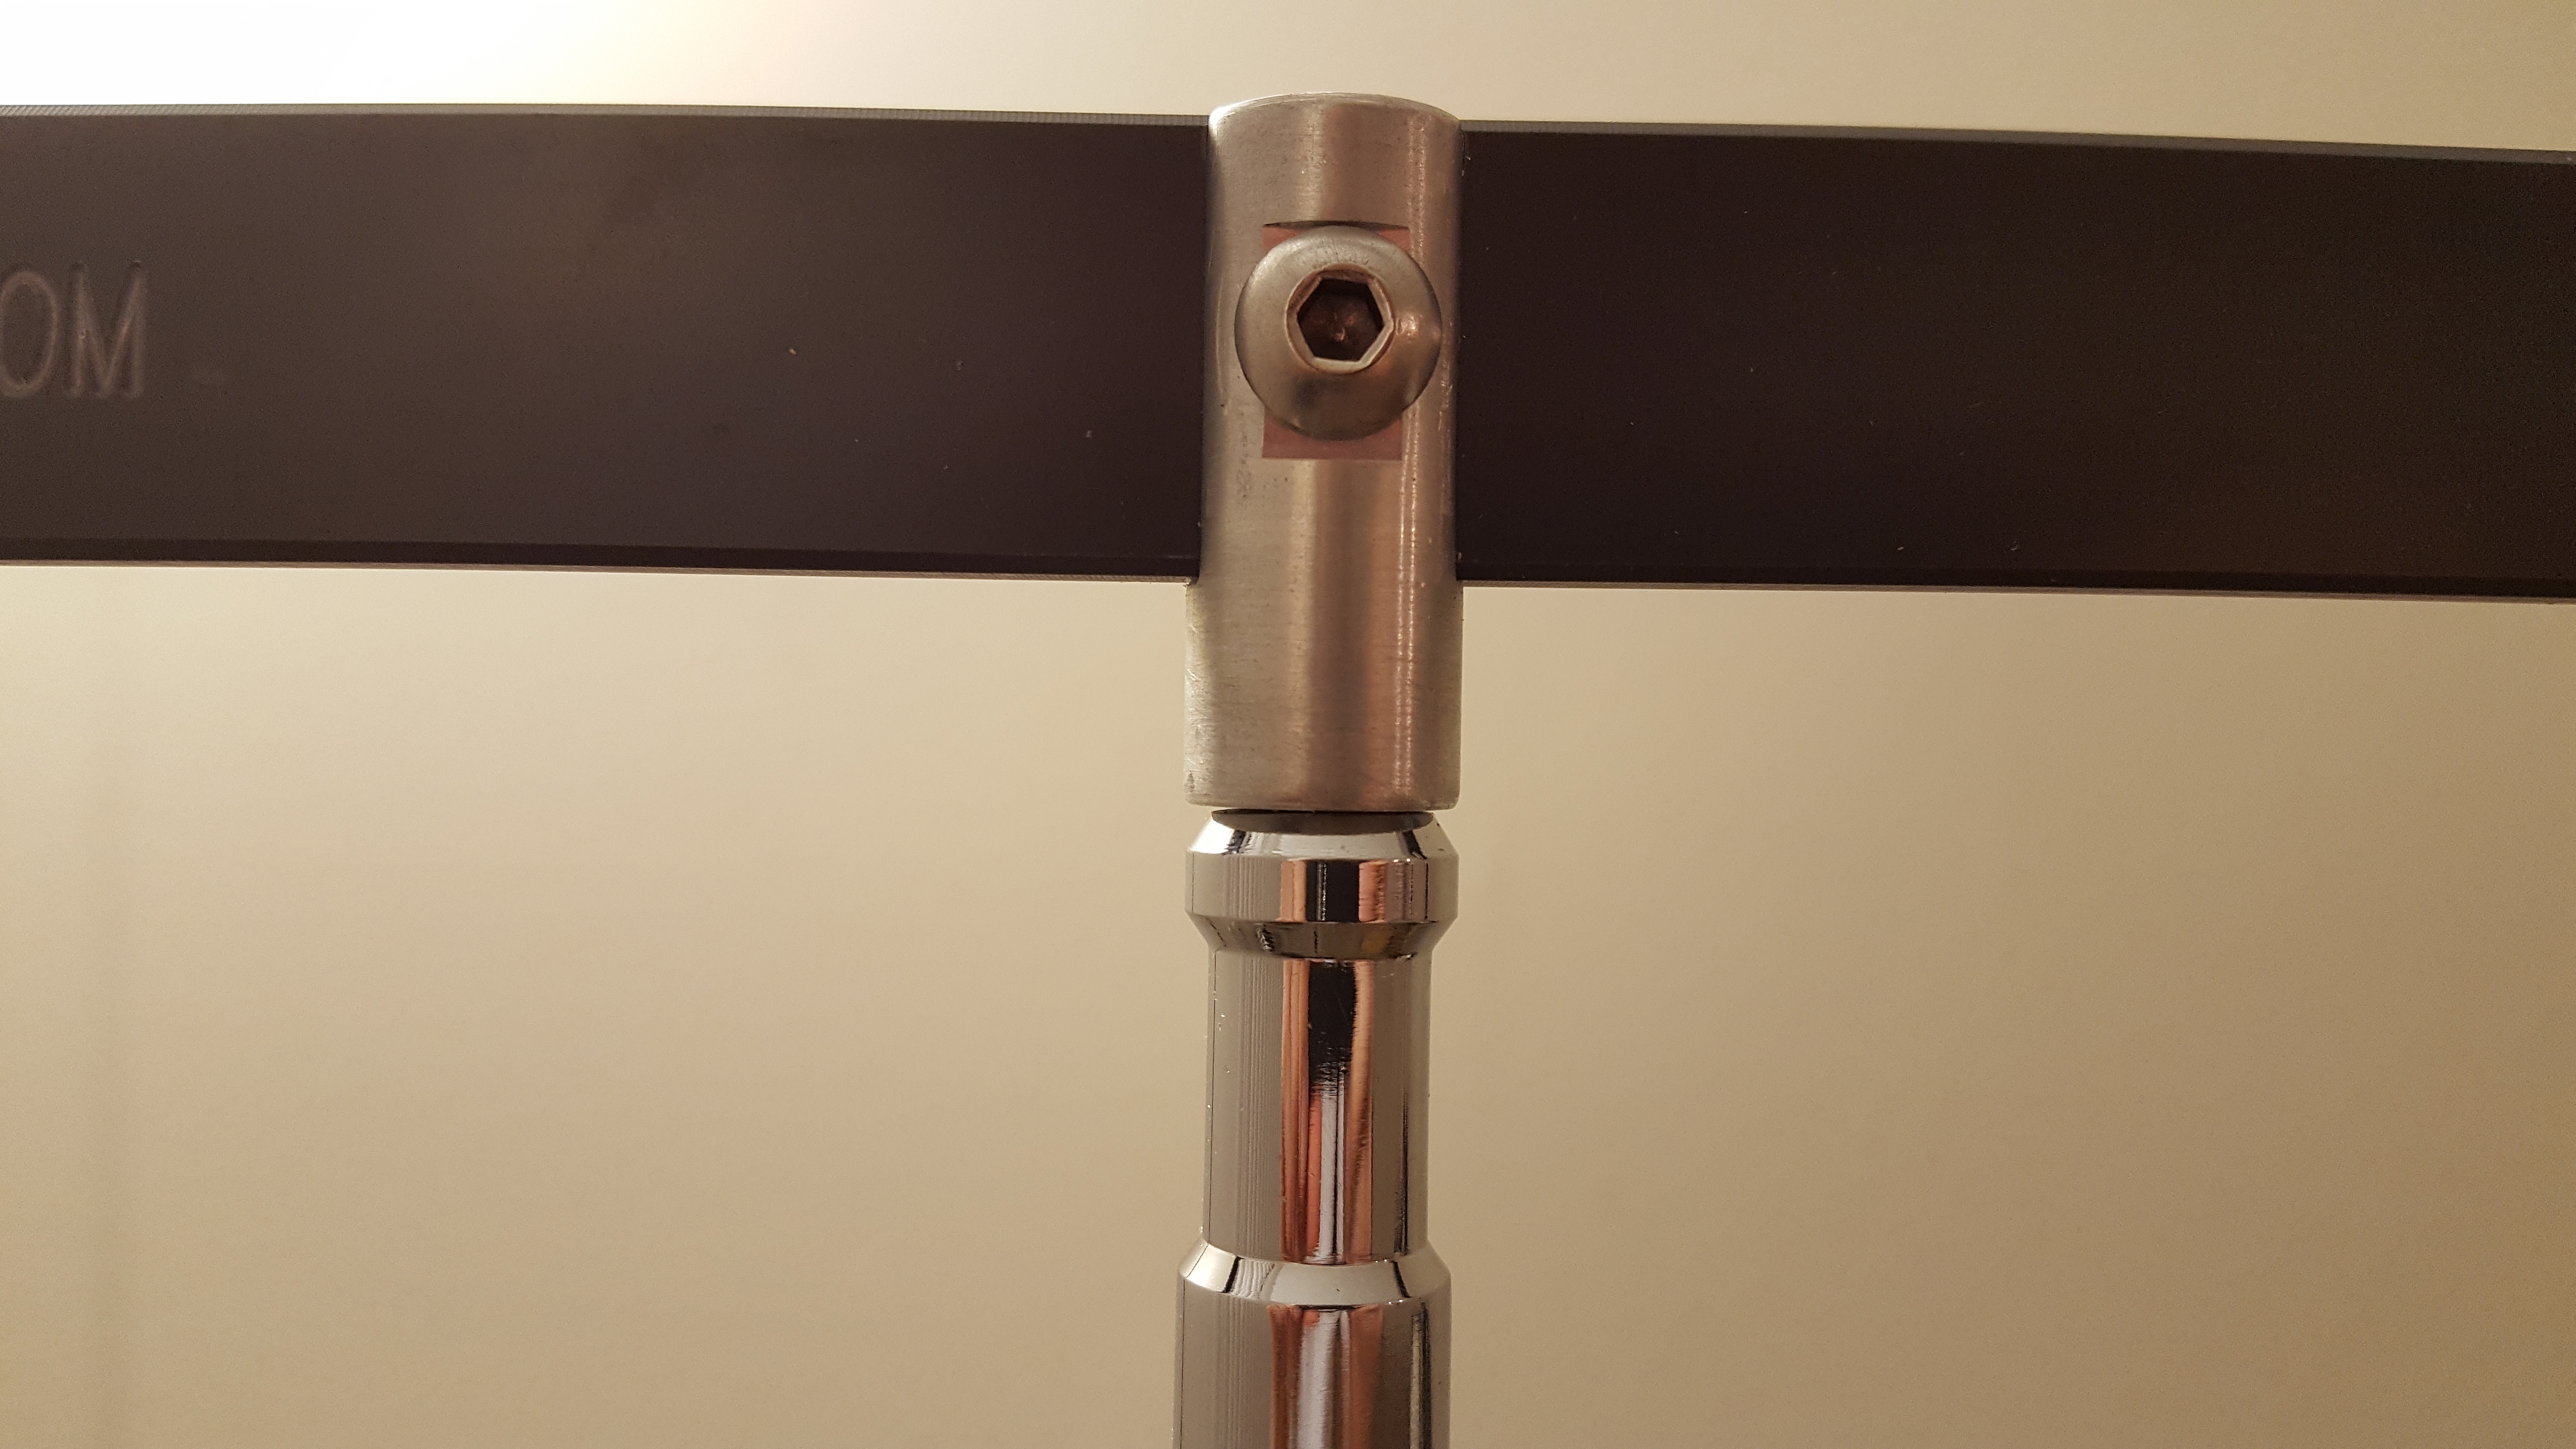
With the final product allowing a 1/4-20 thread bolt to screw in perfectly. We drilled down about an inch total which is plenty for strength and stability, with the idea of only having 1/2 inch sticking up above the top when all said and done. As this is the depth of the hole/threads on the Wi-Fi Stand Bracket. So you’ll have to purchase a bolt and cut it and file the threads down so they allow you to screw on the Wi-Fi Stand bracket easily.
I cut some rubber tubing that fits around the threads to protect them when not in use.
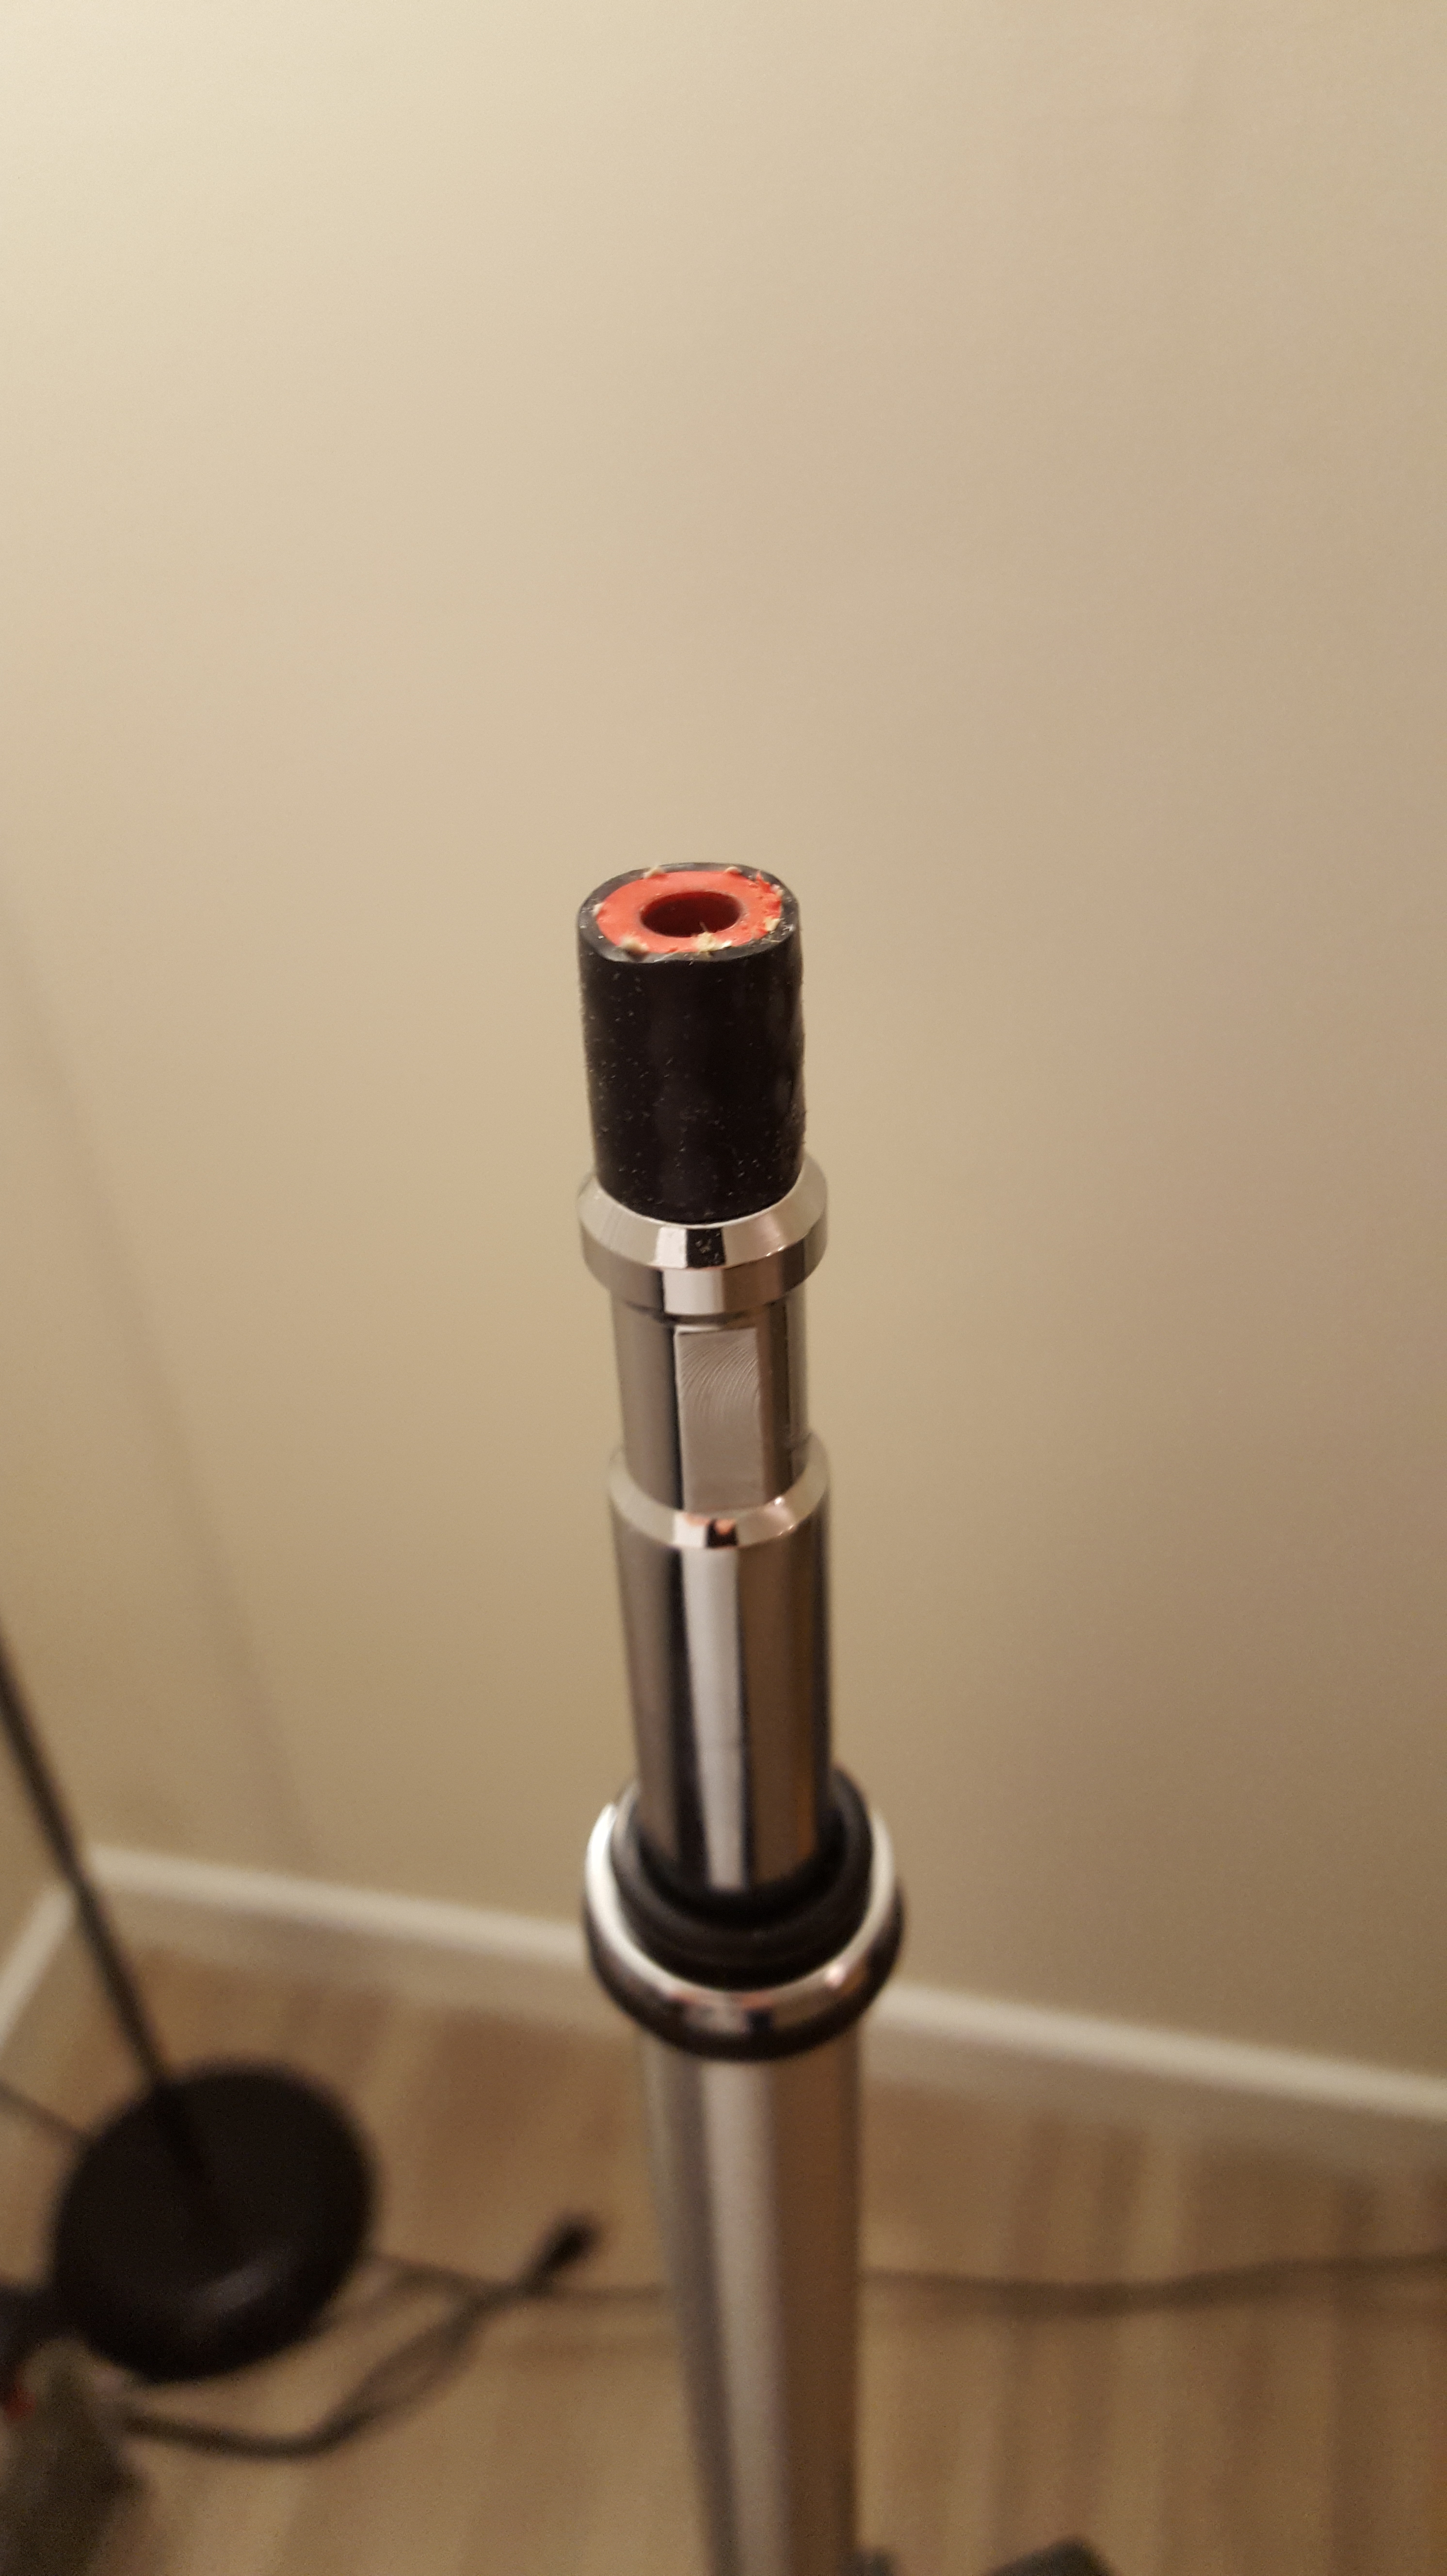
Final product looks professional, and feels professional. I am very happy with how this came out.
Now that I have the Wi-Fi Stand Bracket completed, I then worked on getting the battery terminals connected to the Tycon power converter. I purchased some snap/bullet connectors, and some 14 gauge wiring from Home Depot (purchase 3 feet so you have room for mistakes). The snap/bullet connectors allow you to connect/disconnect easily if need be.
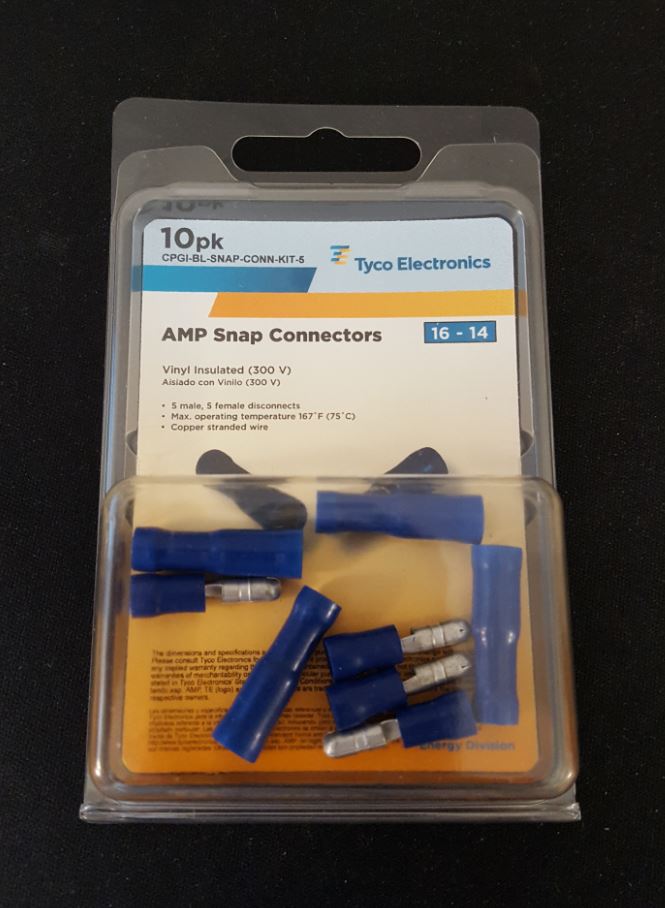
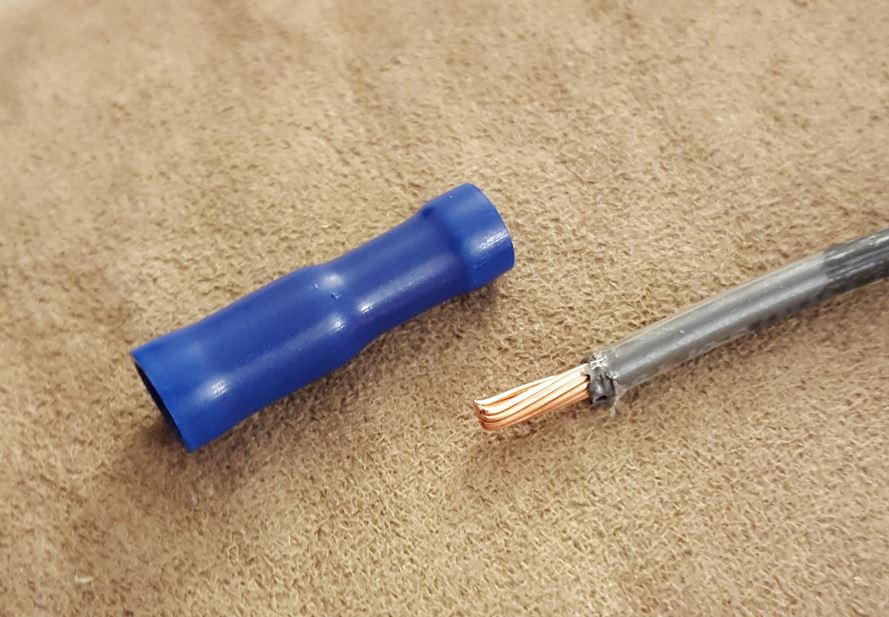
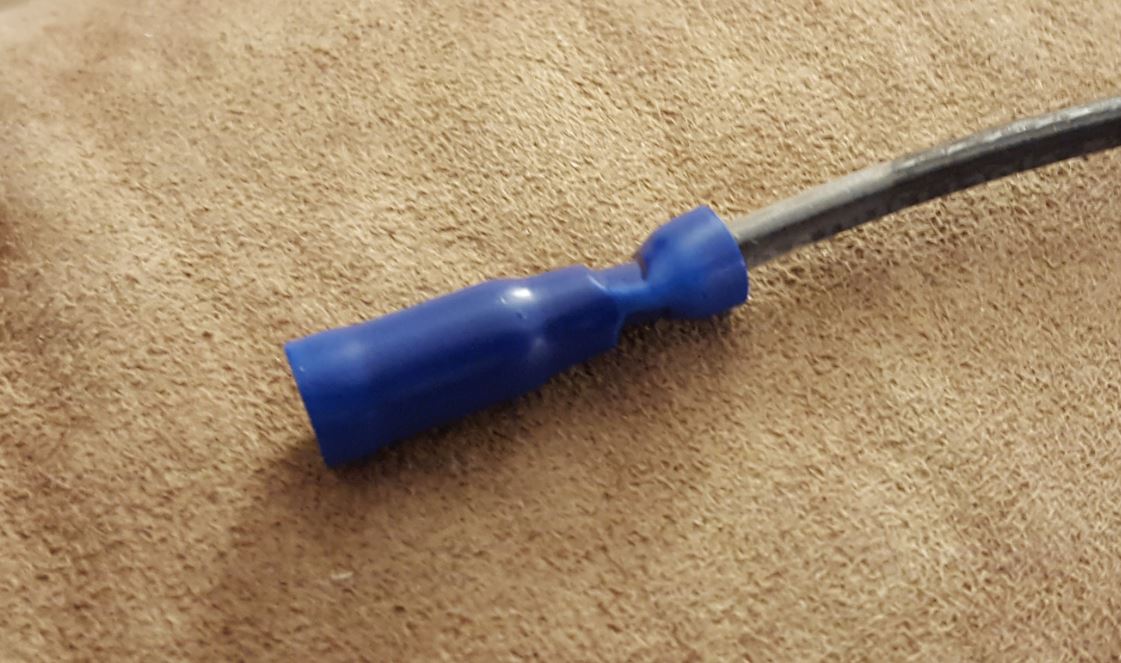
The snap/bullet connectors connect to the battery terminals, which happened to already have snap/bullet connectors on them. If they don’t, you can simply add them yourself. I recommend purchasing the crimping tool for 5 bucks when your at Home Depot.
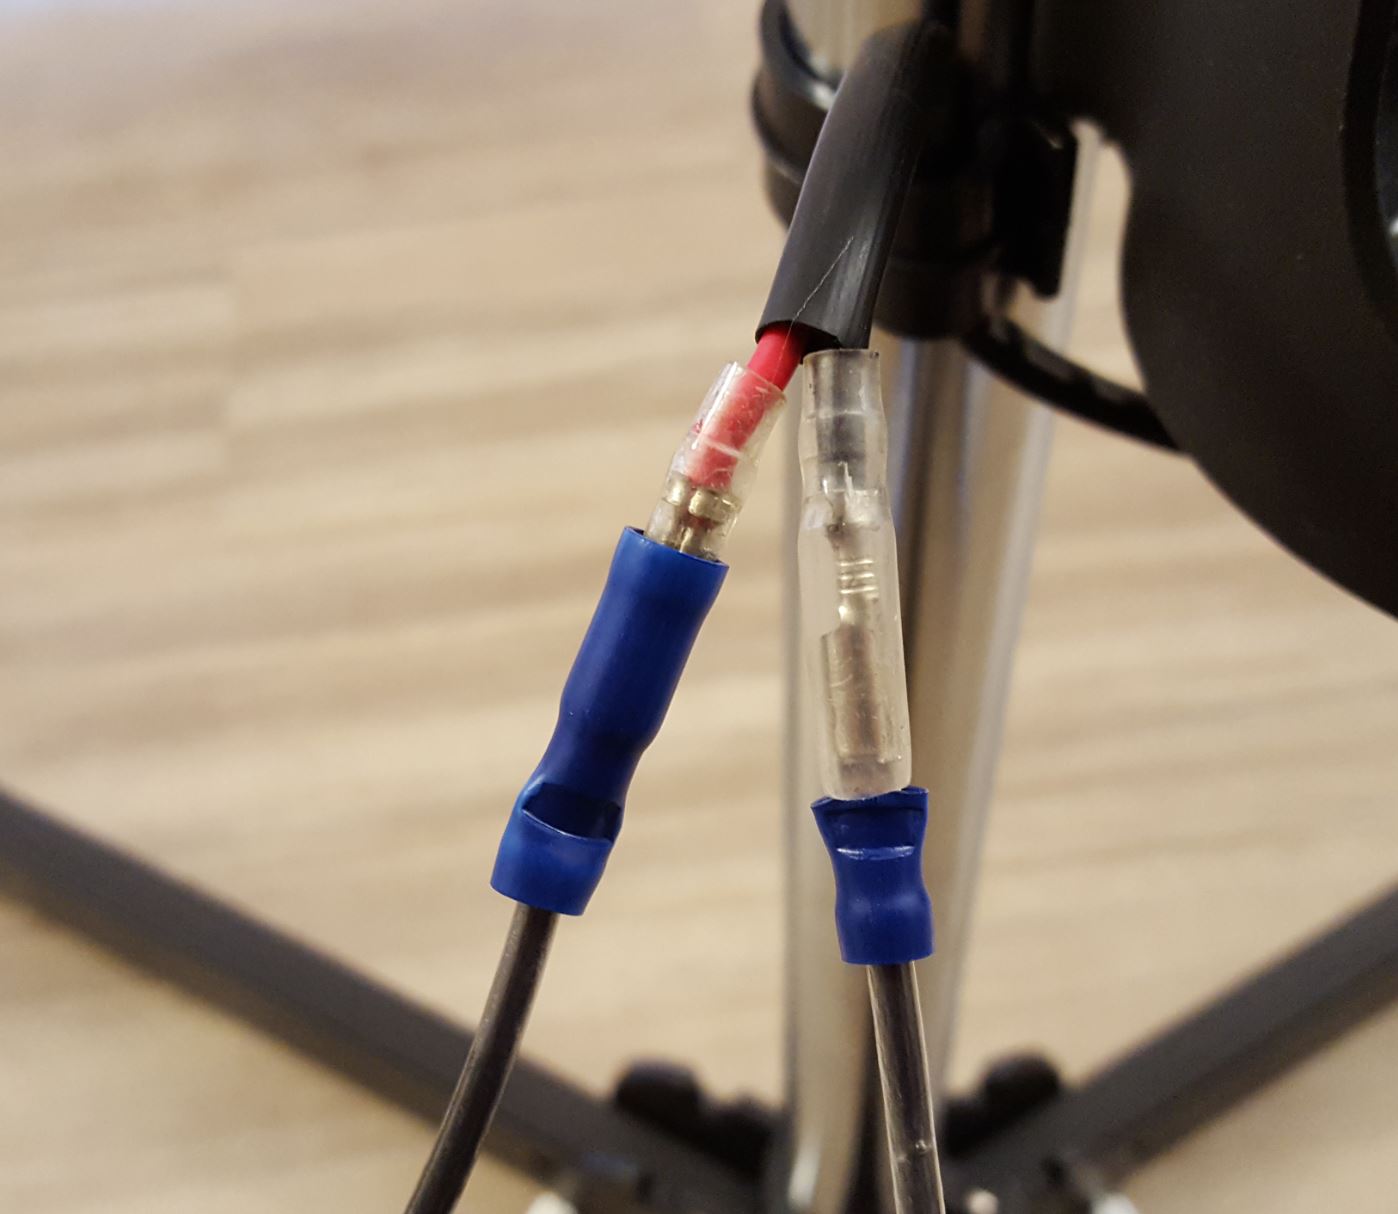
I then connected the Quad-Lock with the supplied zip-ties. I placed it just above the battery, to give it some height from the ground so that the Ethernet cable has a higher starting point. I also placed it under the first knob, so that when the tension from the Ethernet cable pulls up as you raise the height of the stand, the first knob stops it from moving.
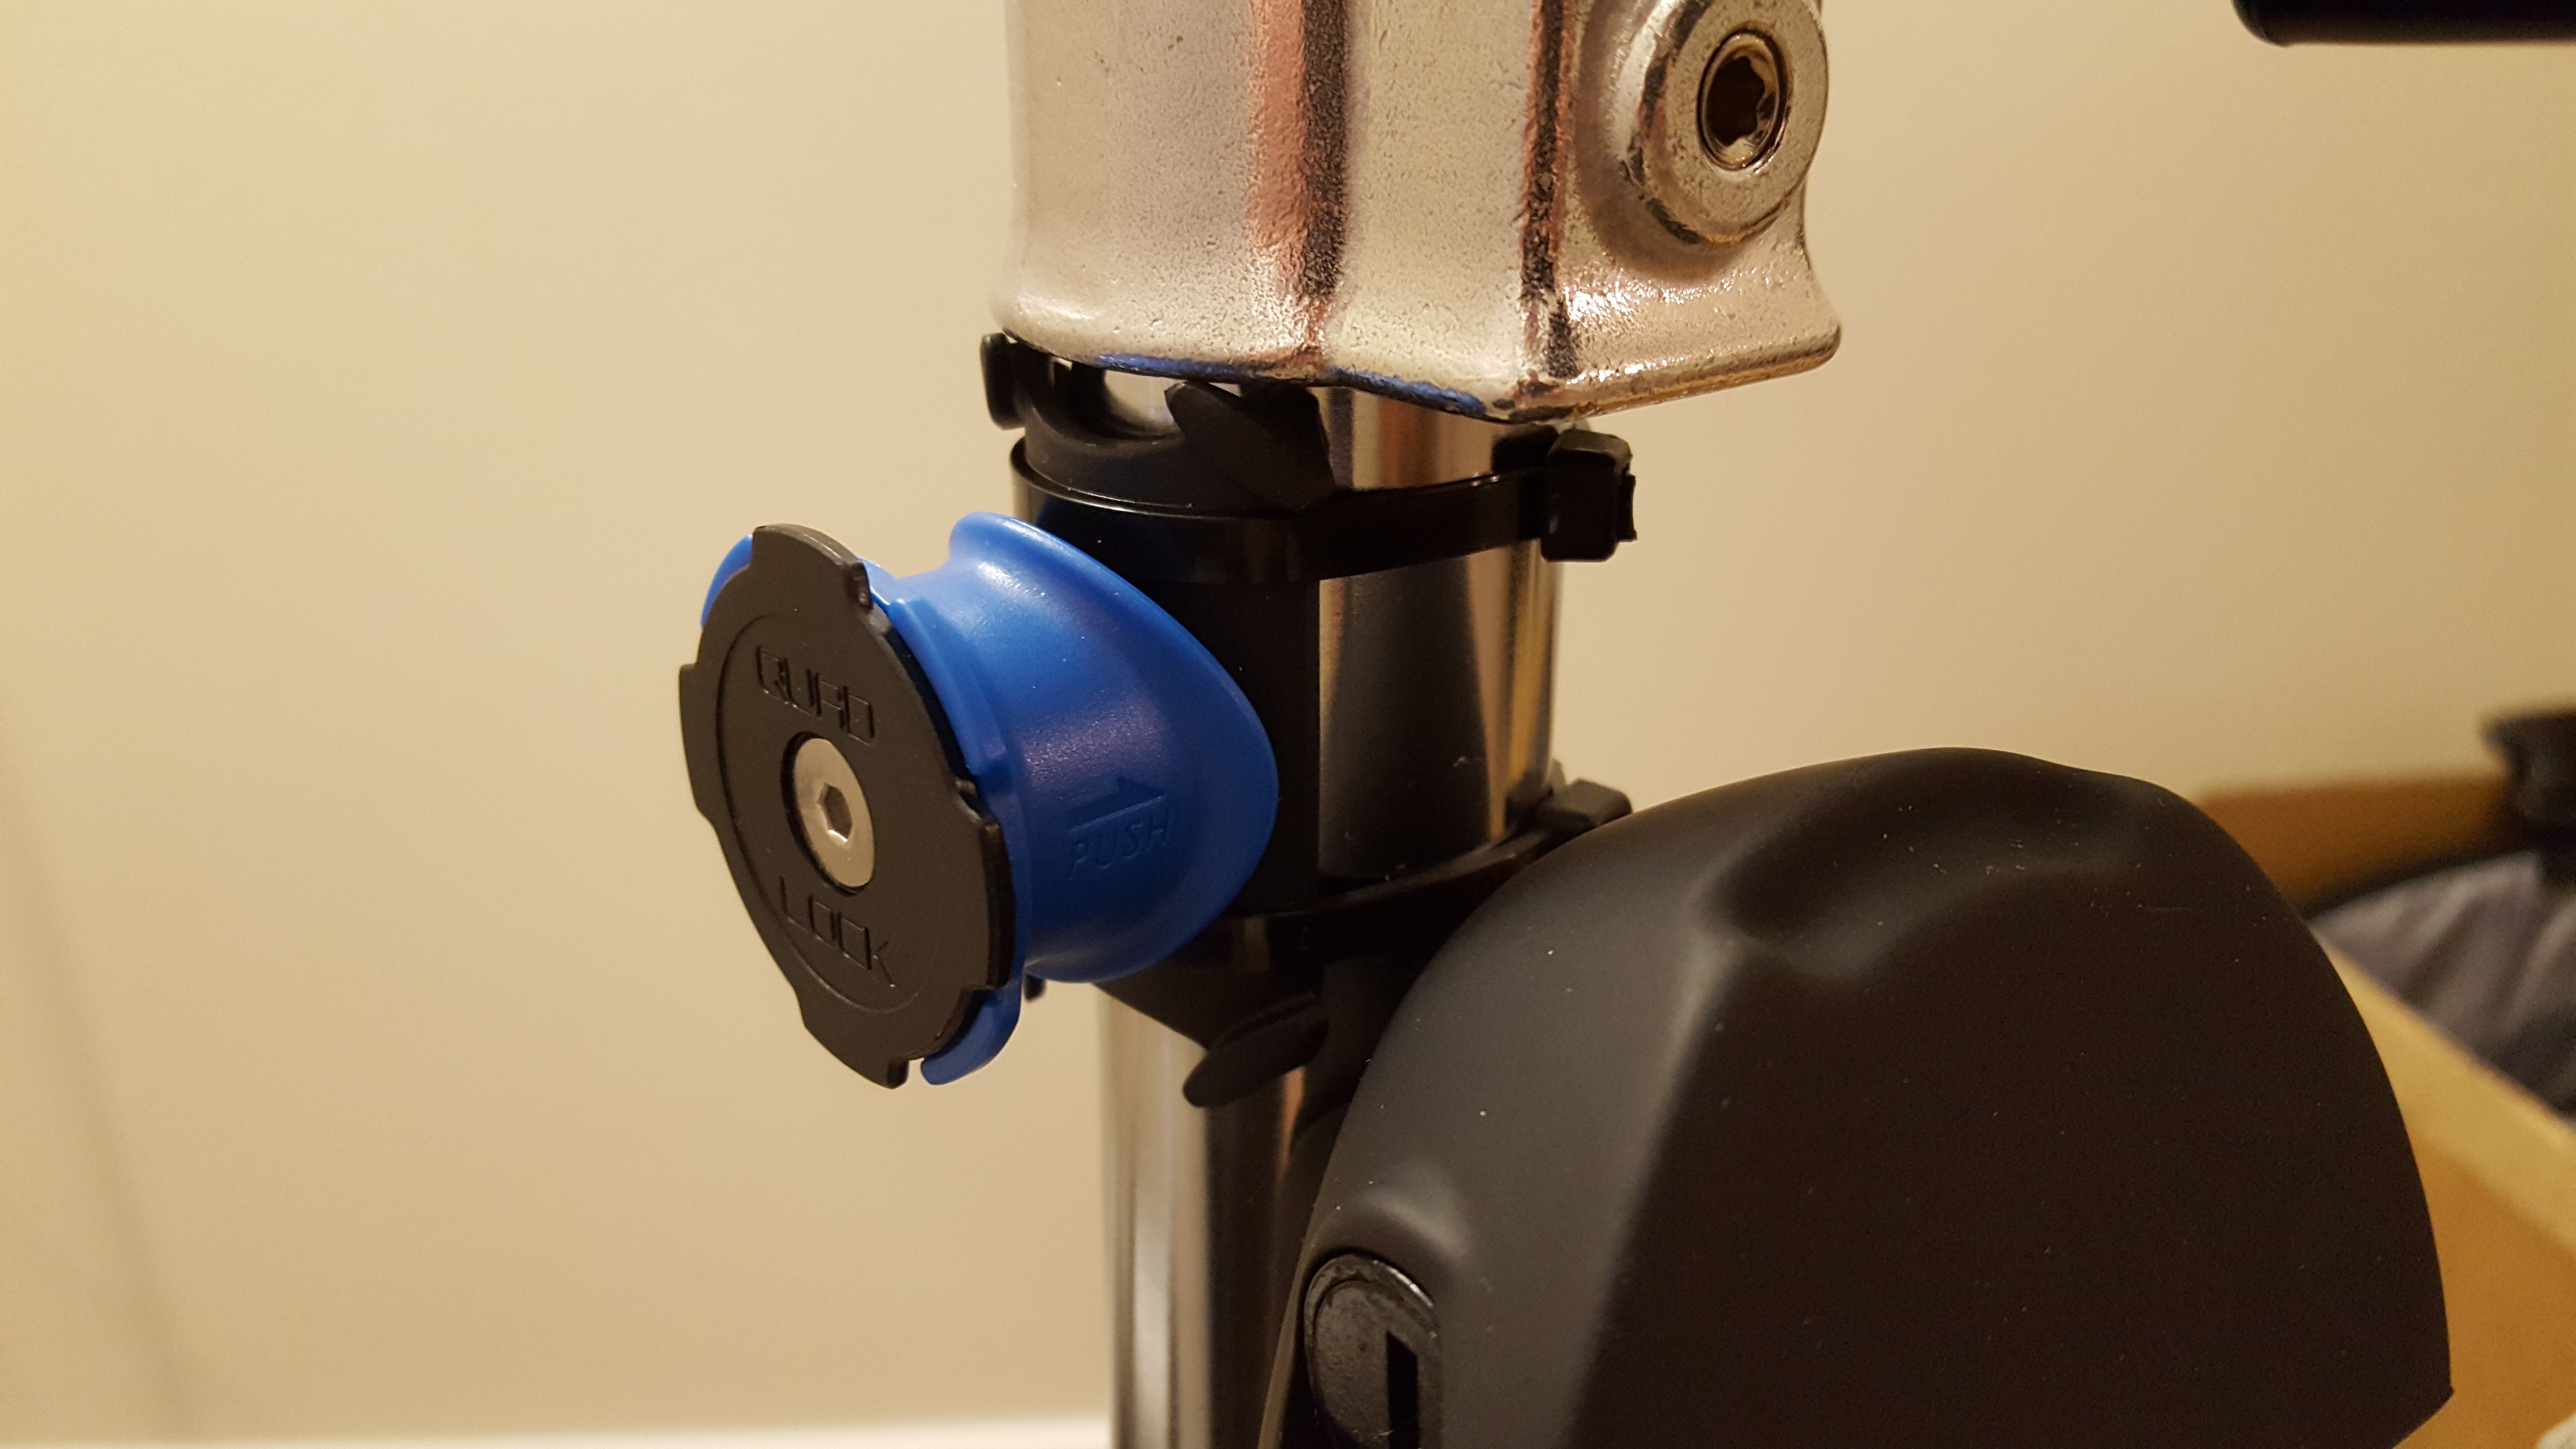
I used hose-clamps to secure the battery mount to the pole, and this puppy ain’t moving ever. I used plastic epoxy to connect the Quad-Lock Universal Mount to the Tycon power converter. It comes with 3M tape but I wanted something heavy duty, and Nick mentioned the 3M won’t cut it. Here you can see I determined how long the 14 gauge wiring needed to be.
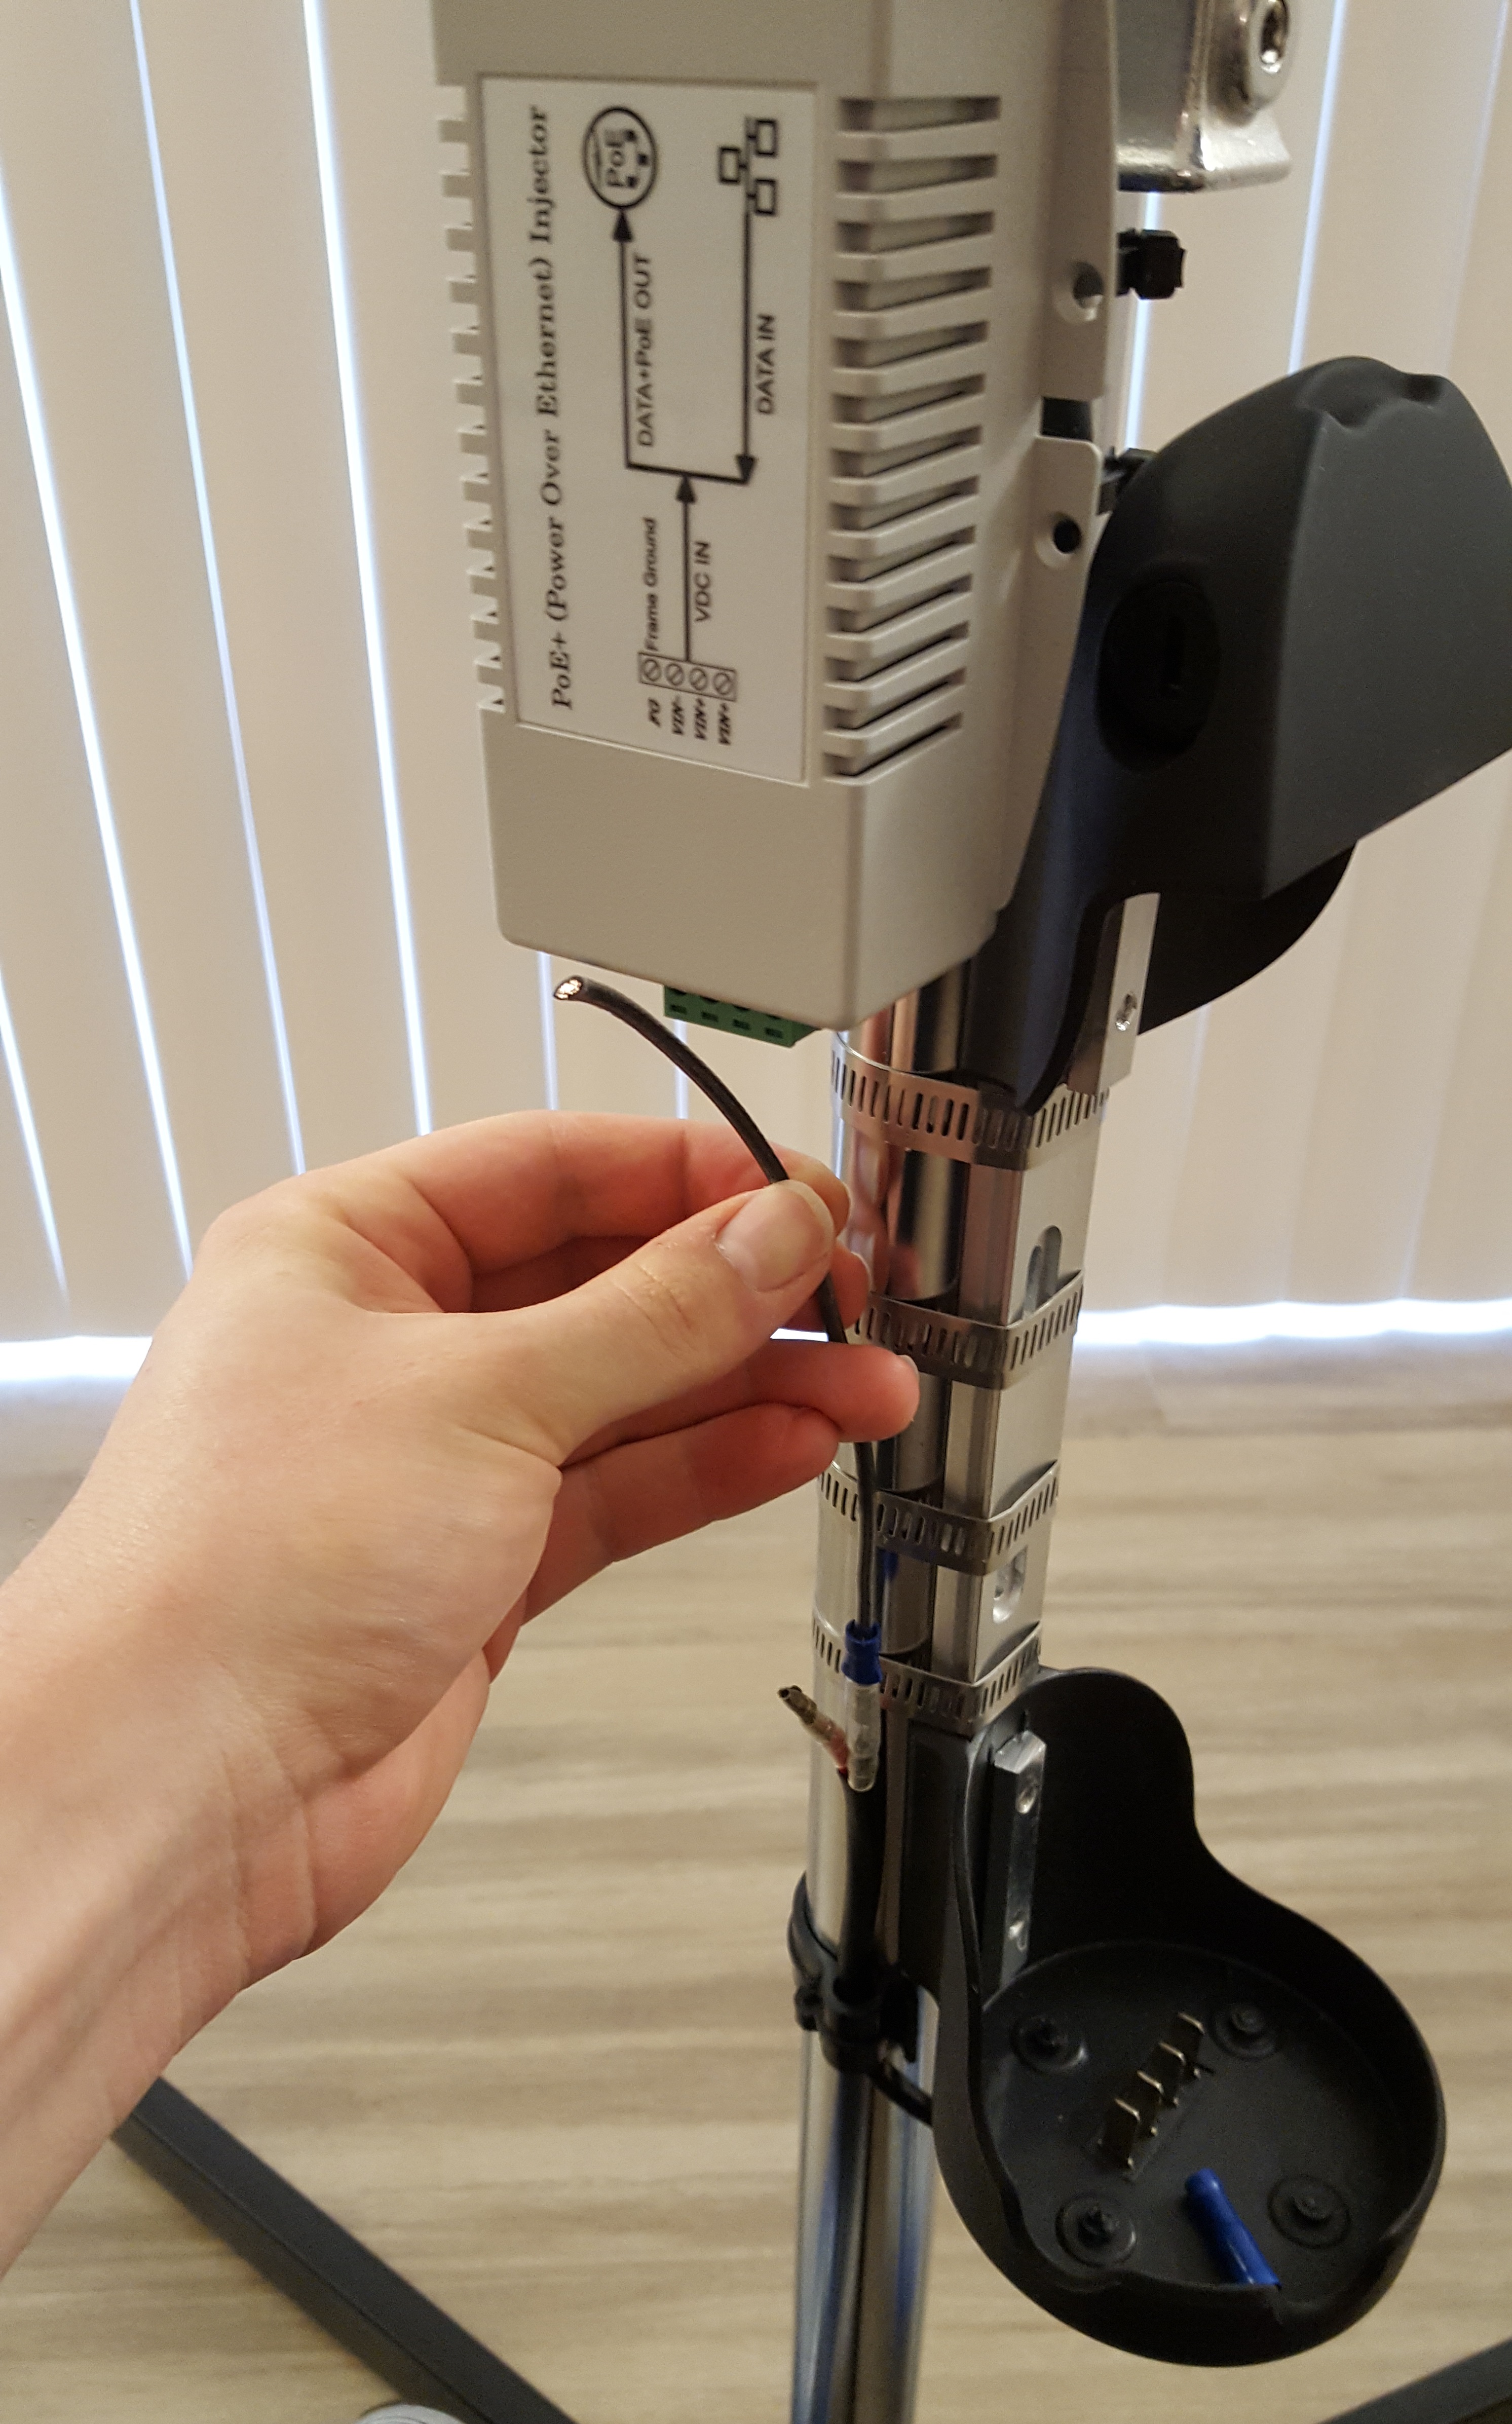

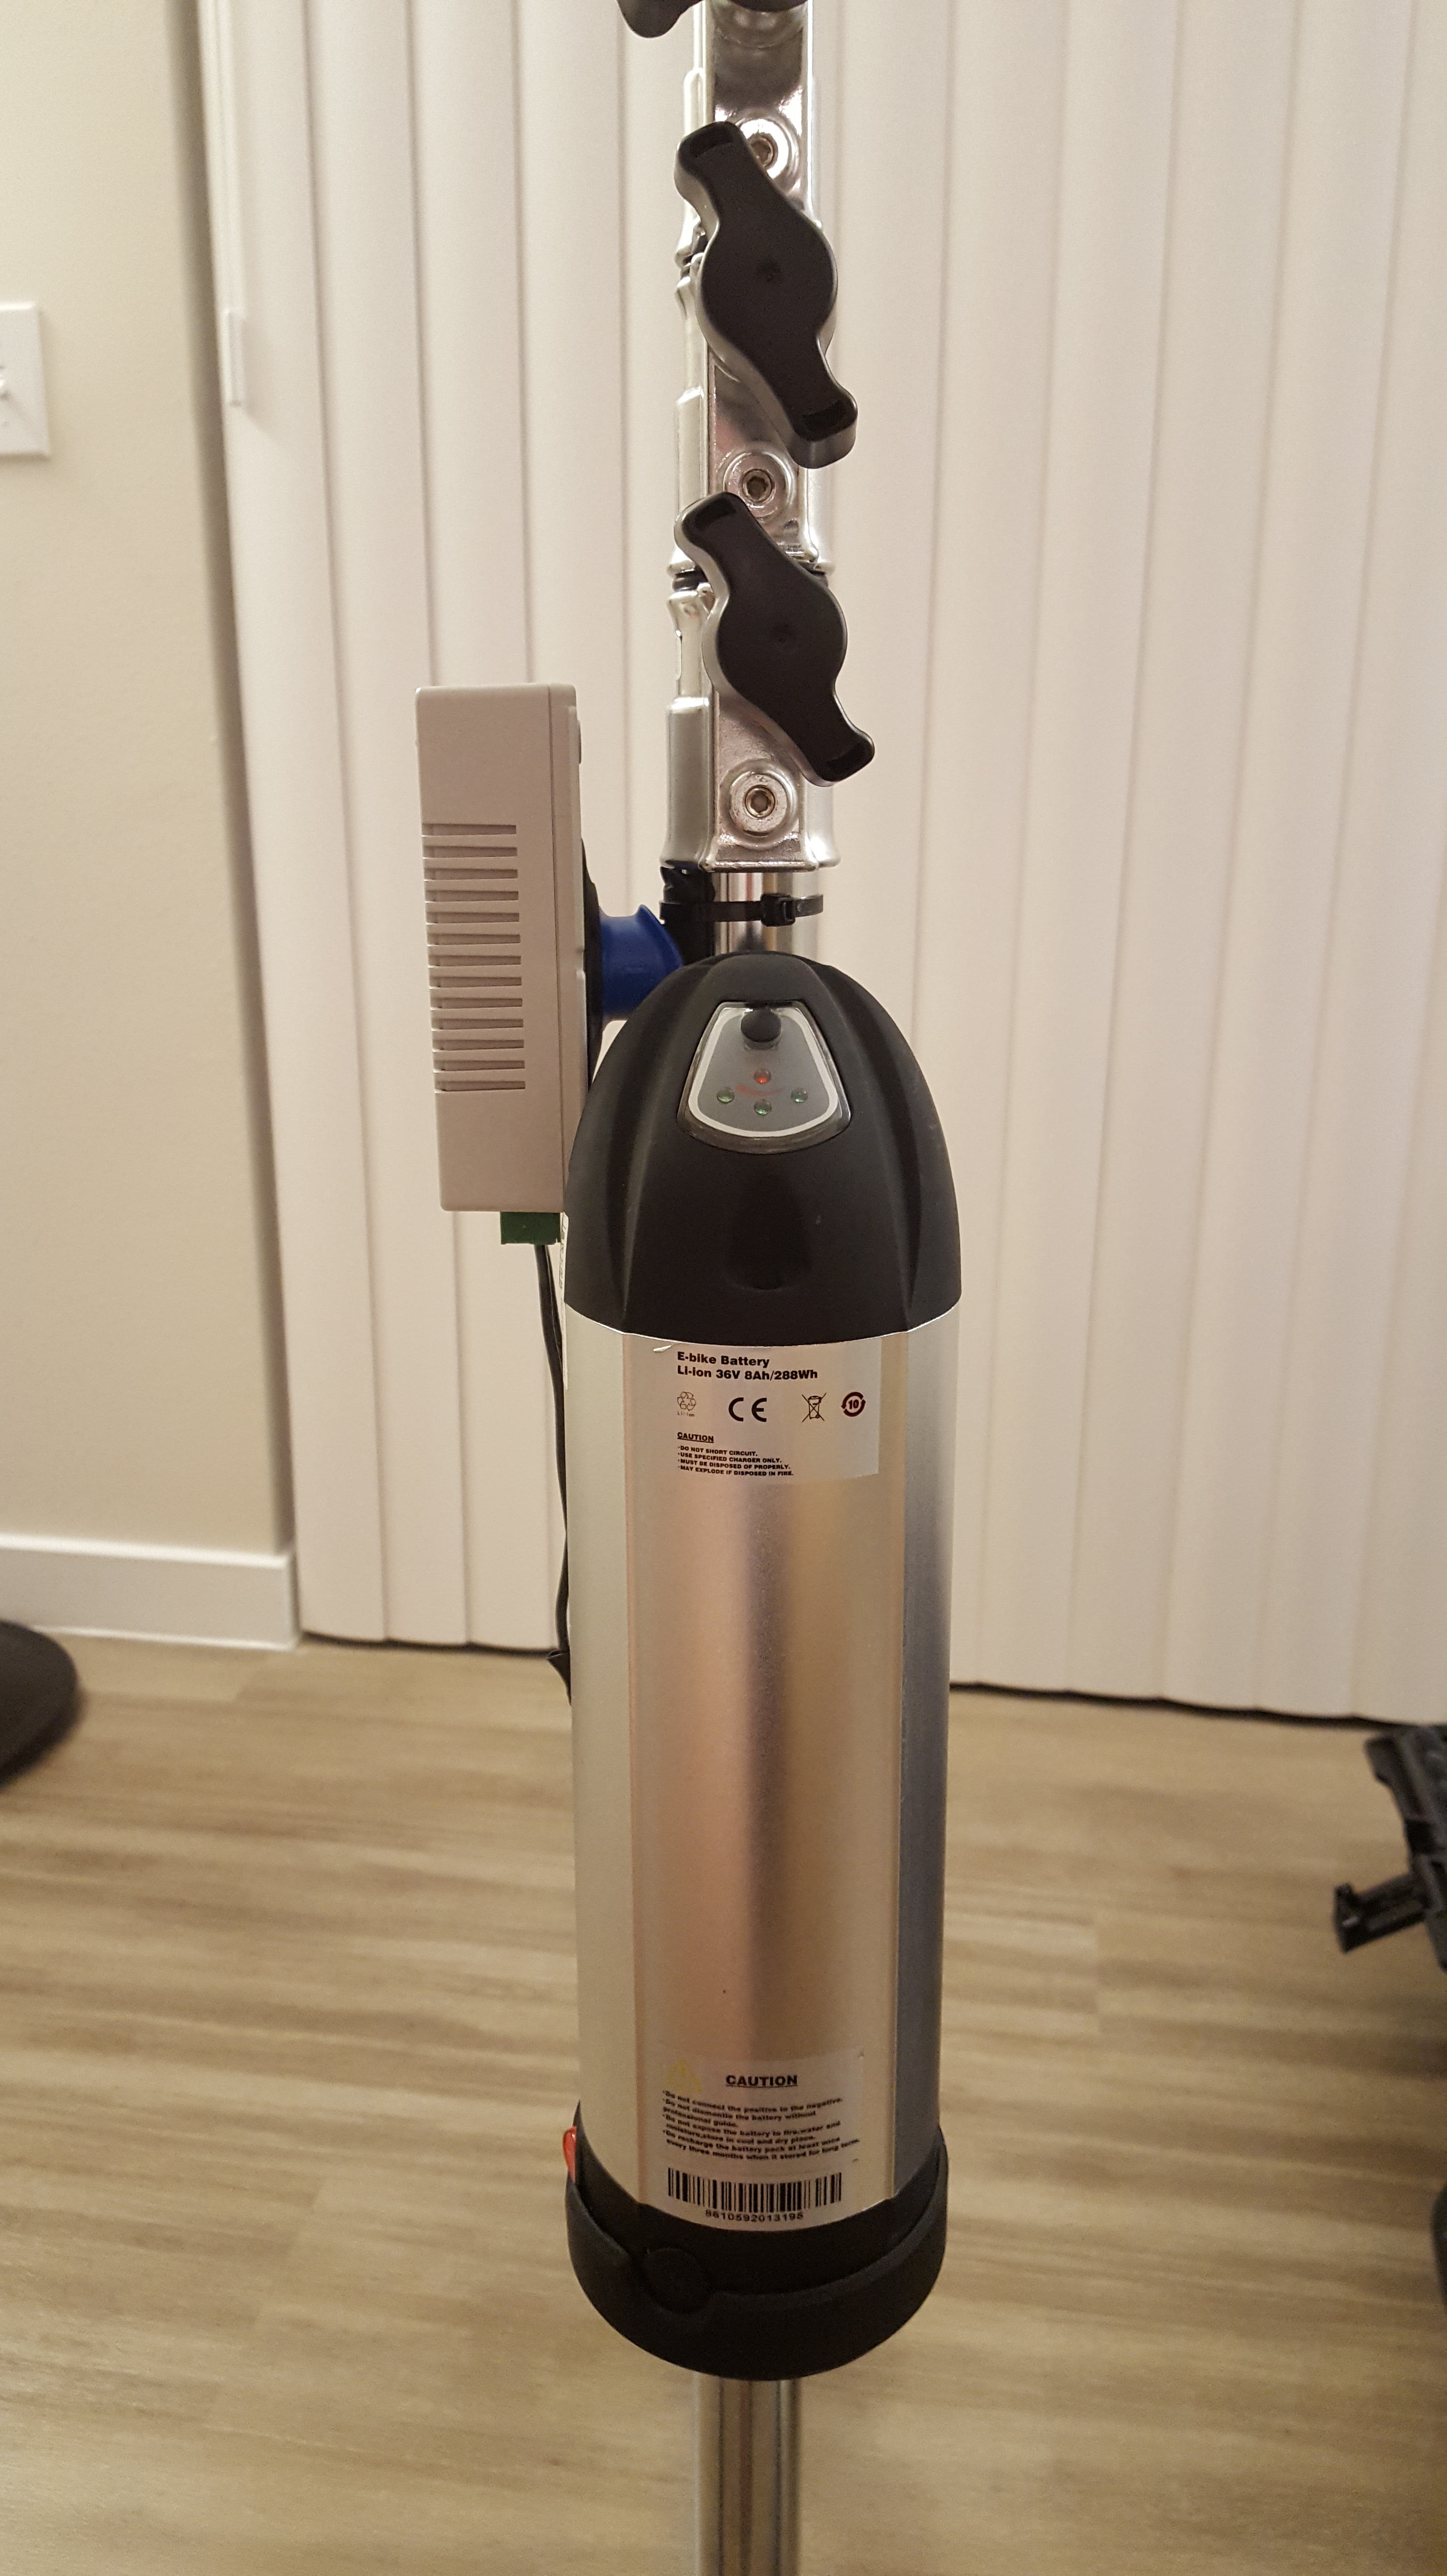
The Tycon power converter has VIN- and two VIN+ connections. Simply take the negative cable (black) from the battery, and insert it and screw down into VIN-
For the positive cable, you can use either VIN+ connections. The nice thing about the Tycon power converter is that the green connector on the left (see image) can be unplugged, so it makes it very modular.
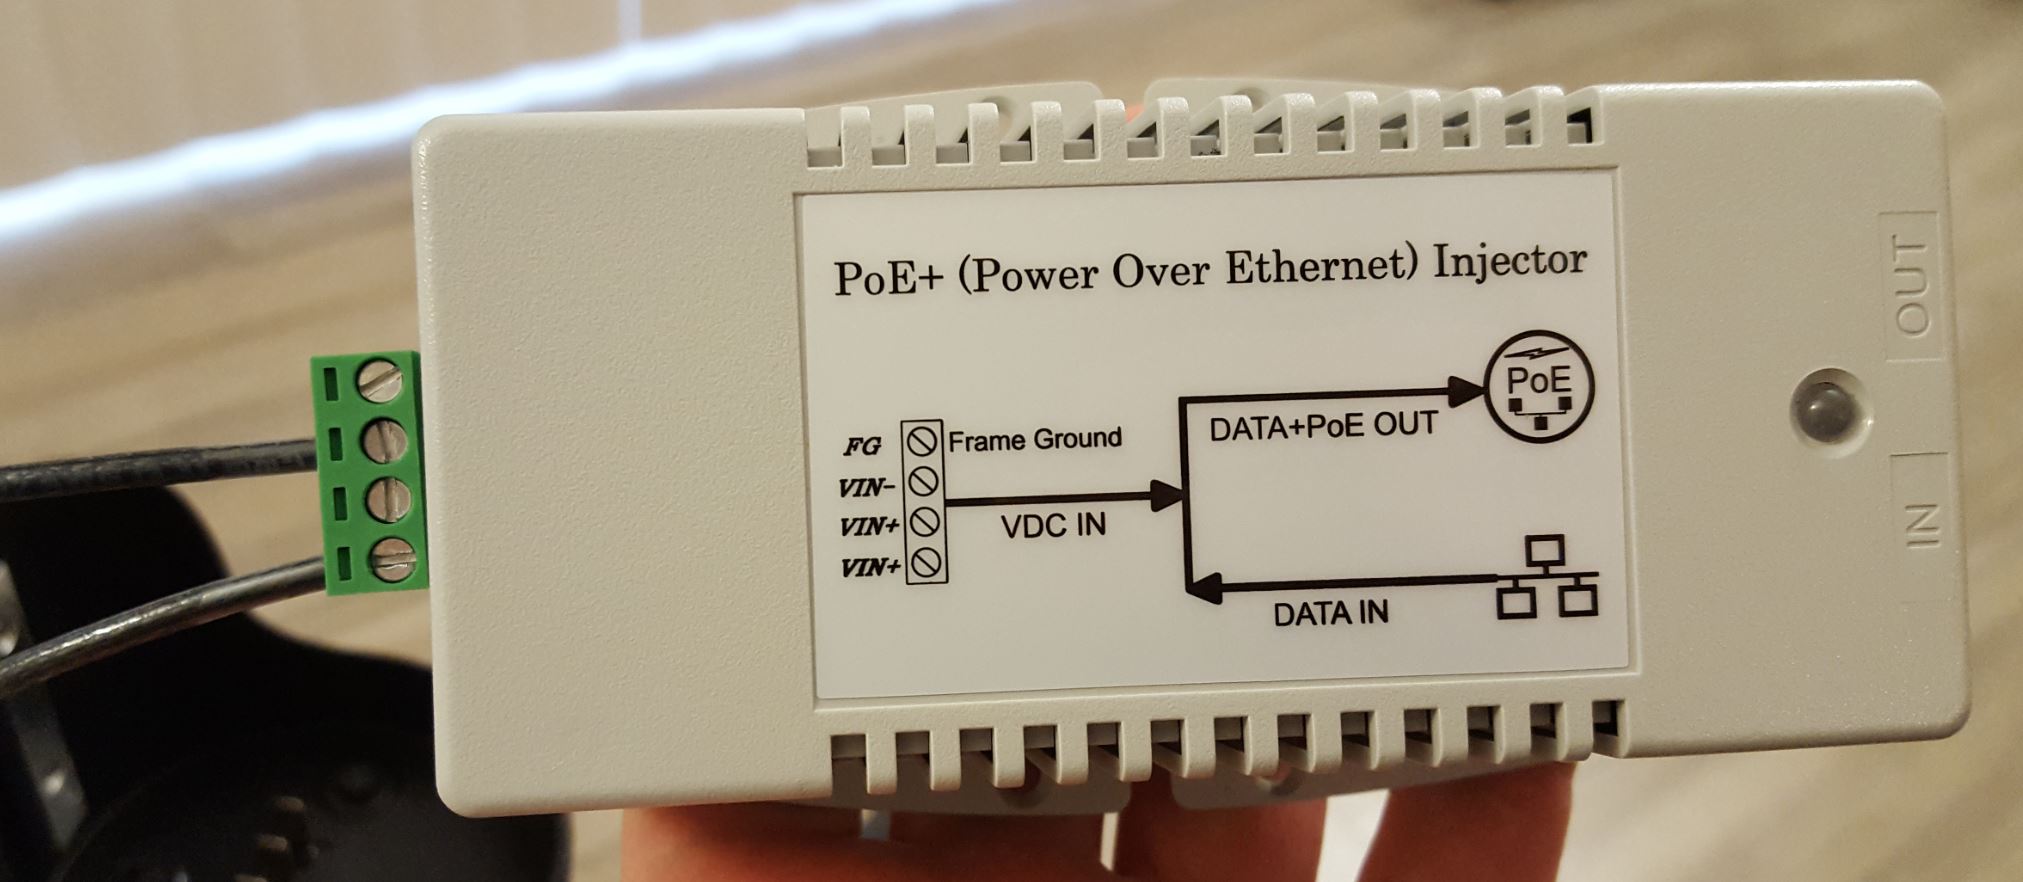
The end result is a perfect setup for my requirements and needs. The CAT6 cable I purchased was pricey, and its big, but I wanted to be able to send power and data over a coiled CAT6 and it was the only option I could find online. I didn’t want to use the trick of taking a phone cord and only sending power, as I may connect my laptop to the other Ethernet port on the Tycon power converter so that I can connect to the AP and do spectrum captures with it in CleanAir mode (not doable with phone cord method).
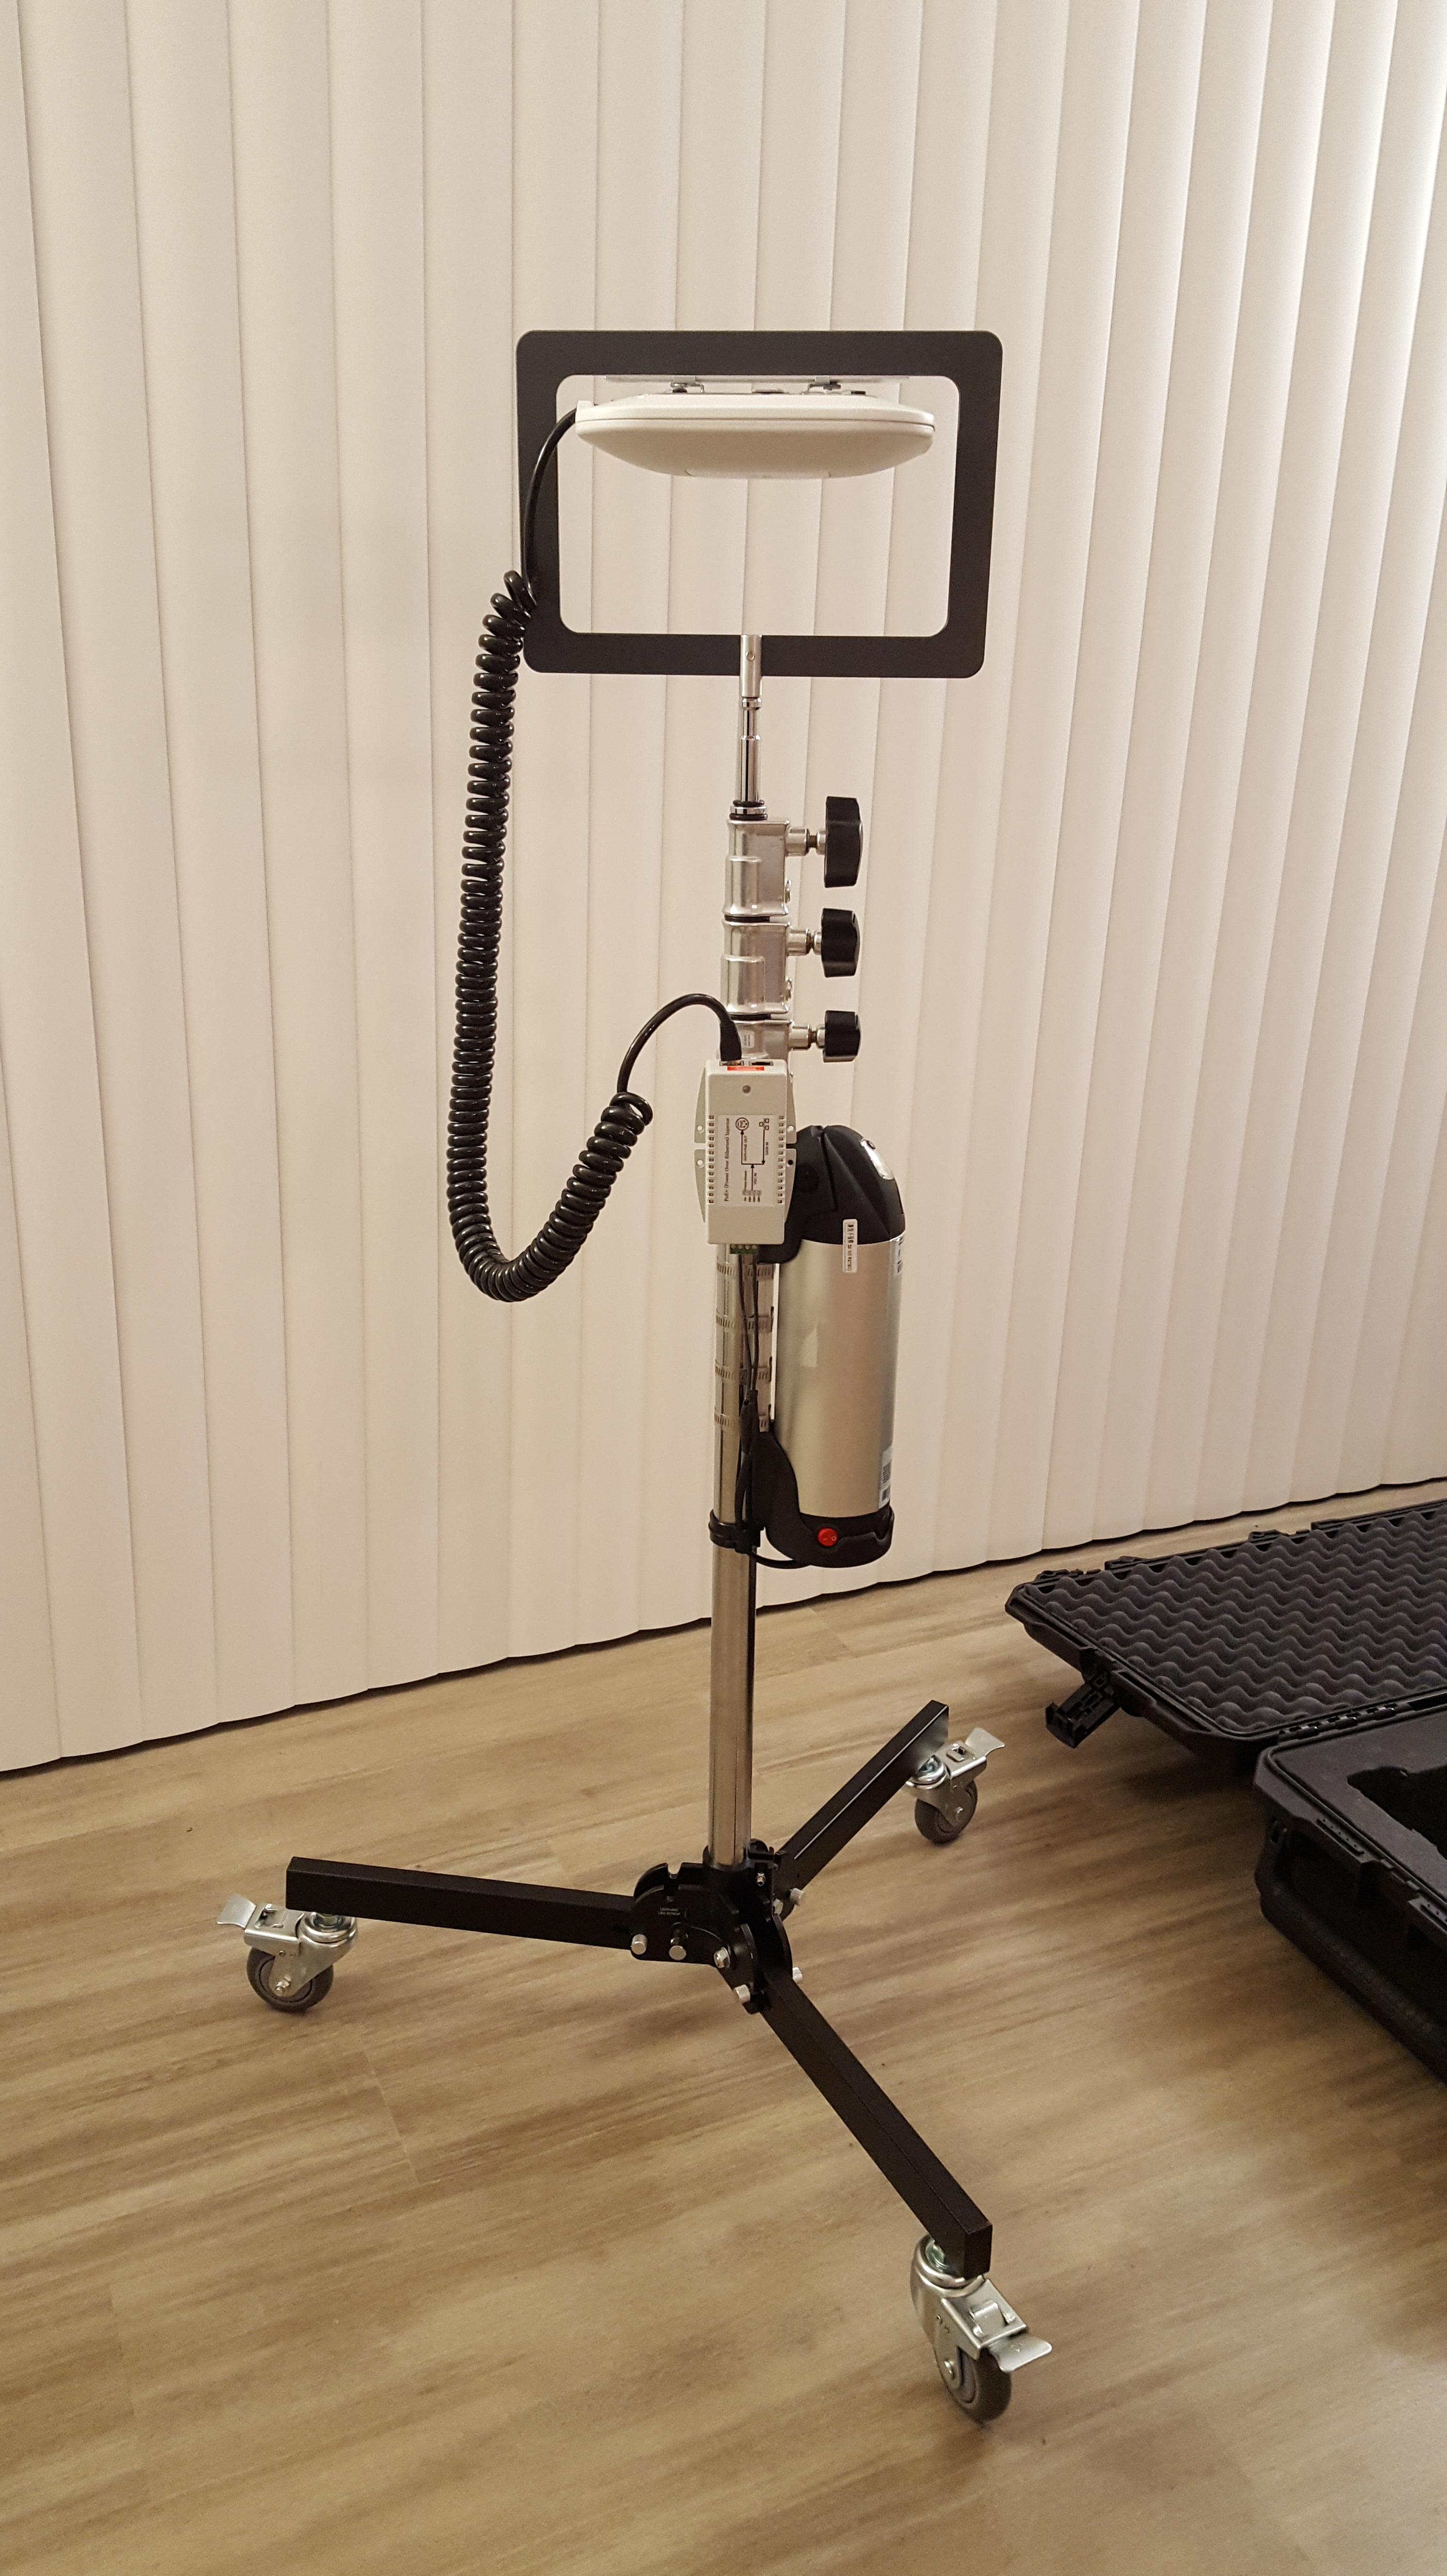
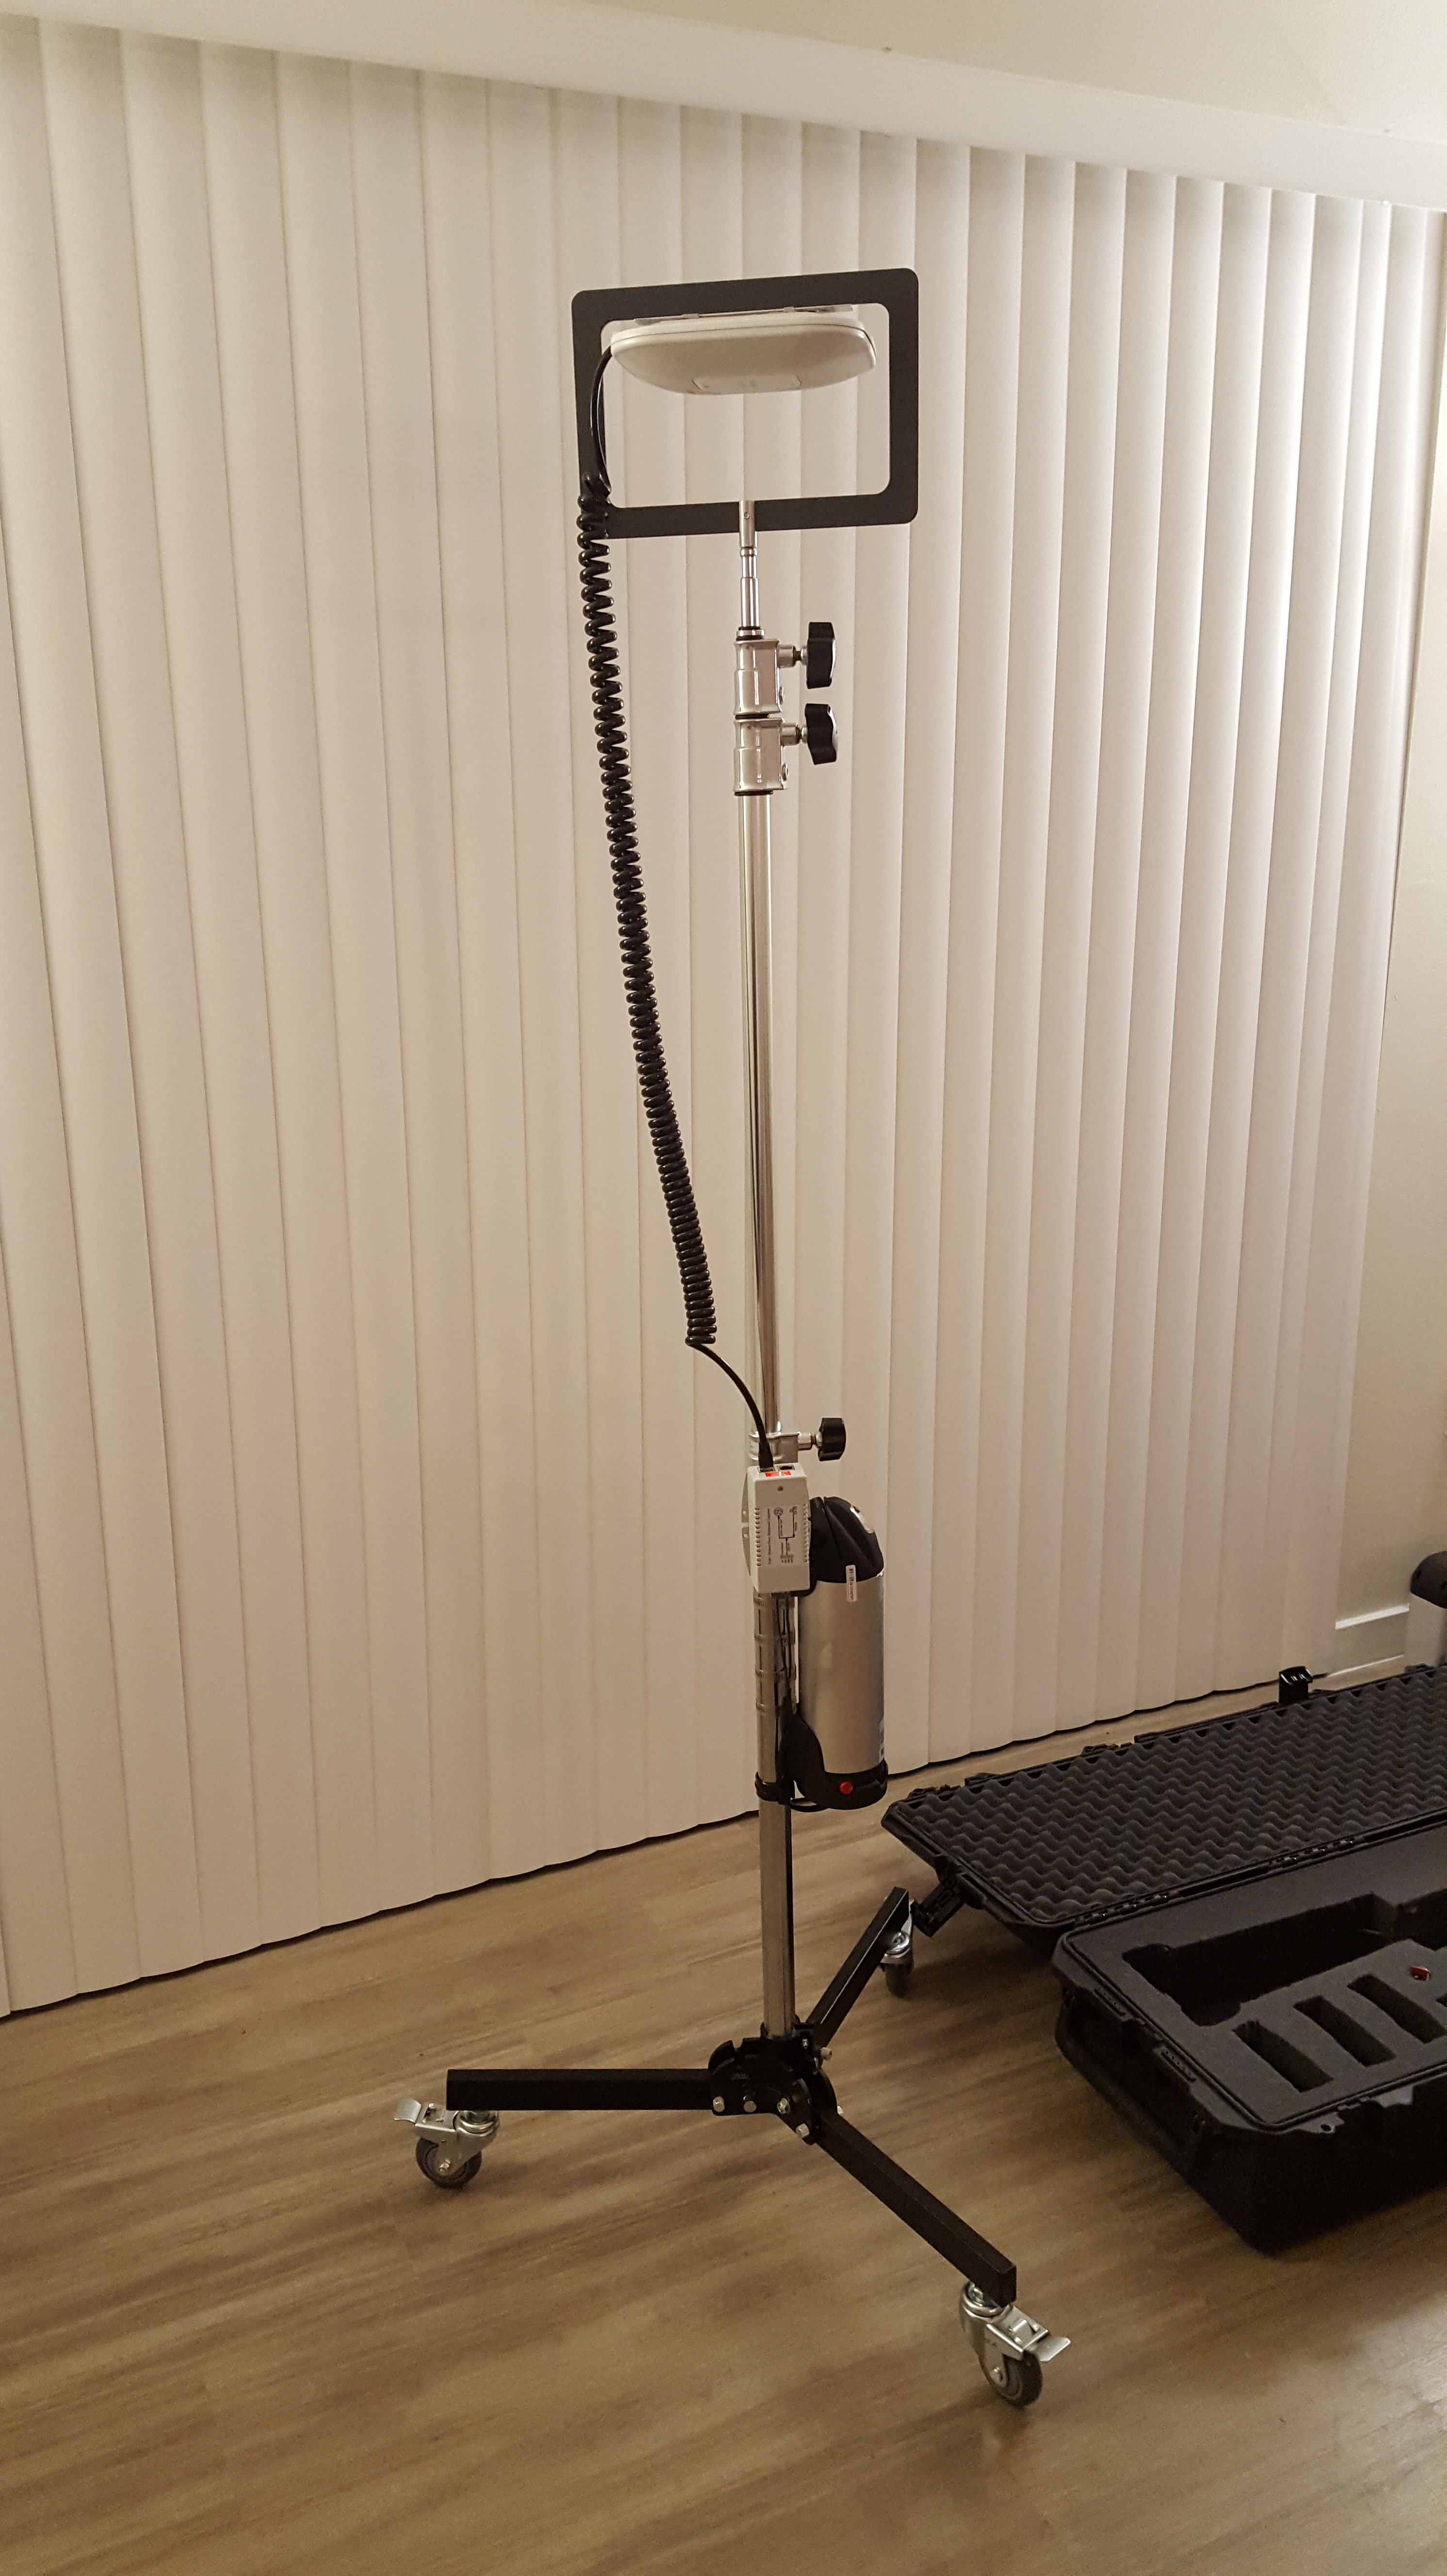

*The last photo is not max height. It goes up higher, but my apartment ceiling does not.


There are alternative survey kit options out there that cost far less, or far more.
My friend John Delhotal (@JohnDelhotal) built his own that was fairly inexpensive, however it didn’t meet all of my requirements. You can see his blog post here on his setup.
Another great survey kit that I used as reference is from Nick Turner (@nickjvturner), and you can see his blog post here.
I was also very impressed with the solution from Hive Radar, and attempted to get my boss to purchase it as it meets all of my requirements, and then some. However I’m not a salesman, so I wasn’t able to convince my boss to get it for me =(
I hope you enjoyed reviewing this blog post, and if you decide to build one of these survey kits yourself, feel free to hit me up with any help you might need.
Thanks !
-Nolan

Hi Just read your blog about the APoS rig. This is fantastic! Just 1 query would the same setup work with Cisco 3700/3800 series AP? I am looking for a surveyor kit for our engineer who needs to do APoS survey and being a Pm trying to find out a cost-effective professional solution! 🙂
LikeLike
How much does it cost?
LikeLike
It was roughly 1k all said and done if memory serves correctly
LikeLike
I see you don’t monetize your website, don’t waste your traffic,
you can earn extra bucks every month because you’ve got
high quality content. If you want to know how to make extra money, search for: Ercannou’s essential tools best adsense alternative
LikeLike
Very nice! Looks very professional. I did something similar, but much more low rent. I used a rolling toolbox from Sears, attached two book shelf brackets on the end opposite the handle. I boxed the area in below the bookshelf brackets in so I could put junk in it, mainly my chargers since I need them all the time. Then on top of the brackets I attach a battery pack. Since the brackets are over the center it makes it more balanced. Inside the box I will put the access points and antennas I use for a survey. For the pole I used a paint pole and I just used a paint roller that I attached to one of the universal plates to the roller handle. I made a ghetto attachment to attach the paint pole to. When I’m surveying I can roll to the survey point and raise the pole to position. It collapses down enough that I can get in an elevator without removing the pole, unless it is a very small elevator. Plus I sometimes have to walk a long distance from a parking area, so I can put my laptop and other tools inside the box.
It looks like it would fall apart, but I’ve been using this rig for at least a decade. I’ve made modifications along the way.
LikeLike
Did you run into any issues with the PoE converter and a fully charged battery? The e-bike battery I have is 36V nominal voltage, but when fully charged puts out close to 42V – the 9-36VDC input PoE converter I have can’t handle this and doesn’t provide an output until the battery is slightly discharged 😦
LikeLike
I don’t have any issues. There is a beefier version though that might help, for the Tycon models if your exceeding 36V
LikeLike