![]()
I have been wanting to make this Spectrum Analysis Kit for a while now, and finally put one together. First and foremost, inspiration for this idea came from Nick Turner (@nickjvturner) via a blog post of his from last year which you can read here. The reasons for this ‘upgrade’ are simple. The Metageek Wi-Spy dBx adapter simply does not have enough resolution to really see whats going on with the spectrum. There is no sign of a future Cognio based USB adapter, so the only real alternative right now is to use the CleanAir functionality that Metageek Chanalyzer offers.
So lets take a look at the parts needed and just how much of an improvement is made…
First lets review the parts that you will need to create this kit.
Cisco CleanAir Access Point – Any model with CleanAir or CleanAir Express
Power Supply / Battery – RavPower 23000mAh Portable Charger Power Bank
DC Converter / Power Injector – Tycon Systems TP-DCDC-2448GD-HP
Power Jack Cable – JacobsParts DC Power Adapter Plug
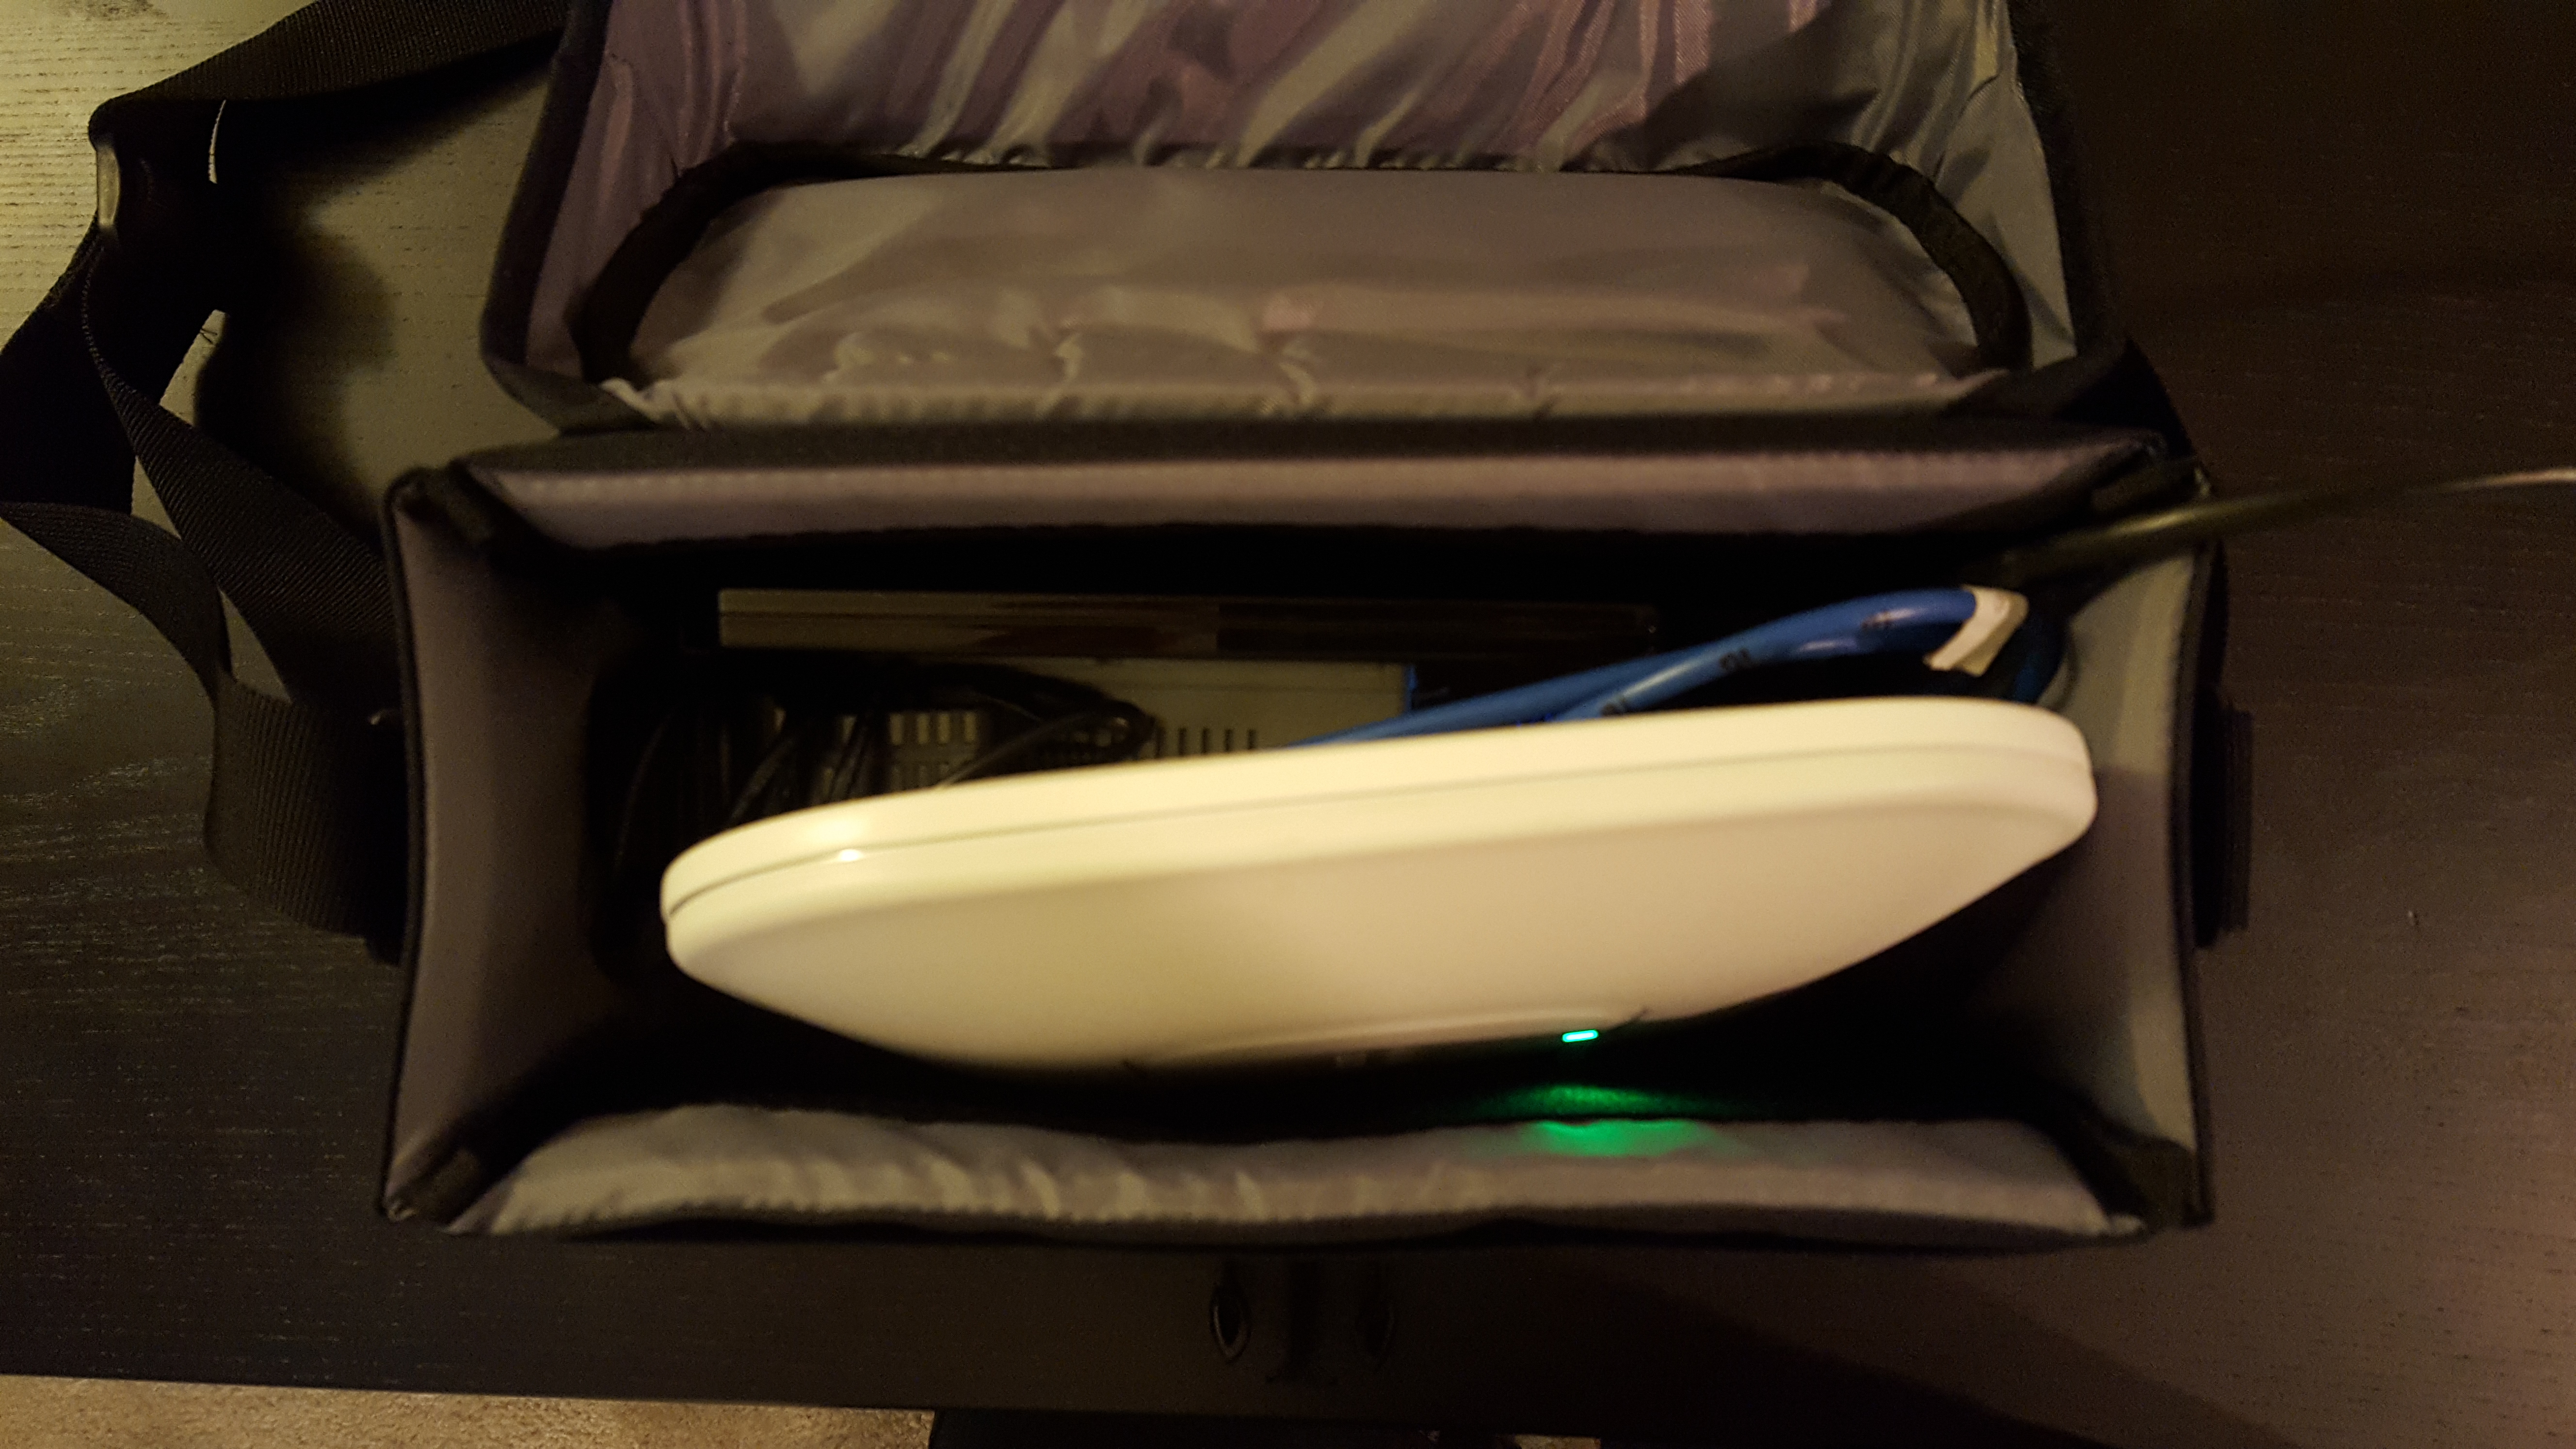
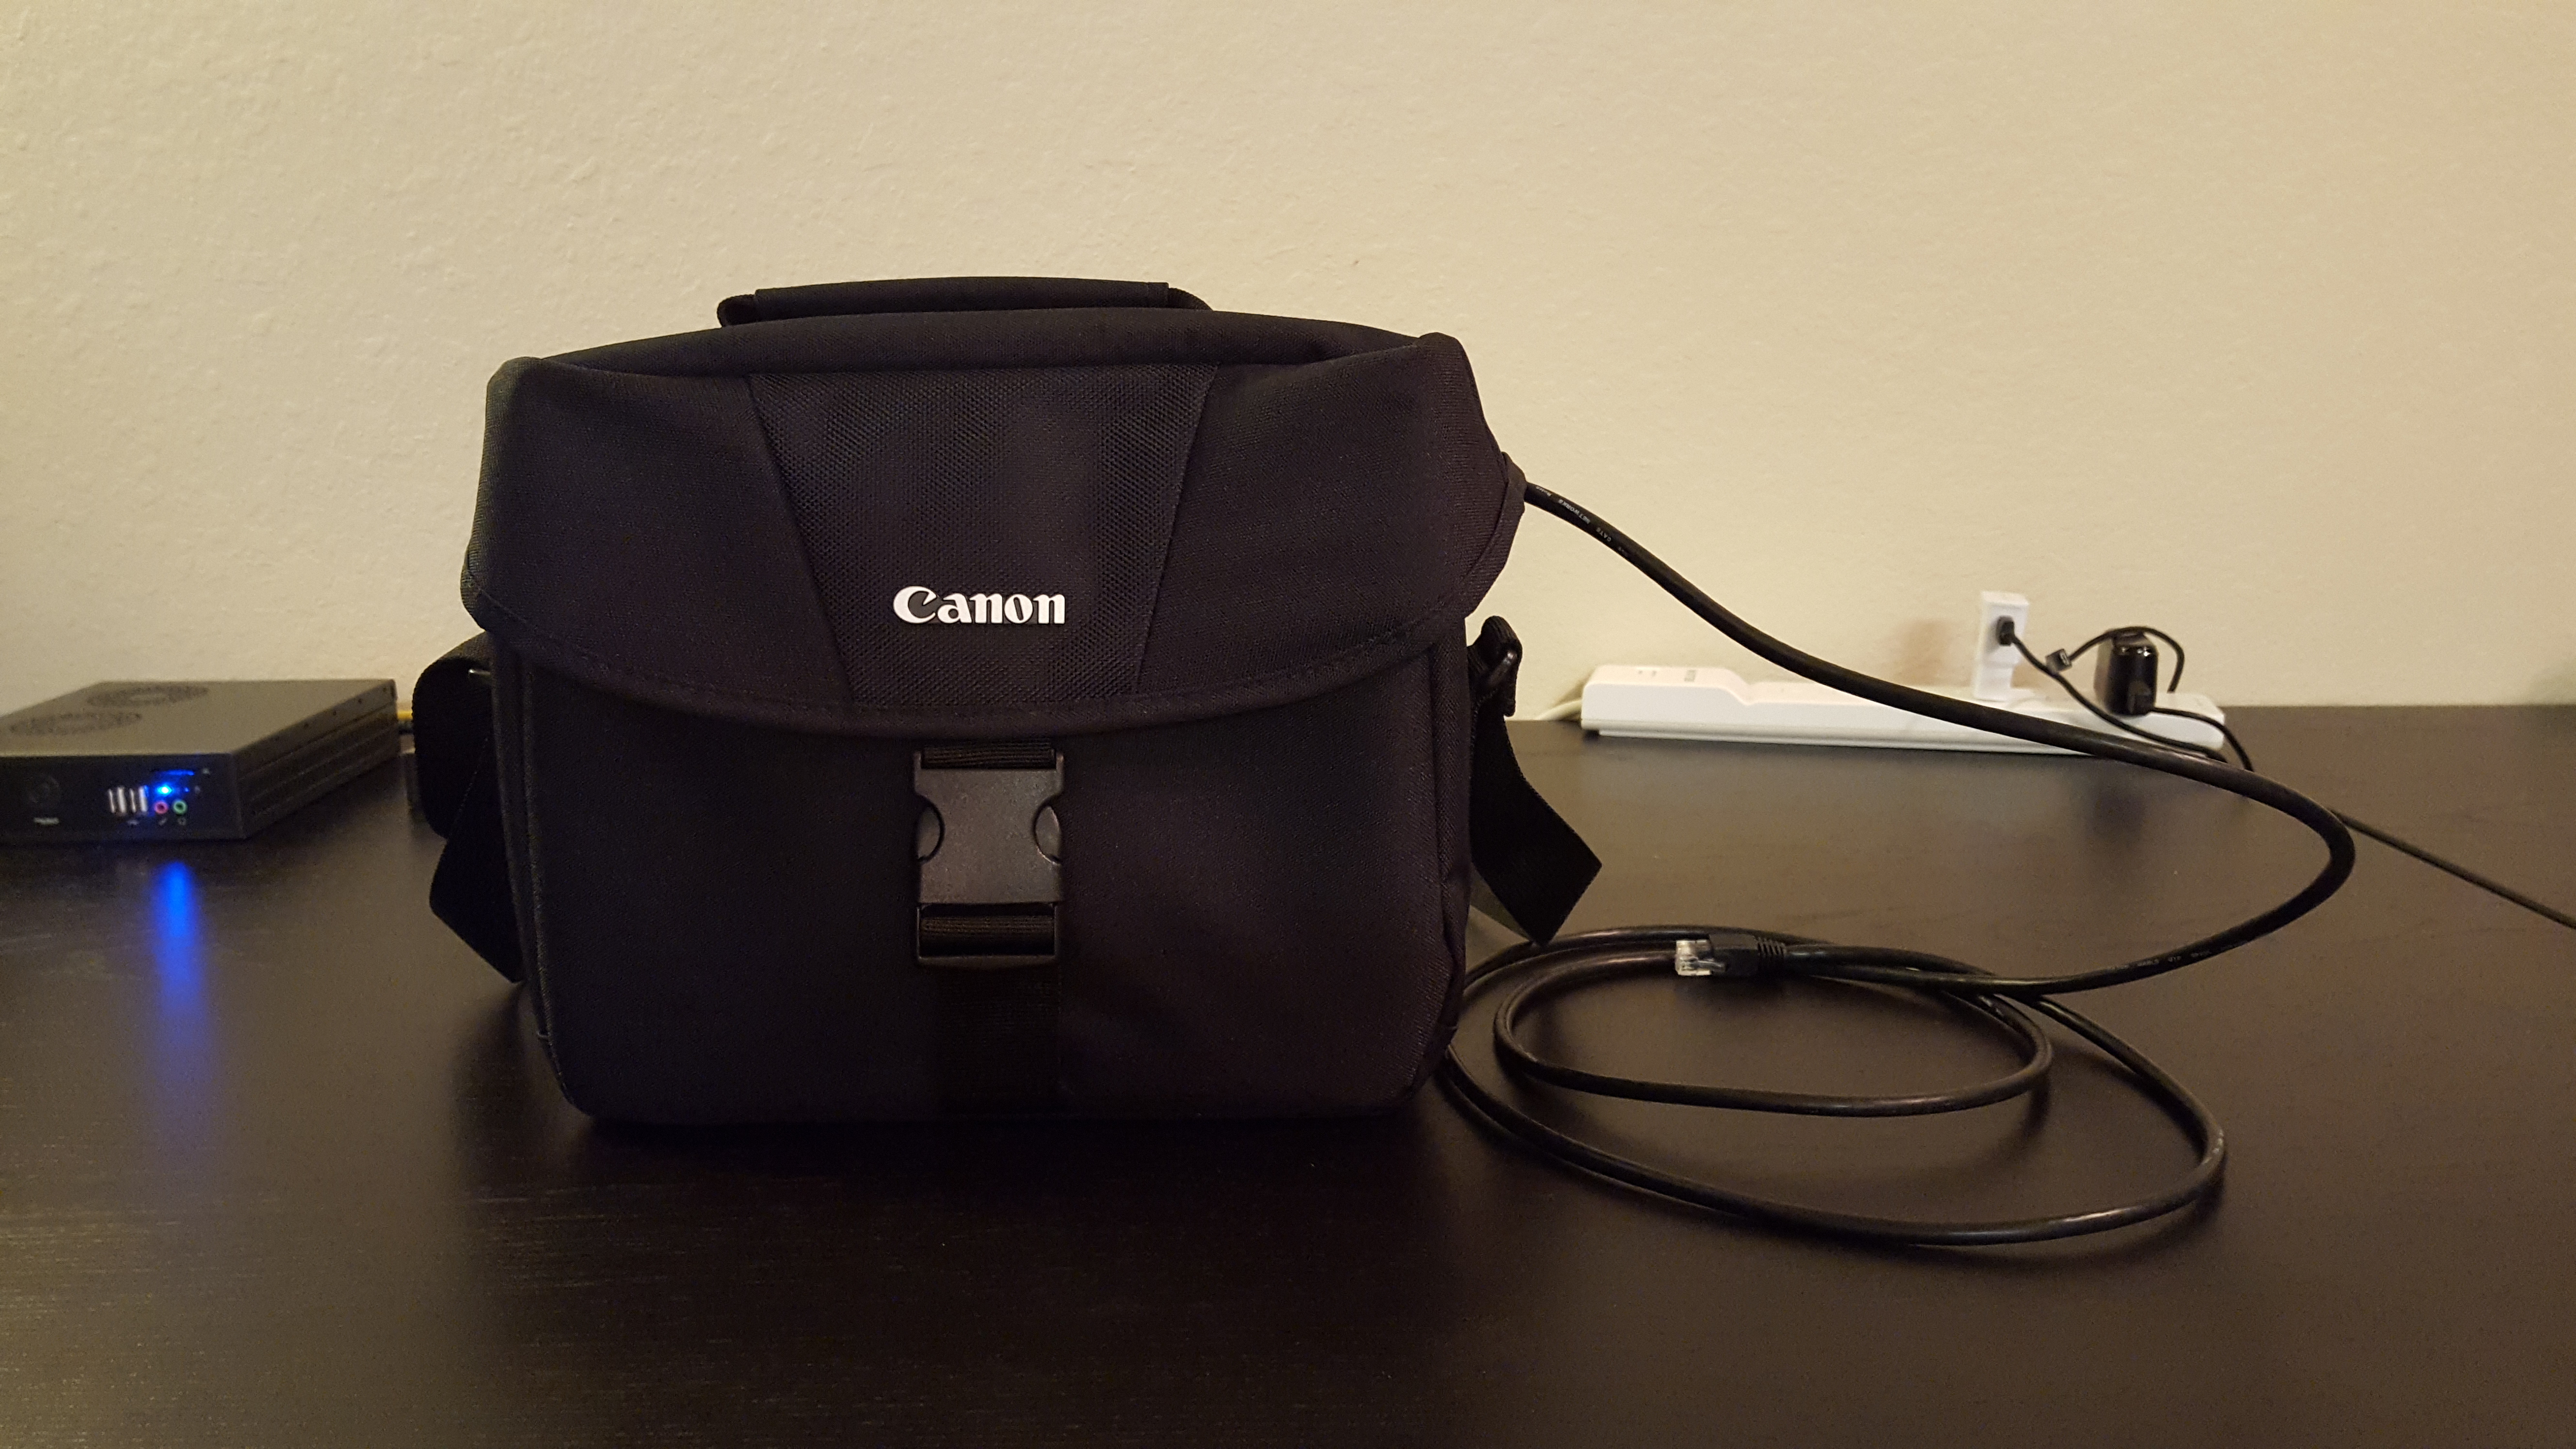
Case – Large enough to fit all parts, I purchased this Canon Camera Bag although it is a little snug, every does still fit. I just wish it was another inch taller.
Ethernet Cable – You will need two (2). I suggest a 1-foot cable for inside the bag and a 5-foot cable for connecting to your laptop. Both easily sit inside the camera bag when not in use.
Now that you have all the parts, lets take a look at connecting it all together.
First, the Cisco Access Point that you use will need to be running in Autonomous mode. If your looking for a guide on how to convert your Access Point to Autonomous mode, look no further than the blog post by Rasika (@mrncciew), which you can read here.
The RavPower battery voltage options need to be configured. From what I’ve heard in the field, this battery should power your Access Point for at least 4 hours or more, which is plenty of time to do some Layer 1 captures. The battery has the following voltage options to choose from.
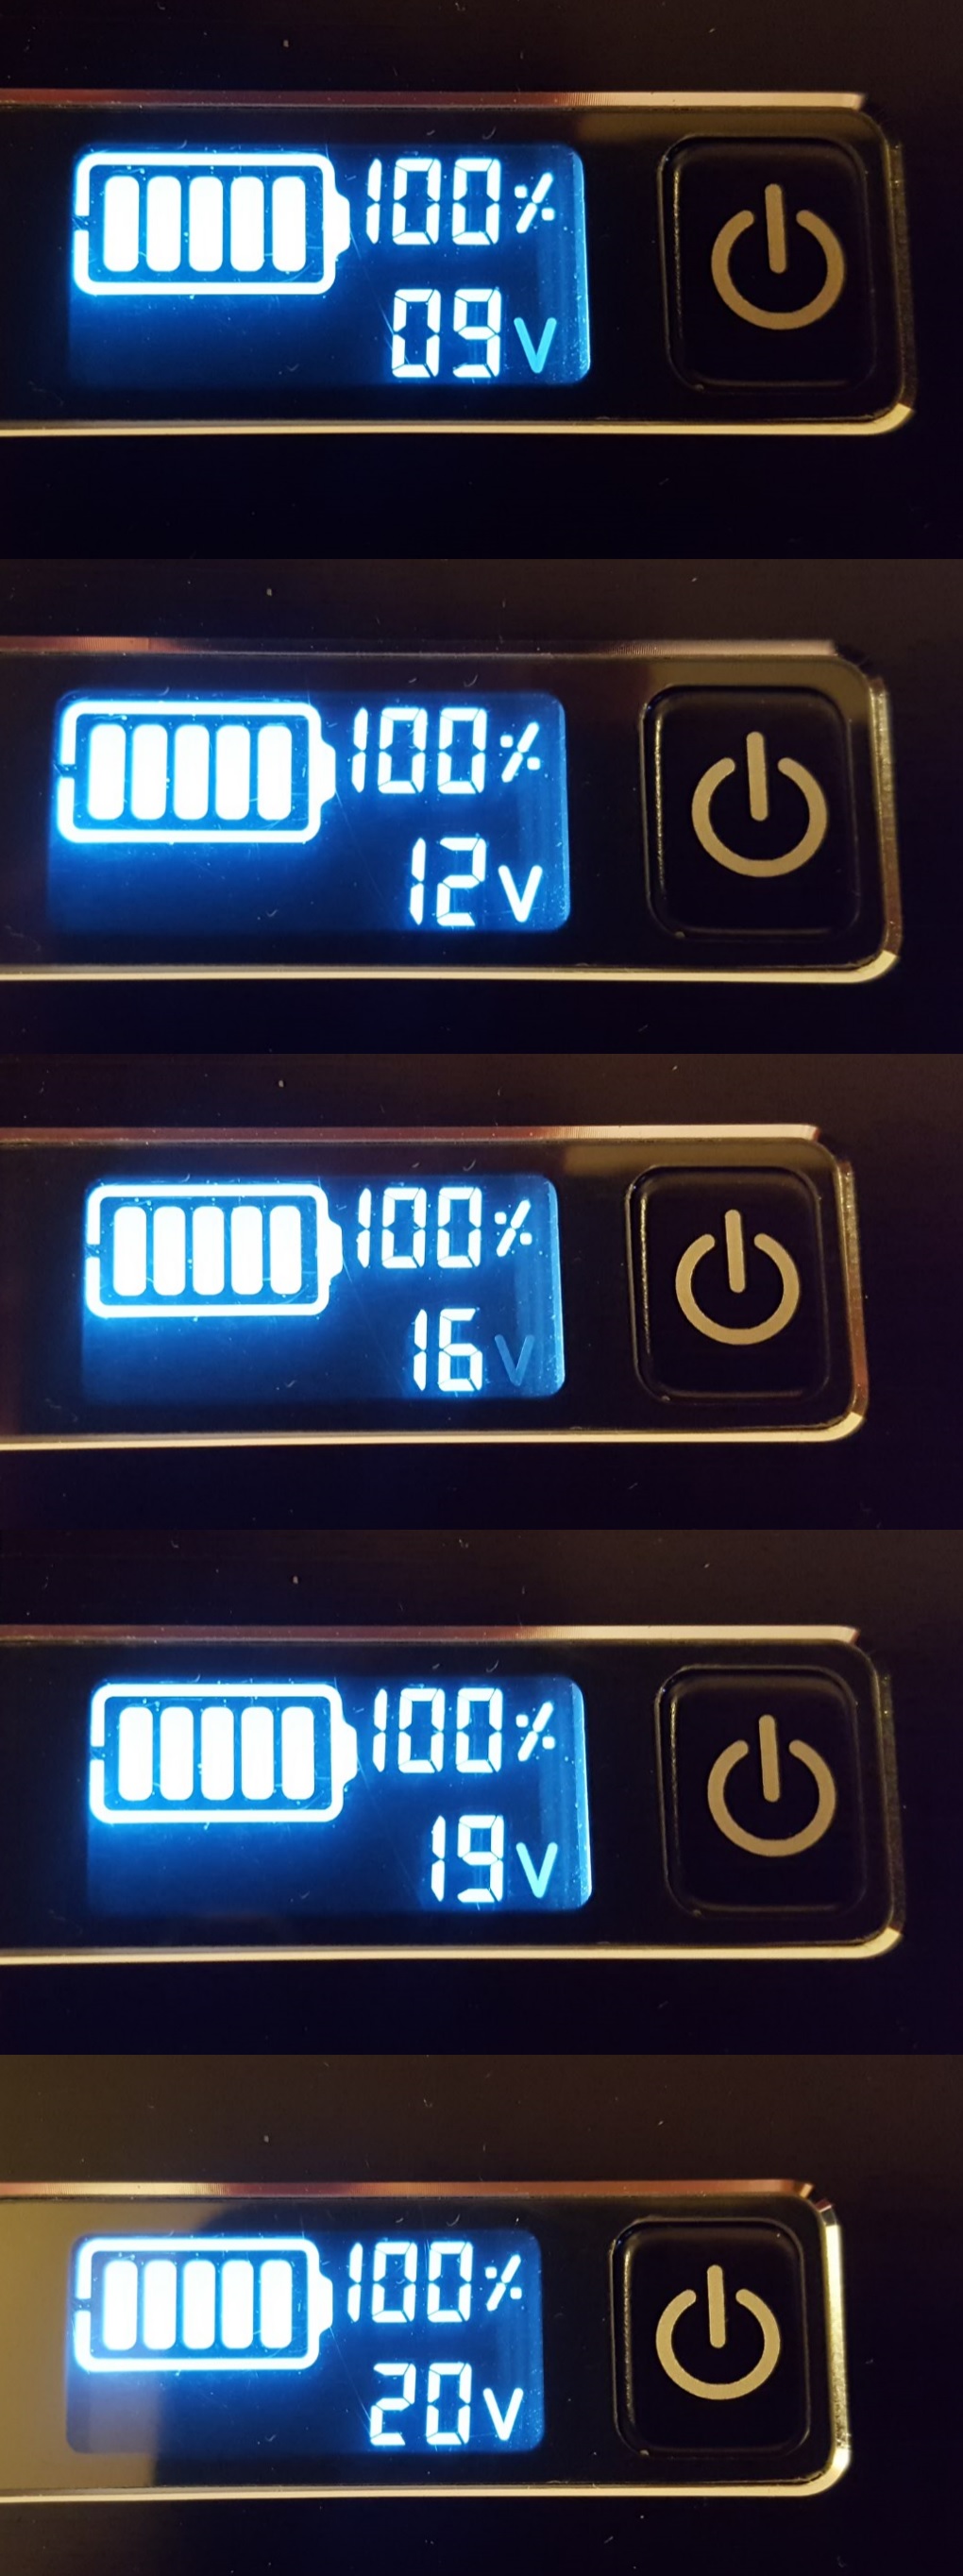
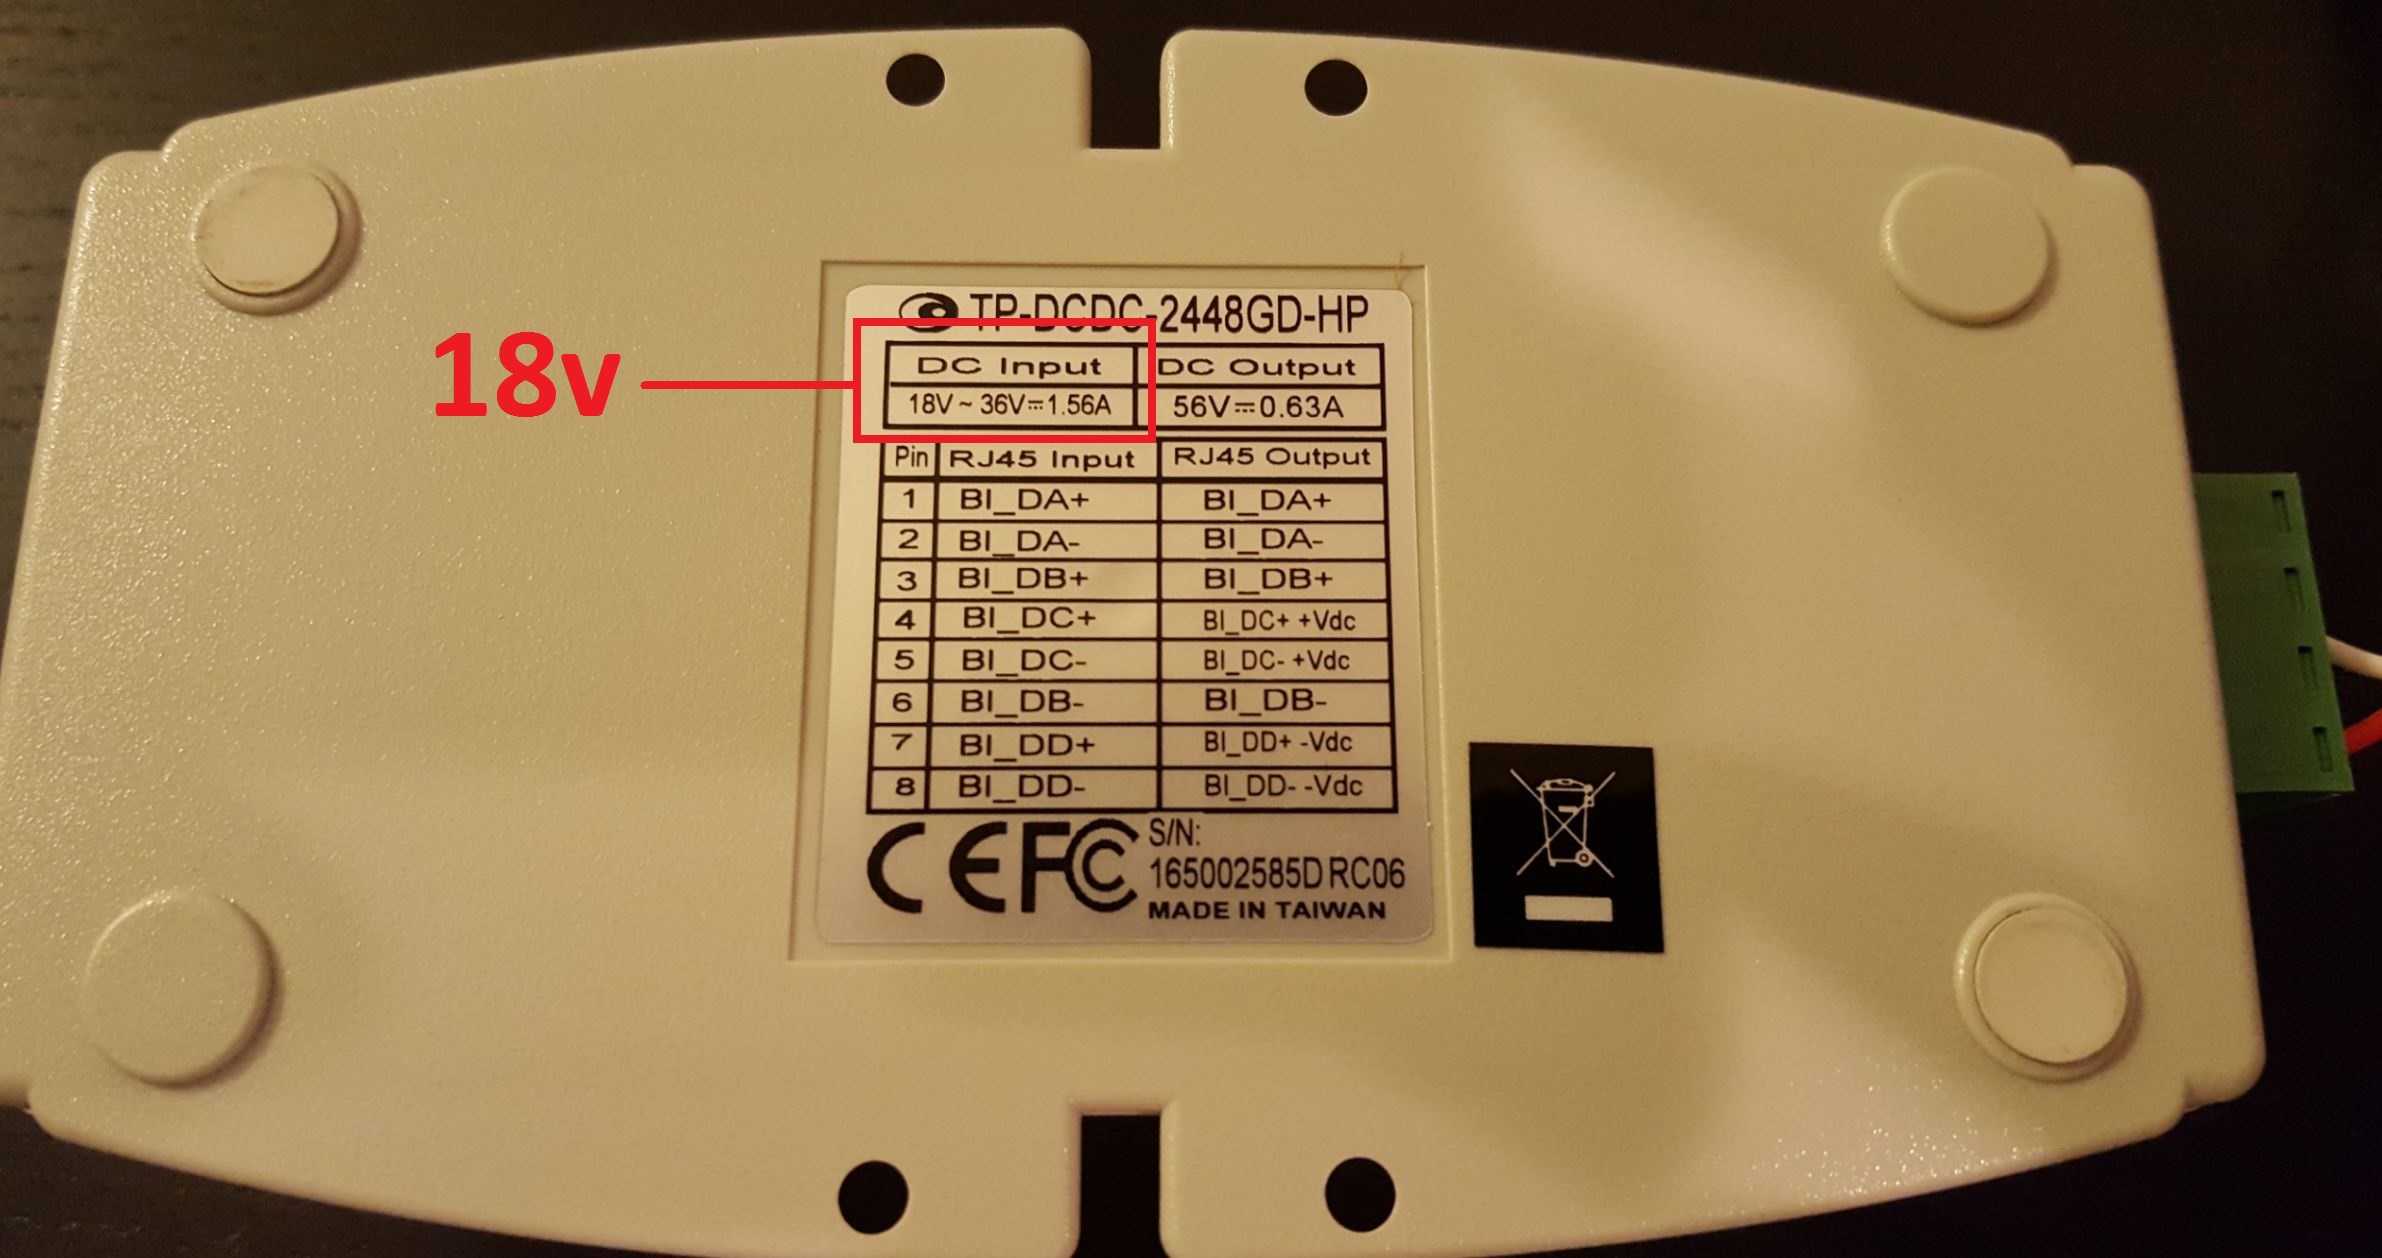
By checking the back side of the Tycon DC Converter, you will see that it requires at least 18V DC Input to even work. I tried all the options, and only 19V and 20V power up the converter/injector light and Access Point, as expected. I personally just leave it on 20V as I’m under the impression it will be more ‘stable’.
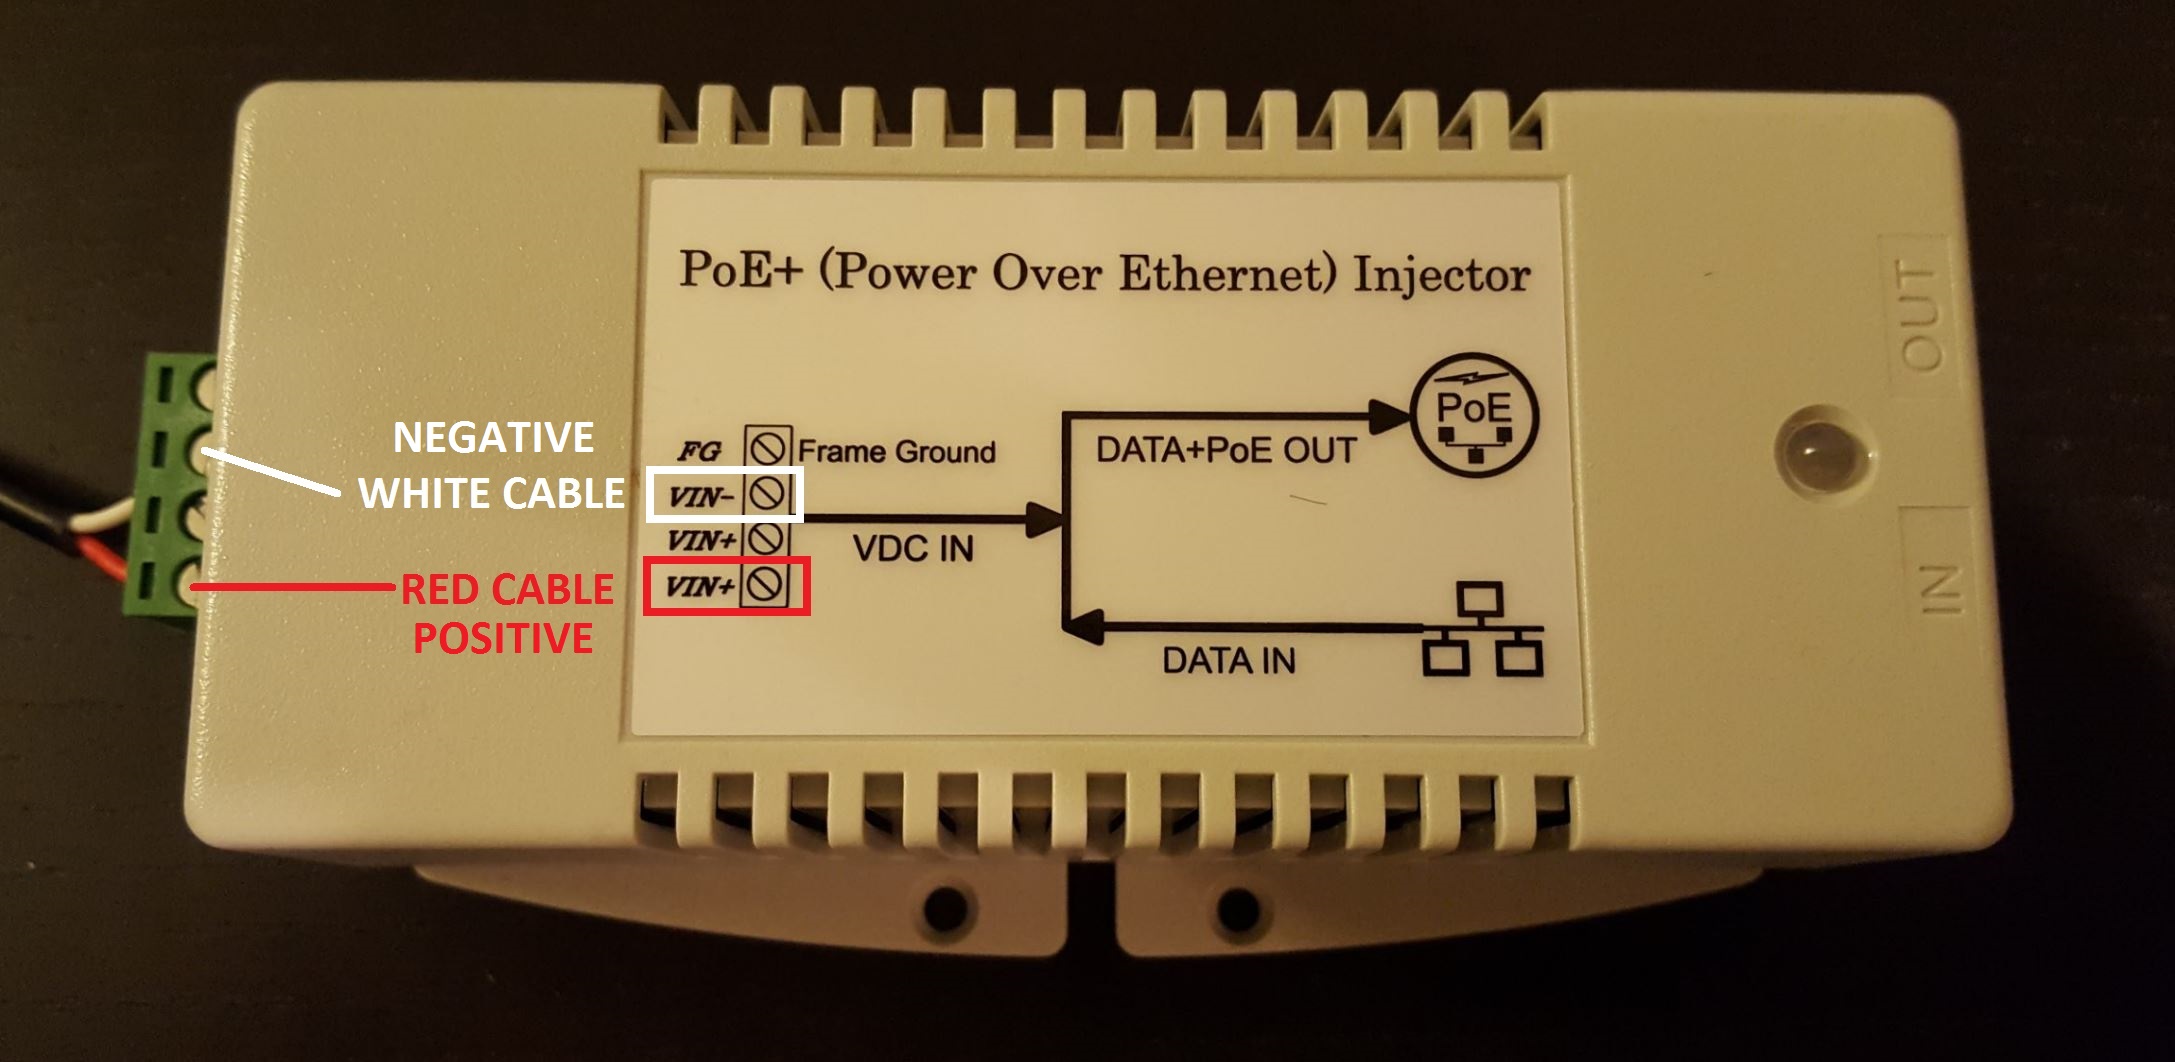
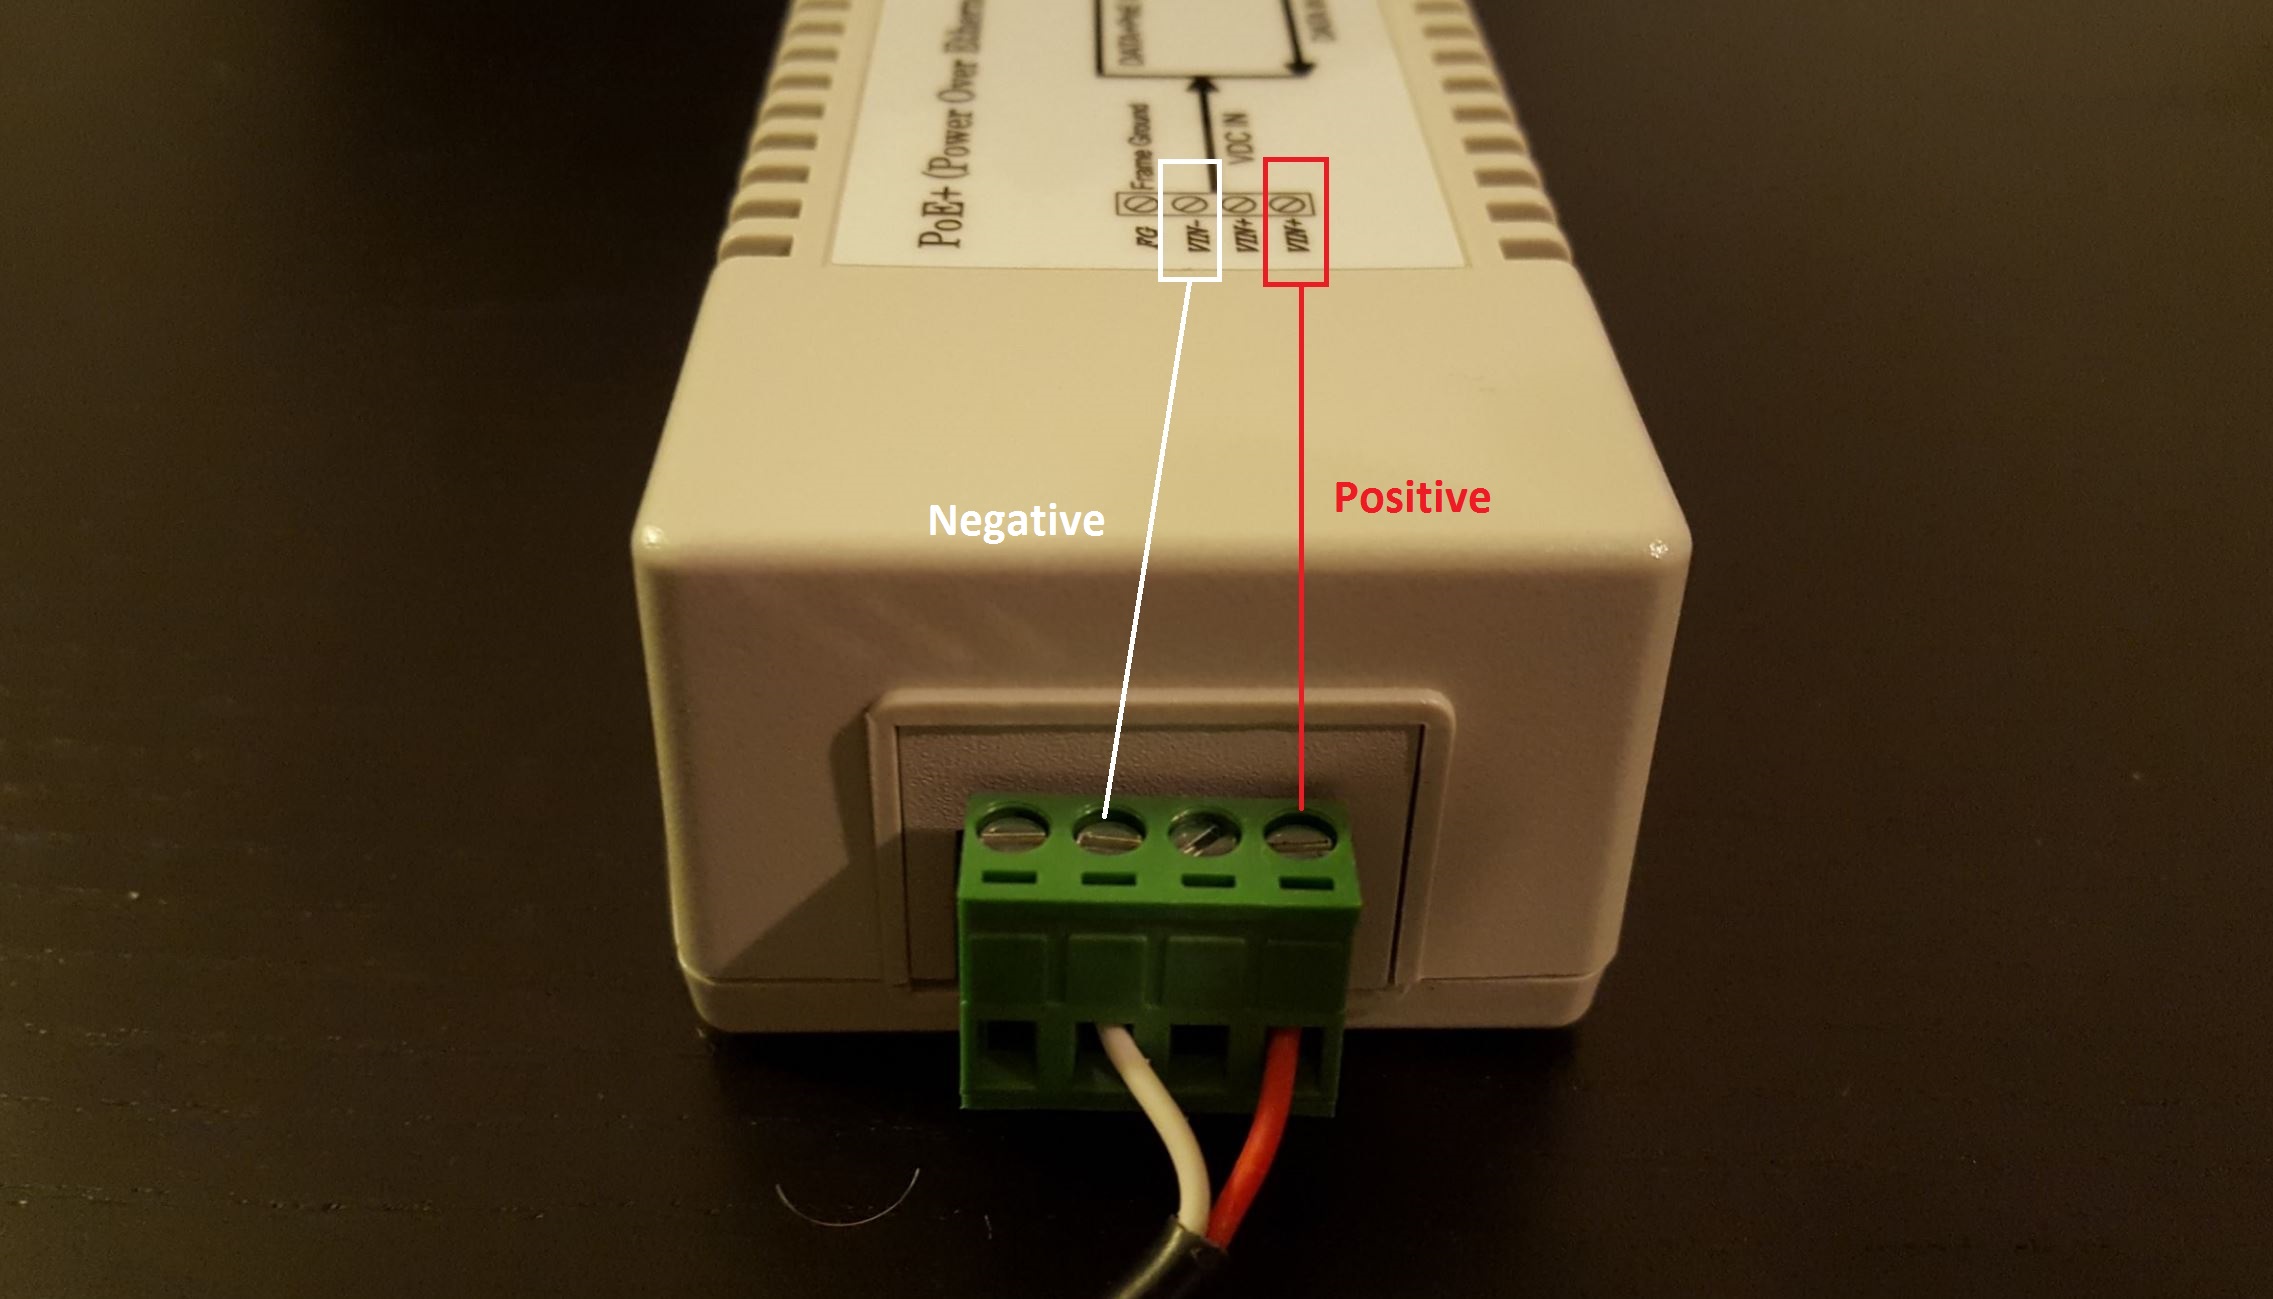
Connecting the power jack cable to the DC Converter is fairly simple and straightforward (thanks to @grcate for assisting me).
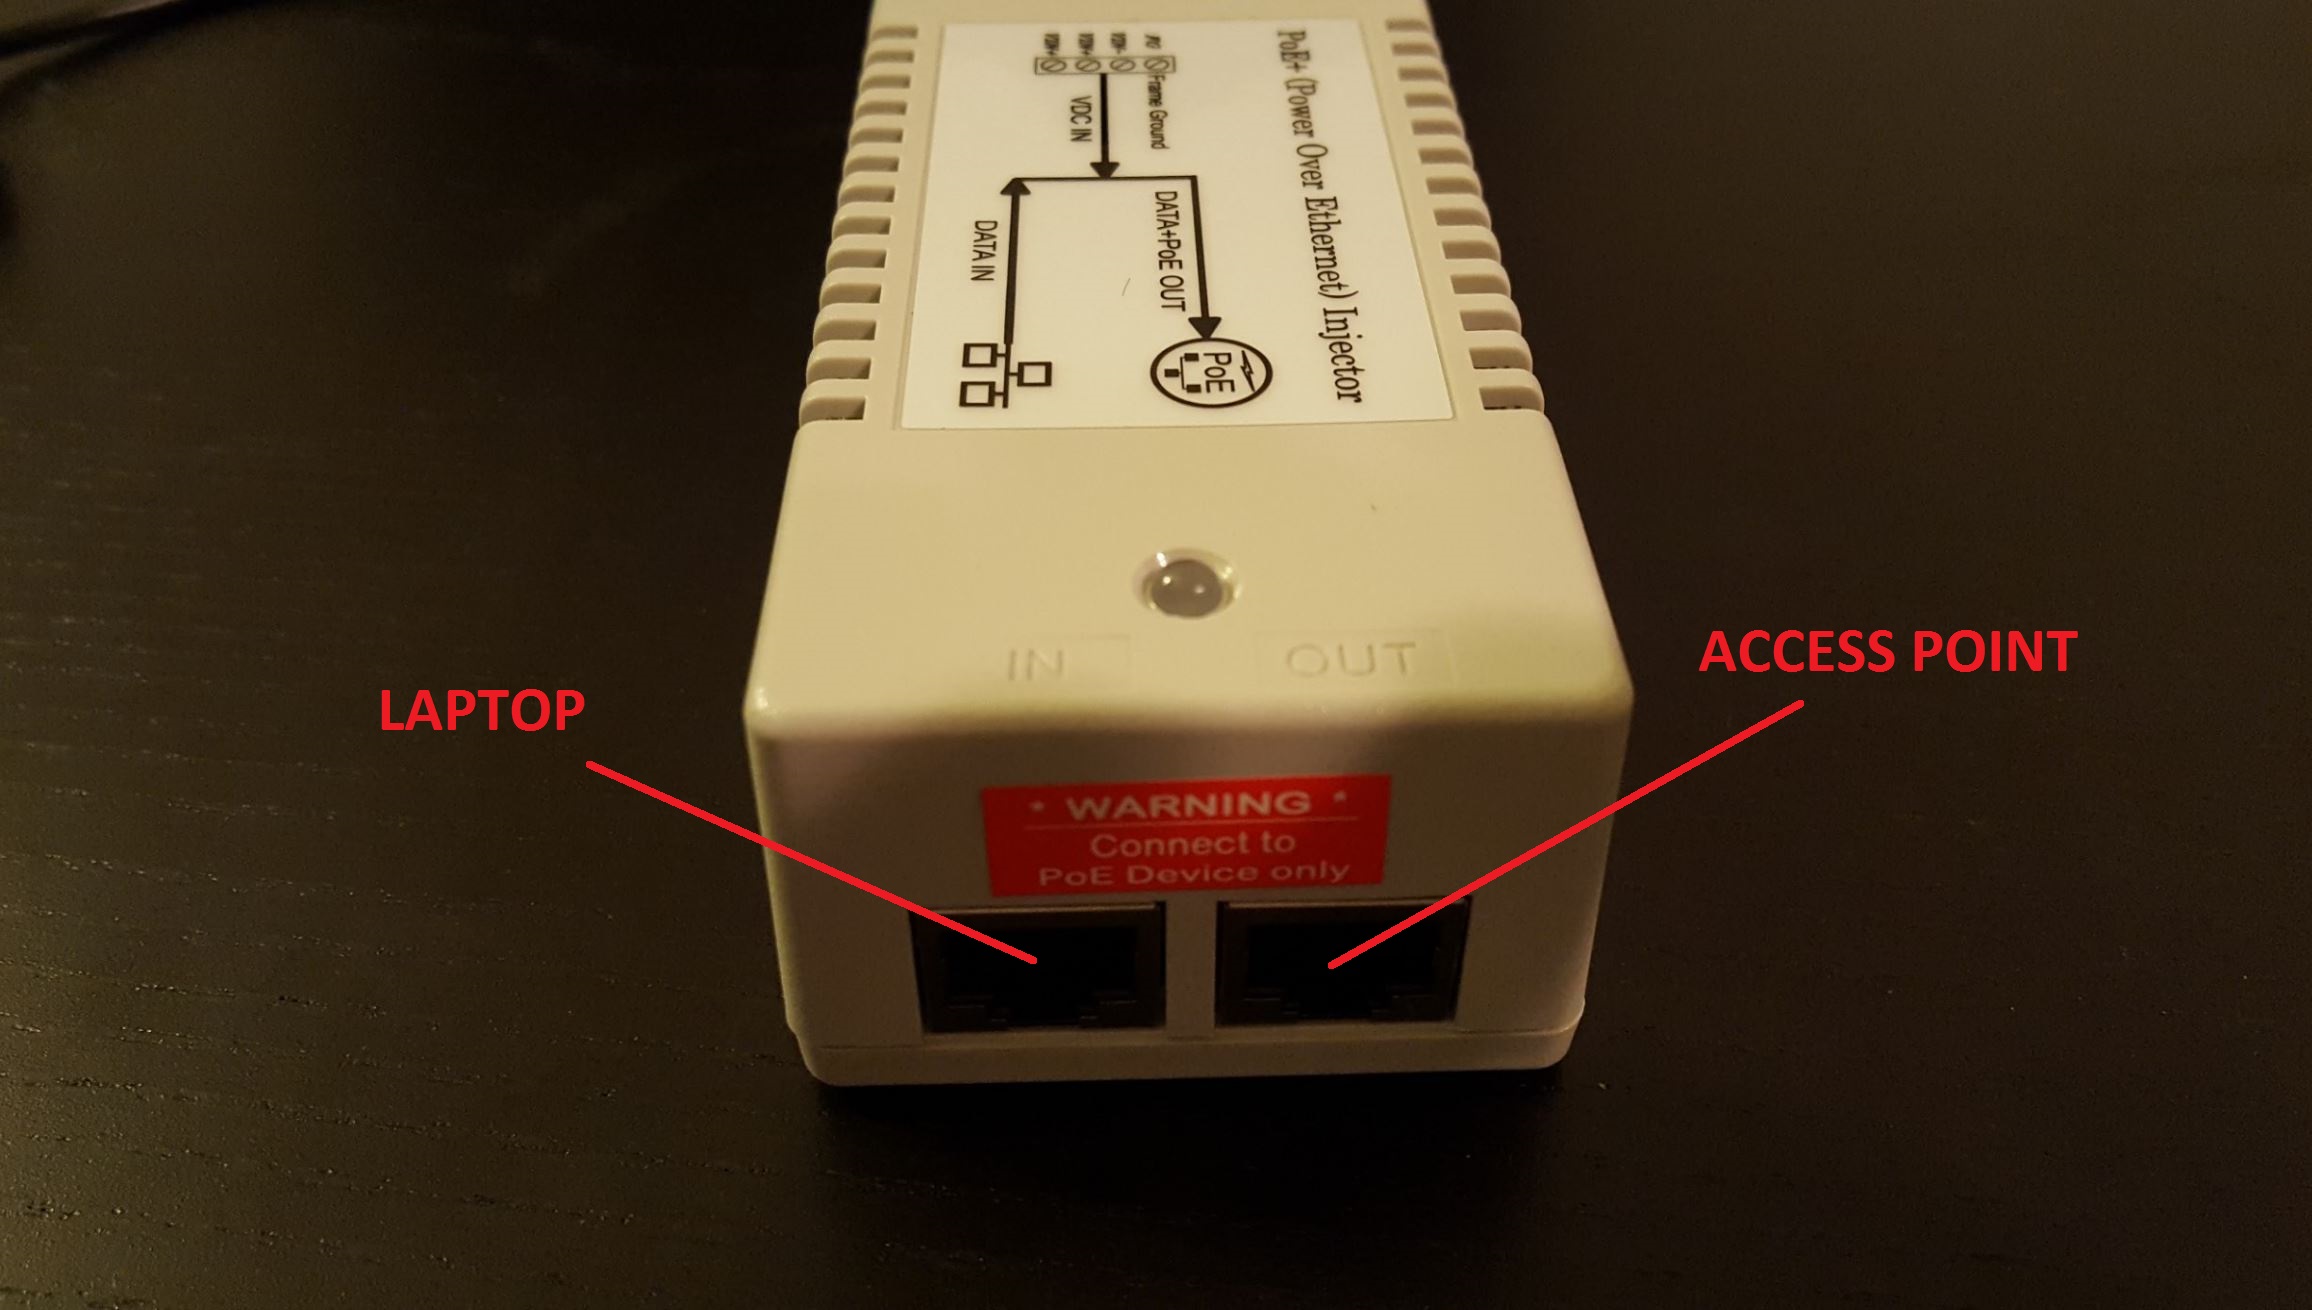
Here is how you connect the Ethernet ports to the Access Point and your laptop.
The other end of the power jack cable connects to a RavPower provided cable, which plugs into the DC Output on the RavPower itself, which supplies the power. The RavPower battery automatically powers on/off when you connect or disconnect this cable.

That is basically all there is to it. After it is all connected together, you can then place it all inside your bag that you use, and you now have a Spectrum Analysis Kit for on the go that provides super quality Layer 1 captures.
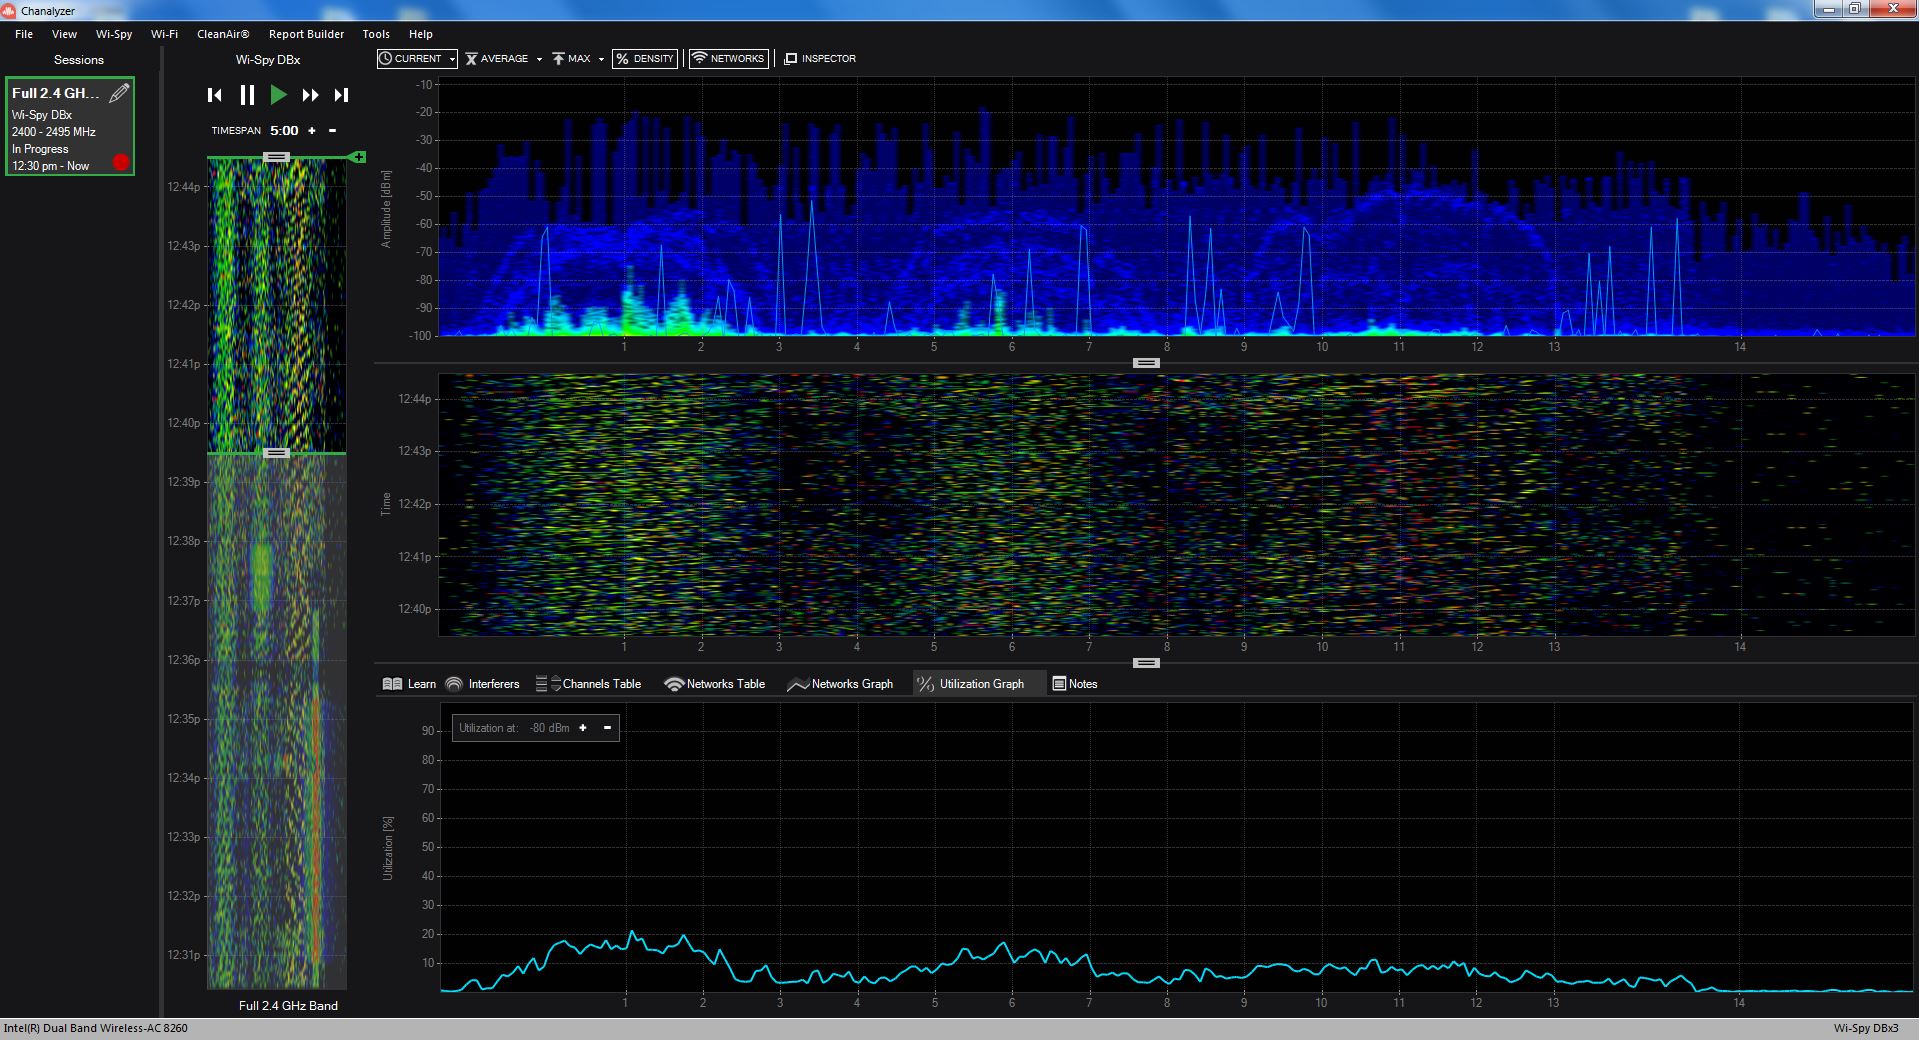
Here is a comparison of the quality between the Wi-Spy dBx adapter (top) and CleanAir (bottom).

If you are looking for a basic configuration template for your Cisco Access Point running in Autonomous mode, you can download my template here.
The configuration is setup to automatically give you an IP Address when you connect your laptop, and the IP Address of the Access Point is set to 10.0.0.1. You will need to know this because each time the Access Point reboots, you have to telnet to get the NSI Key as it changes each time.
If you already have your Access Point in Autonomous mode and mostly configured, here are the quick config changes you will need to make to get the radios set to ‘station-role spectrum’.
*Note – Autonomous Code 15.2 or higher required to place AP into spectrum mode.
AP#configure terminal
AP(config)#interface dot11radio 0
AP(config-if)#station-role spectrum
AP(config-if)#exit
AP(config)#interface dot11radio 1
AP(config-if)#station-role spectrum
AP(config)#exit
AP#
AP#show spectrum status
–Look for NSI Key output here–
You can check out this blog post by Sam (@samuel_clements) on how to configure Metageek Chanalyzer to connect to your Cisco CleanAir Access Point.
Side note: I like to keep the RavPower charging adapter inside the bag as well, so that I can easily plug it into a wall outlet whenever I need to charge it.
I hope you enjoyed this blog post.
-Nolan

Awesome write-up Nolan! Really like the idea of using a small camera bag. By the way, you can also configure the spectrum role via the web UI under radio settings.
Omar
LikeLike
Somehow just now seeing this comment lol. Thanks for the reply Omar. I’ve avoided the GUI for Autonomous since forever, but good to know you can do it from there too. =)
LikeLike