A few months back I had to troubleshoot a wireless issue that was about a thousand miles away. Luckily I have at my disposal two fantastic tools for such troubleshooting scenarios.

![]()
Both tools allow me to utilize a Cisco Access Point remotely (Chanalyzer requiring a CleanAir capable AP) in order to troubleshoot wireless issues from a L1 and L2 perspective. So here is a quick blog on how to use both tools.
Savvius Omnipeek
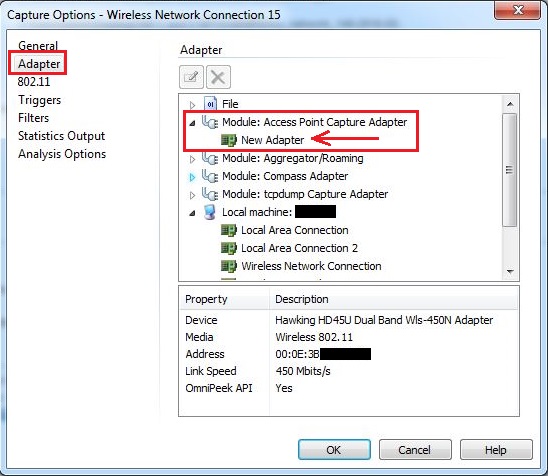
Step 1: Setup a new Access Point Capture Adapter
Step 2: Give it a name you want. The IP Address can be left blank unless you only want to capture data from one of multiple Sniffer APs you have, then insert the AP IP Address here.
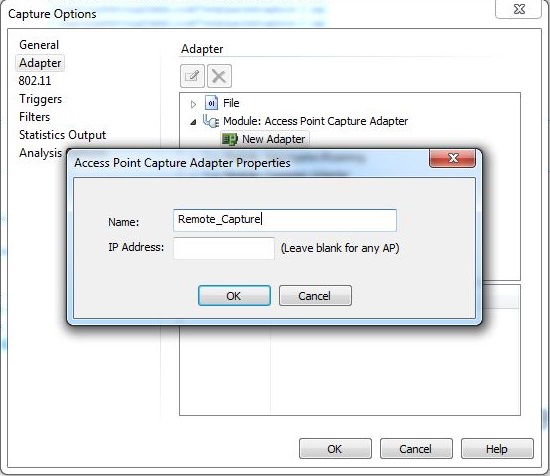
Note: You will notice that the 802.11 tab no longer allows you to choose what channel to scan. This sill be setup later.

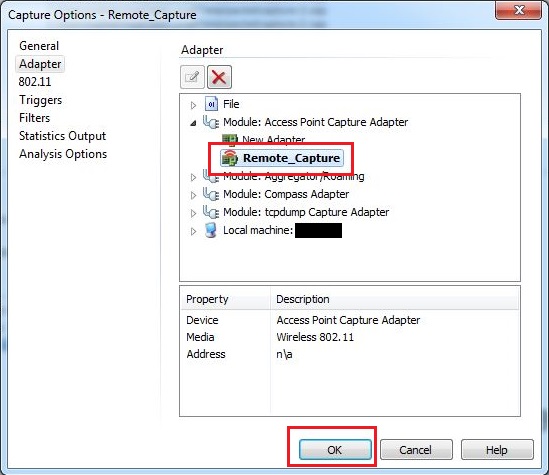
Step 3: Select your new adapter and click OK
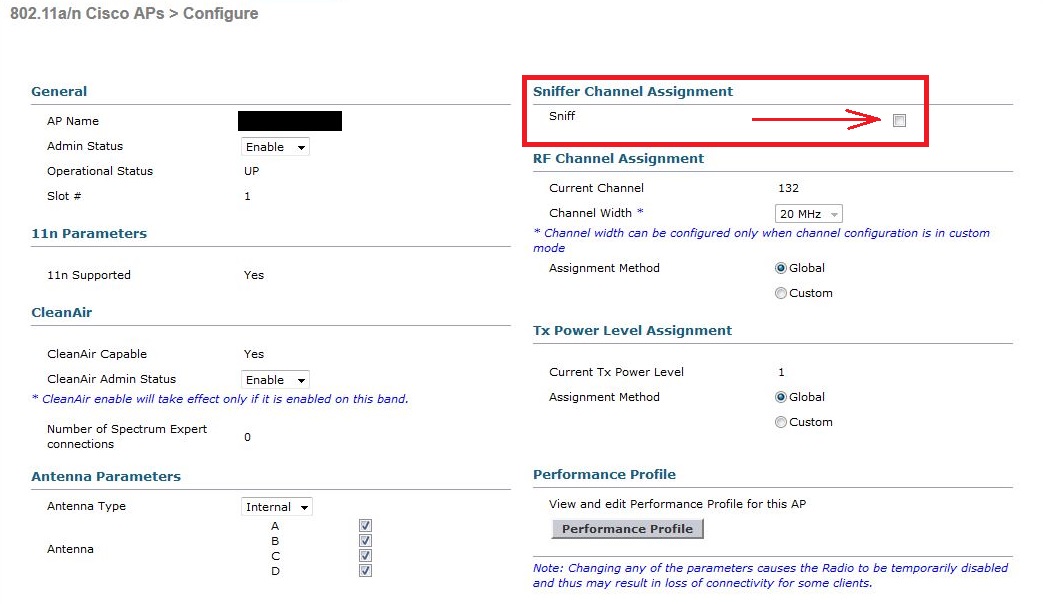
Step 4: Change your Access Point AP Mode into Sniffer

Step 5: Go to the radio you want to capture on (2.4 GHz or 5 GHz) and you’ll see a new option to enable the Sniff feature. Check the box.
Step 6: Choose the primary channel you want to scan. Set the Server IP Address, which will be the IP Address of the machine that has Omnipeek running on it (your computer). Also set a static channel and what channel width you want to use.

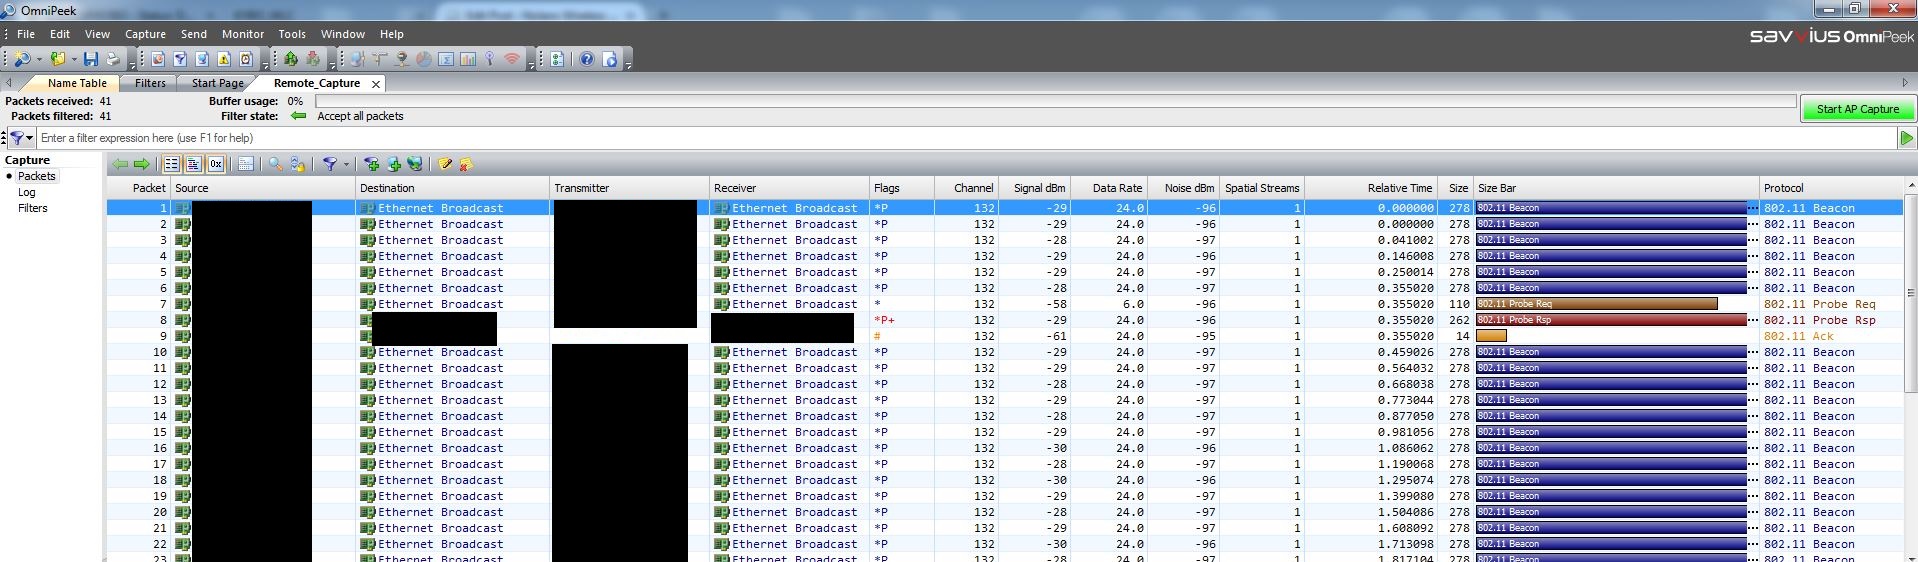
Step 7: Start your capture on Omnipeek and you should start getting results.
MetaGeek Chanalyzer
Step 1: Change your AP Mode into SE-Connect. Note that if you leave it in Local Mode, then you will only be able to capture the single channel that the radio is operating on at the time. Changing it to SE-Connect mode allows you to see the entire 2.4 GHz or 5 GHz spectrum at the same time.

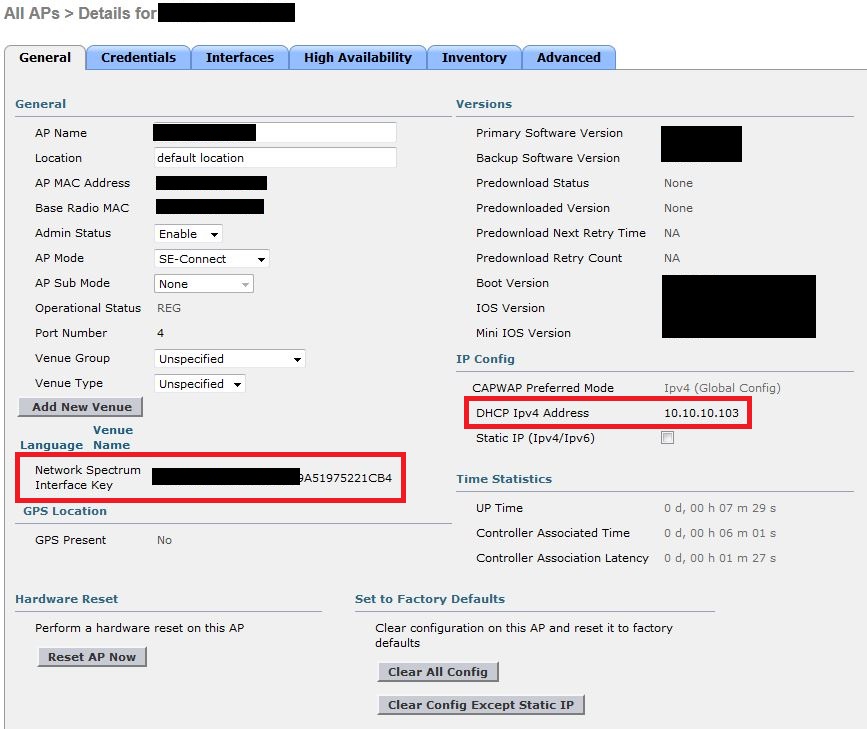
Step 2: Once your AP is in SE-Connect Mode, you will need to know its IP Address and the NSI Key that will be displayed.
Step 3: Within Chanalyzer, choose the CleanAir tab at the top menu and click the ‘Connect to a CleanAir AP’ option.
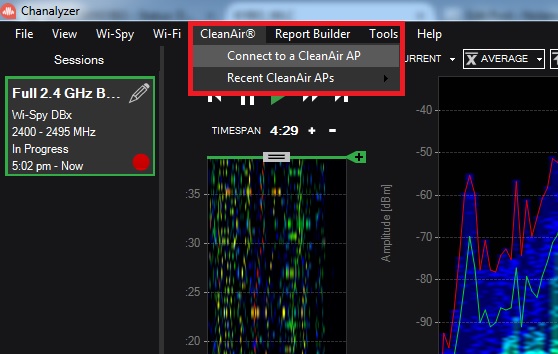
Step 4: A window will pop-up, and this is where you will put the AP IP Address and NSI Key that you gathered earlier.

Step 5: You will now be capturing the RF utilizing the CleanAir Cognio chipset on-board the Cisco Access Point.
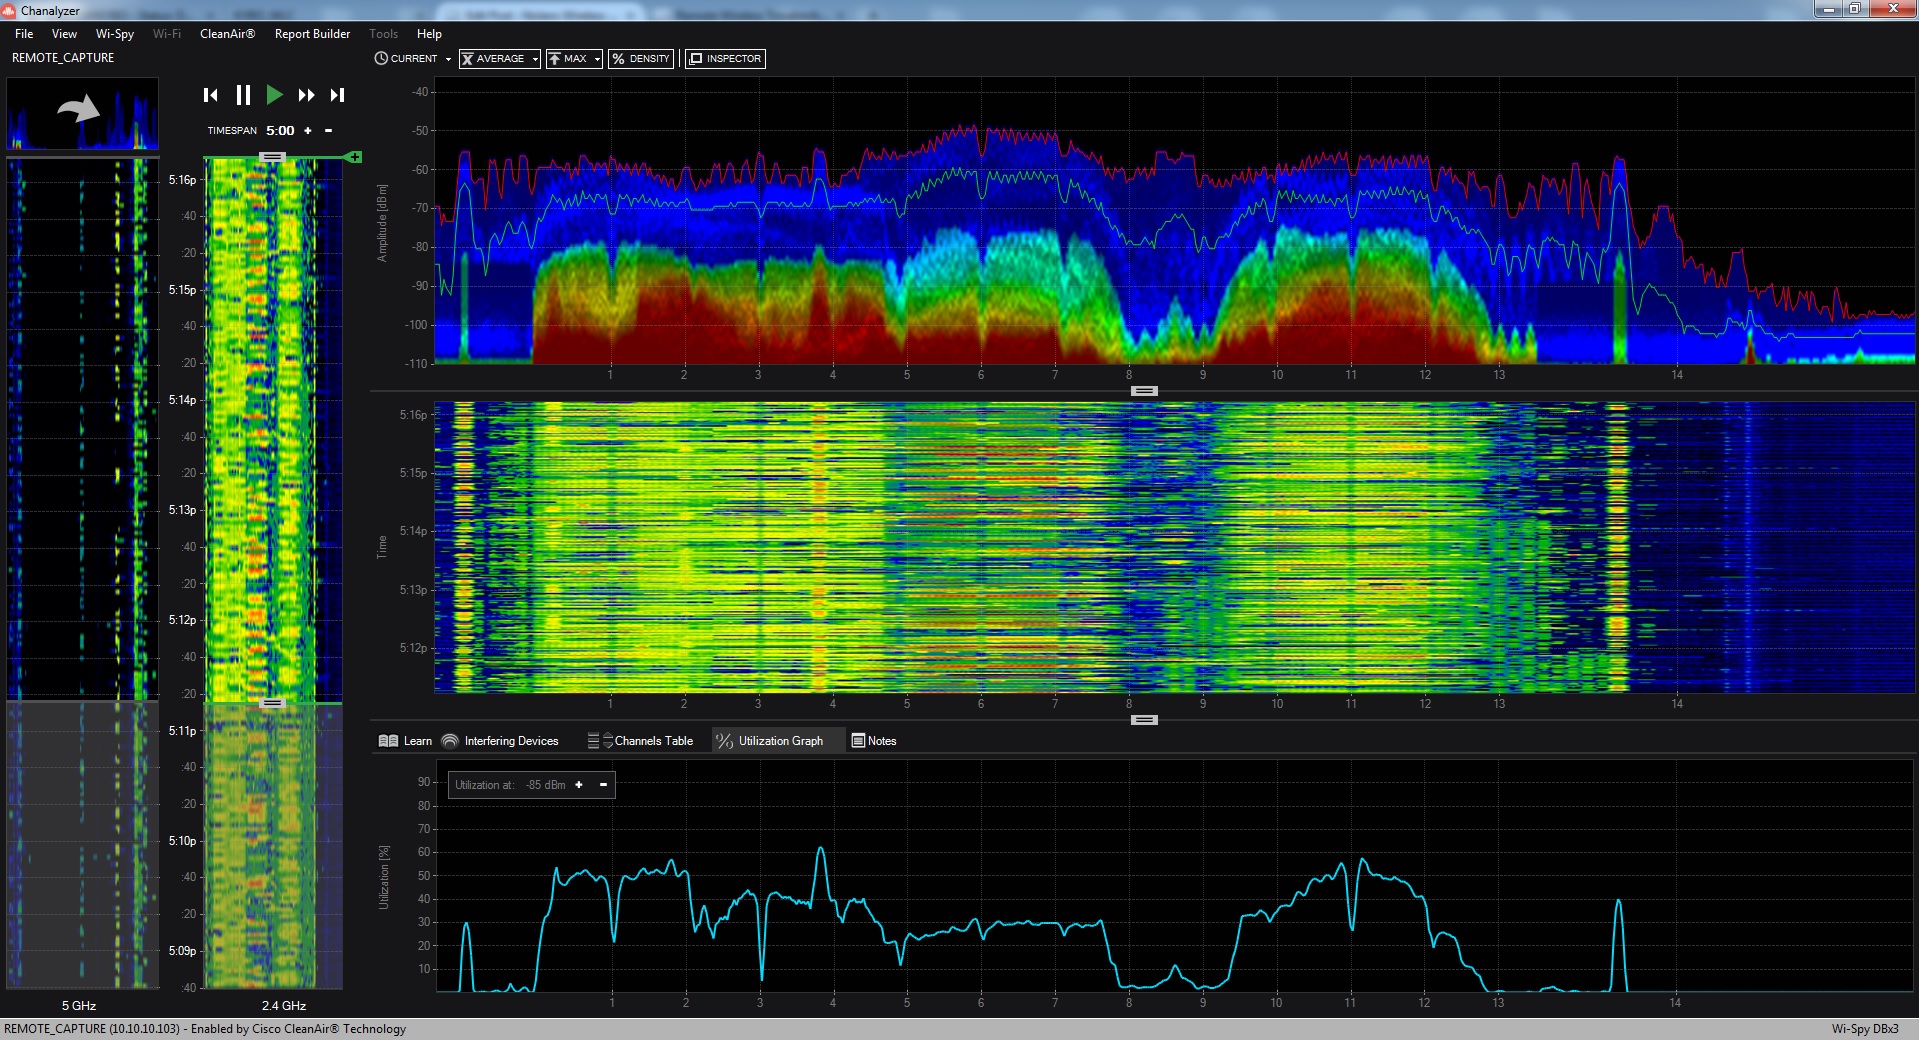
You can clearly see how the results are vastly superior and enhanced when compared to capturing with the Wi-Spy DBx USB Adapter. Using the USB adapter means you have to physically be located onsite. For these two examples, the AP and USB Adapter were in the same spot within a 10 minute window of each other for these captures. Results are surprisingly different, only further advocating the need for higher quality captures from a USB Adapter. (Adapter results below)

In addition, the DBx adapter will only let you choose one band to scan at a time.
[5/10/2016 – Update] — Making a correction here after my friend Glenn Cate (@grcate) corrected me. Using the DBx USB adapter does indeed let you scan 2.4 GHz and 5 GHz at the same time. There is an option below that says “DUAL-BAND” and choosing this will scan both bands.
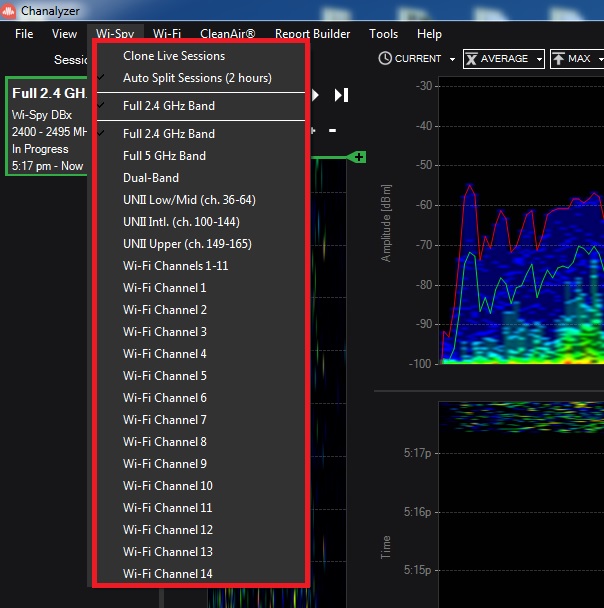
The CleanAir Access Point will scan both bands at the same time by default, allowing you to swap between them while the band your not looking at is still capturing in the background.

P.S. In regards to that problem I had to troubleshoot a thousand miles away, the root cause was channel utilization simply being over-saturated, like 100% style.
I hope you enjoyed this blog post and hopefully you learned something new.
Thanks!
-Nolan
